.png?width=240&height=55&name=Untitled%20design%20(86).png)
This article will show you how to add Display Categories to organize your products in the shopping cart.
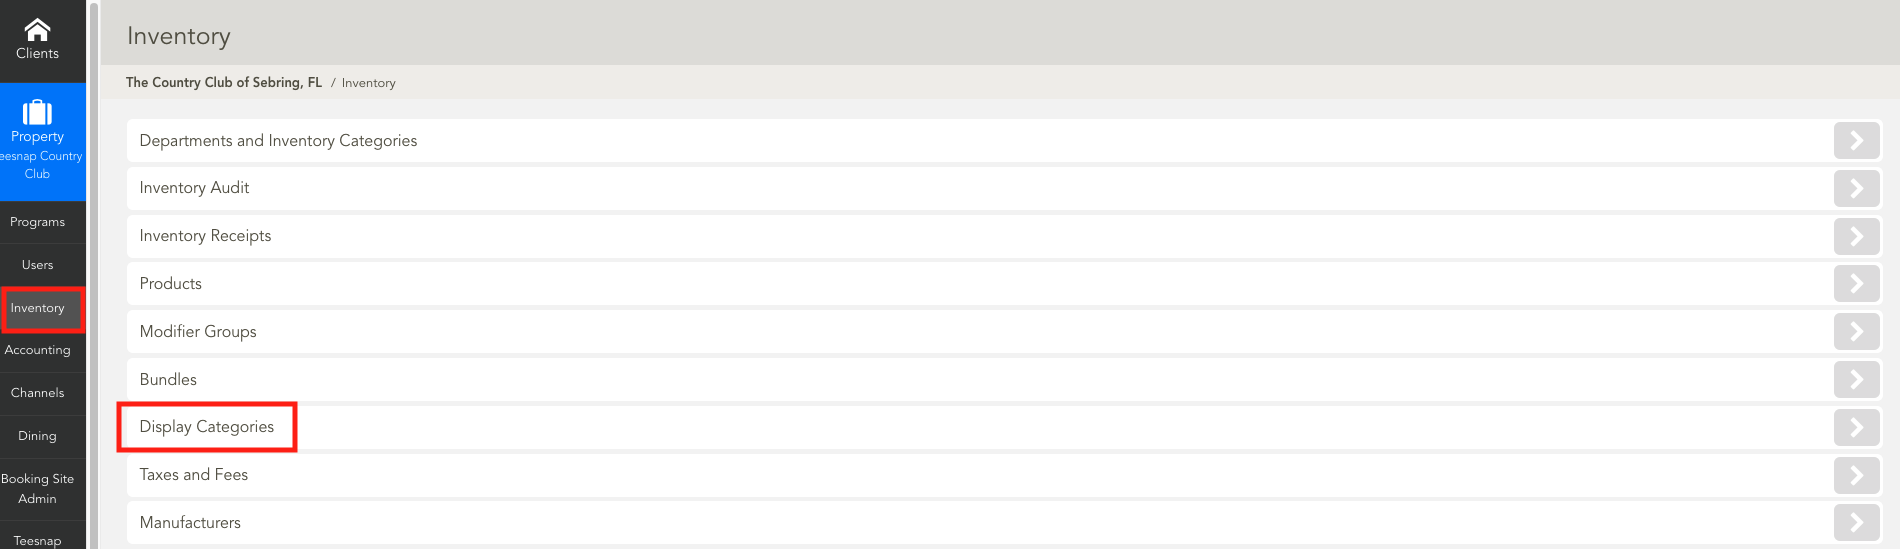
1. Go to the Admin Portal and select Inventory and then Display Categories
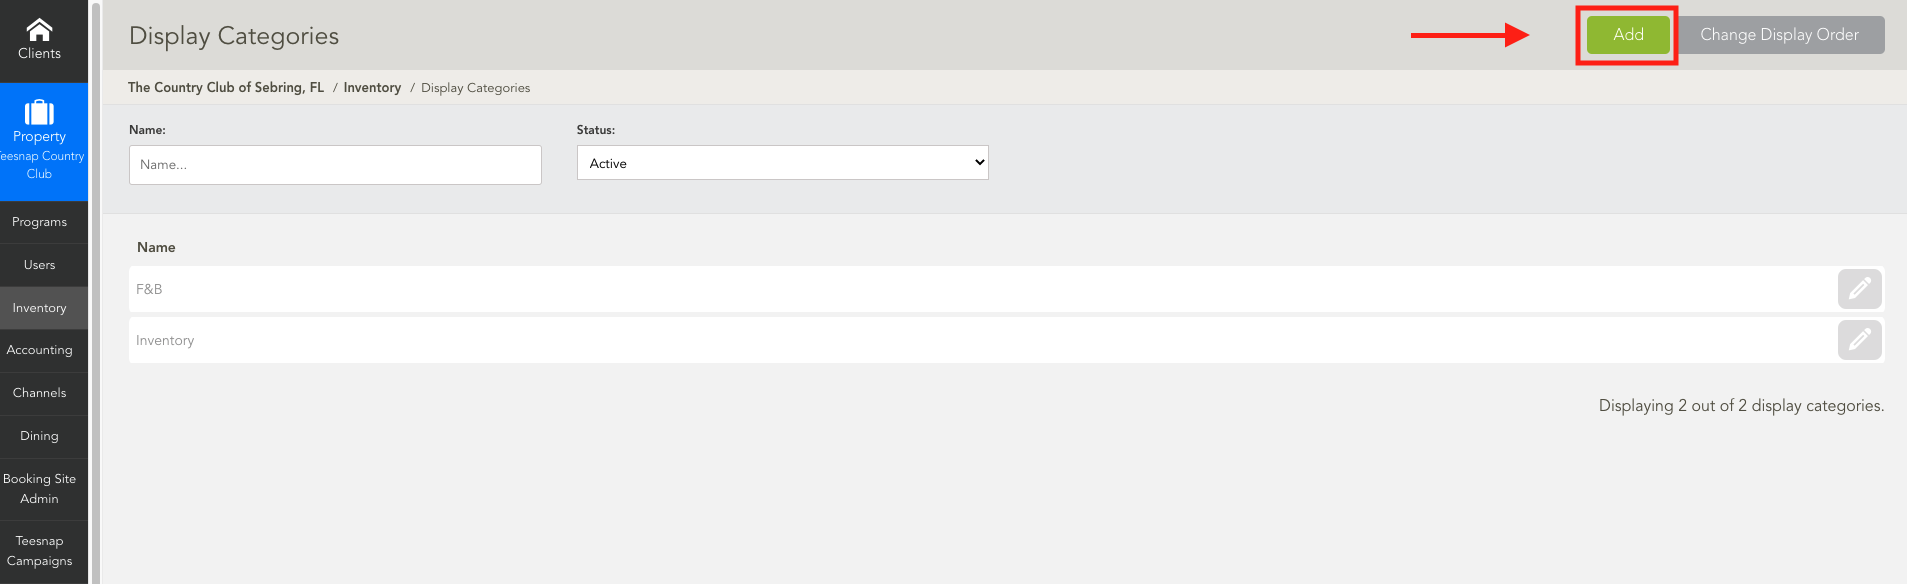
2. From the Display Categories page select Add
3. Enter the Name of the Display Category here. Then select the Products Tab to enter the products into this category.
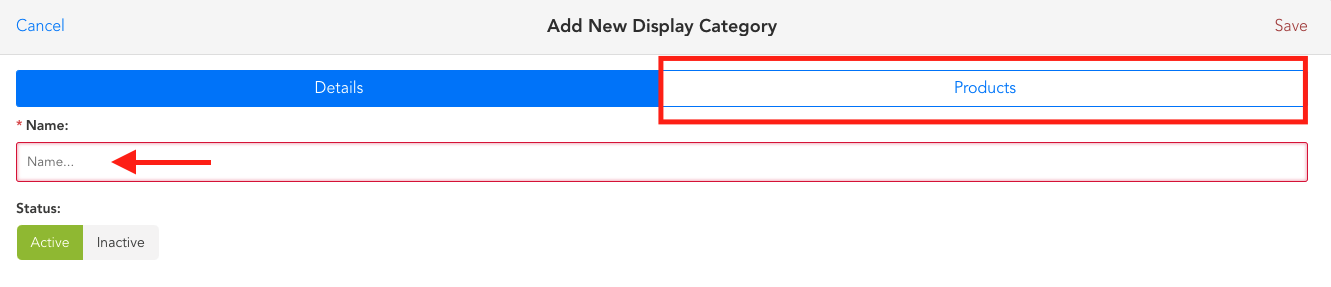
4. Use the drop-down to search your product list. Select Add to the items you want to be shown in this display category. Once complete select Save.

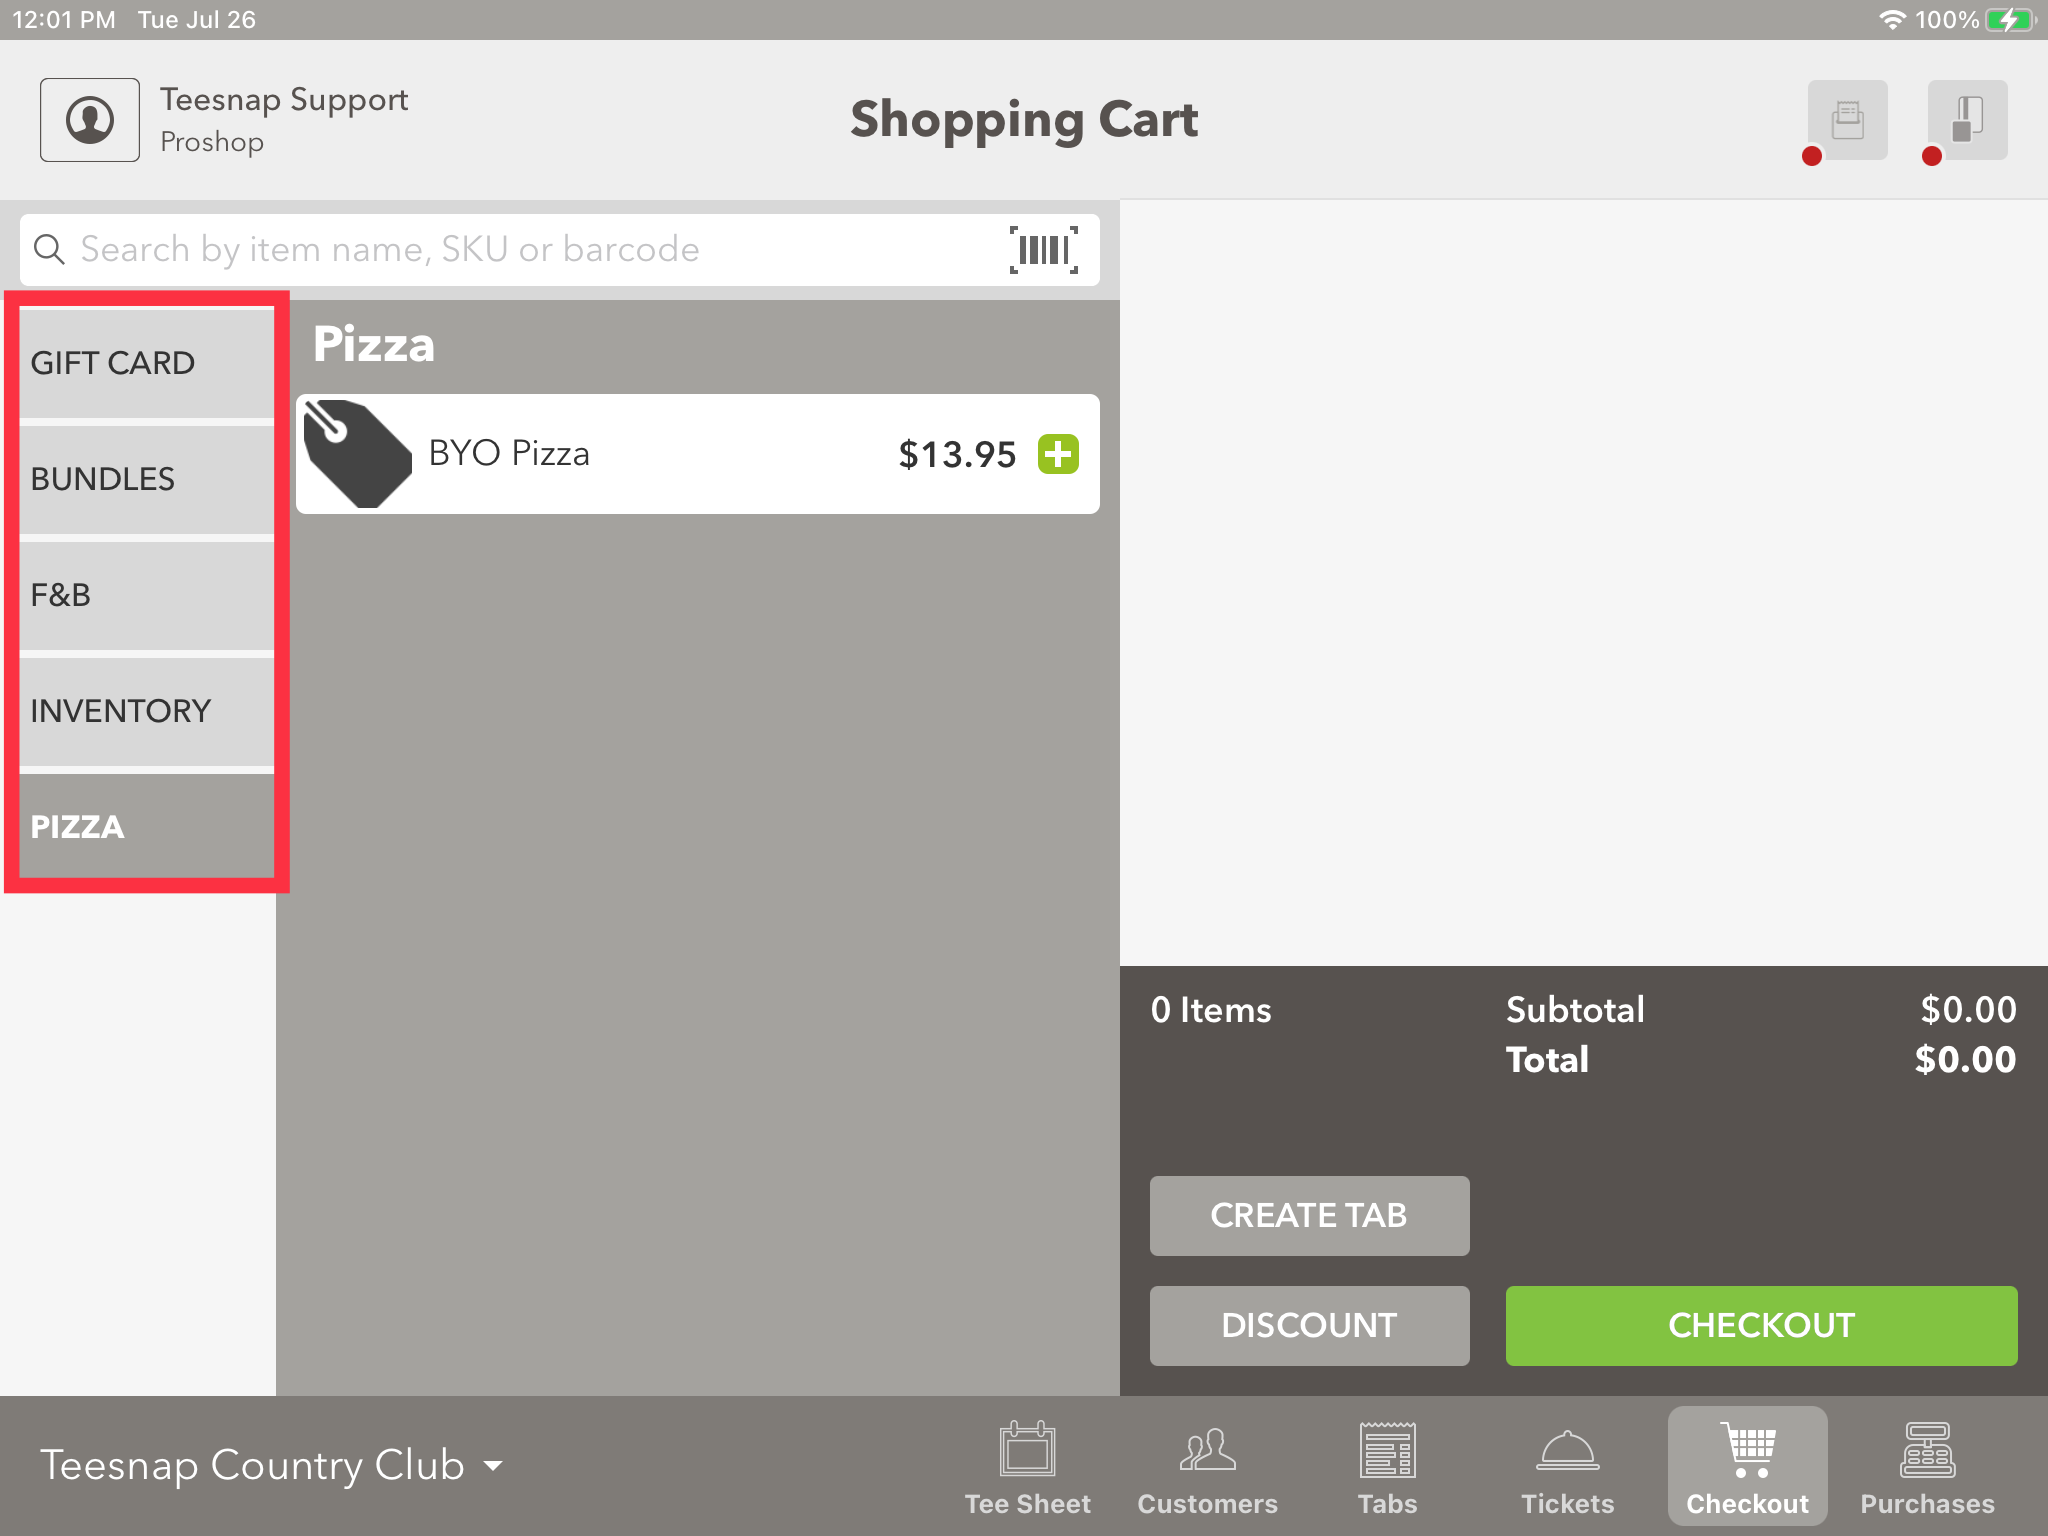
5. Now in the Shopping Cart you can see the Display Categories you have created.
If you have any questions, please do not hesitate to reach out to Teesnap Support by emailing us at support@teesnap.com or calling 844-458-1032