.png?width=240&height=55&name=Untitled%20design%20(86).png)
1. Login to the Web-Admin site
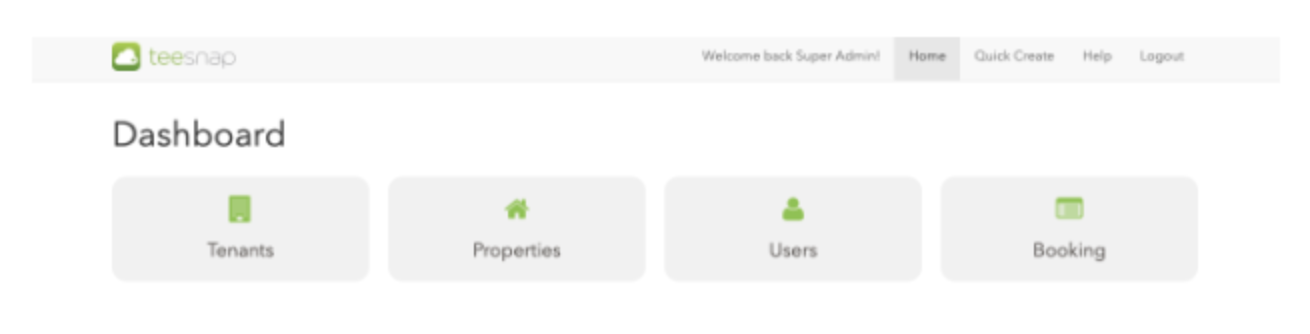
2. Go to the Properties Page
3. Click on the Course Name (bottom left of the Property Page)

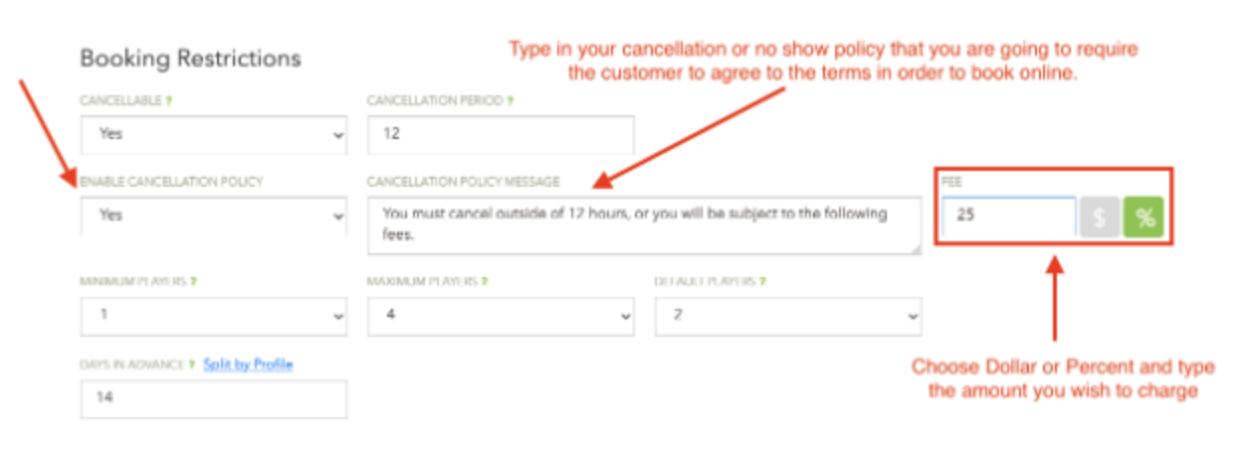
4. Under Enable Cancellation Policy select Yes, then enter your Cancellation Policy Message. Finally, choose the Fee amount and whether it is a dollar or percentage of the fees.
These next images are going to show the step-by-step experience your customer will have when booking their reservation.
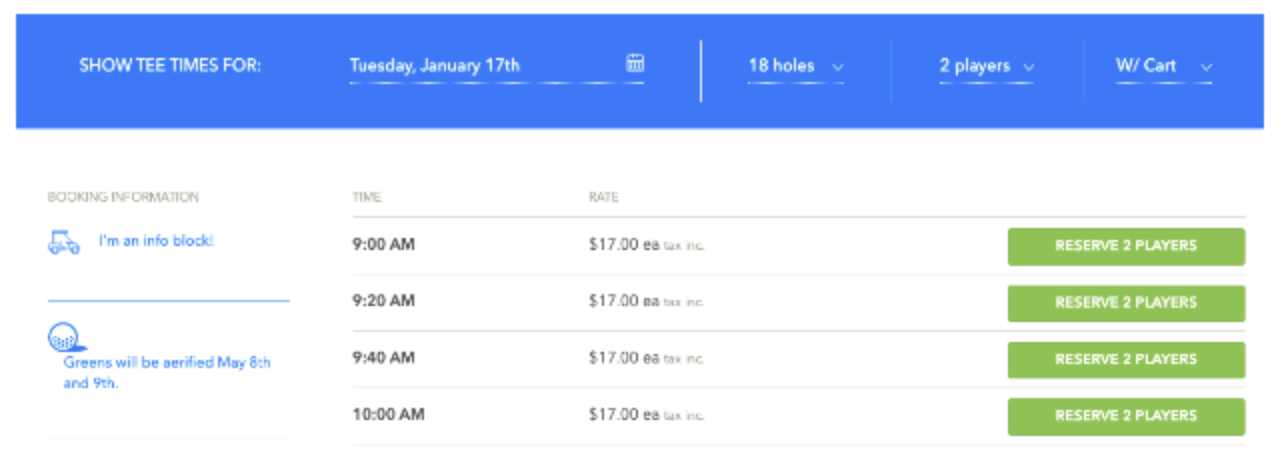
1. The golfer selects a date, number of holes, players, and whether they will need a cart. They will then select which time they wish to reserve.
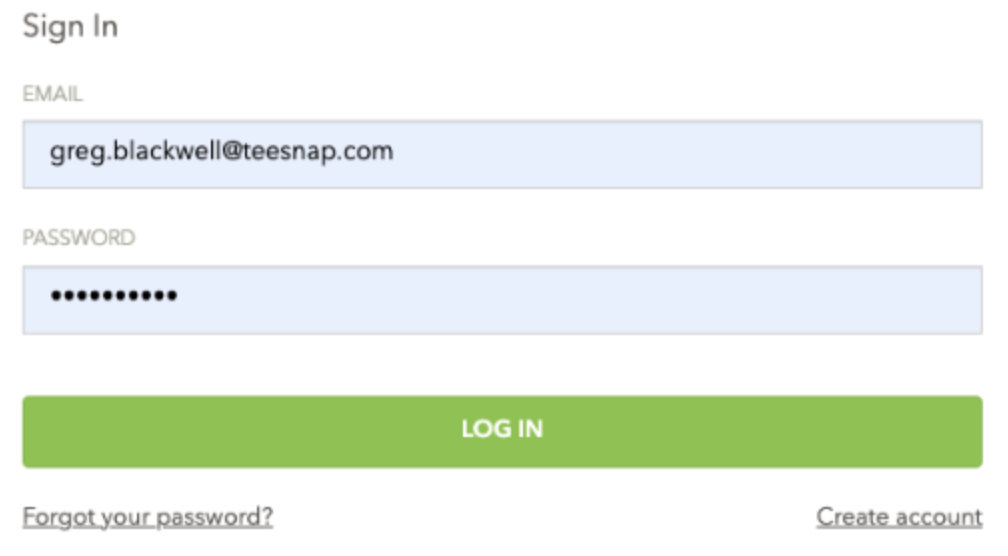
2. The golfer will be asked to log into the site (if they didn't login first)
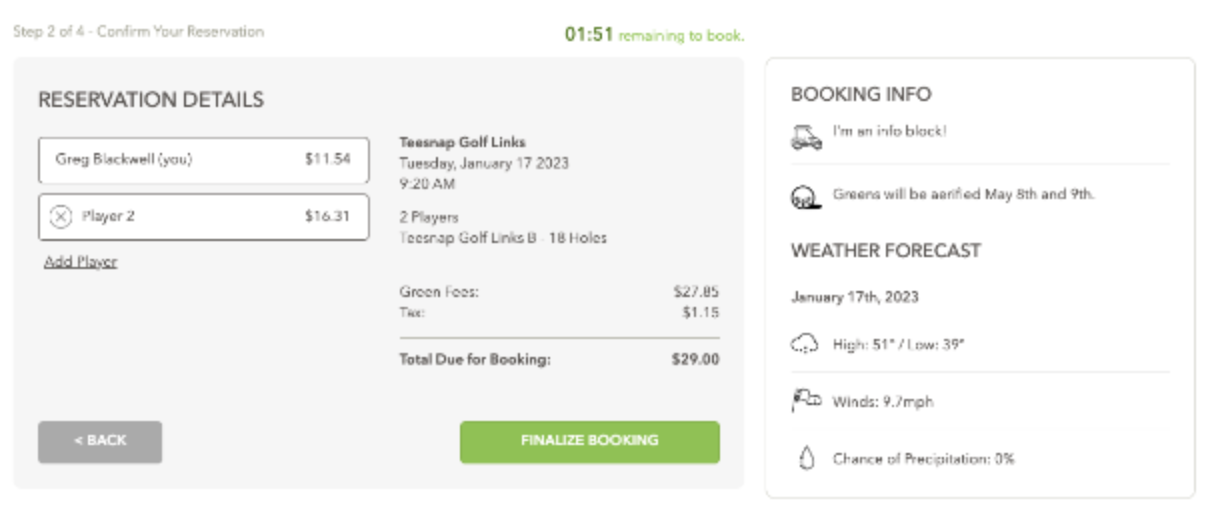
3. Here they will see their reservation details and will click Finalize Booking.
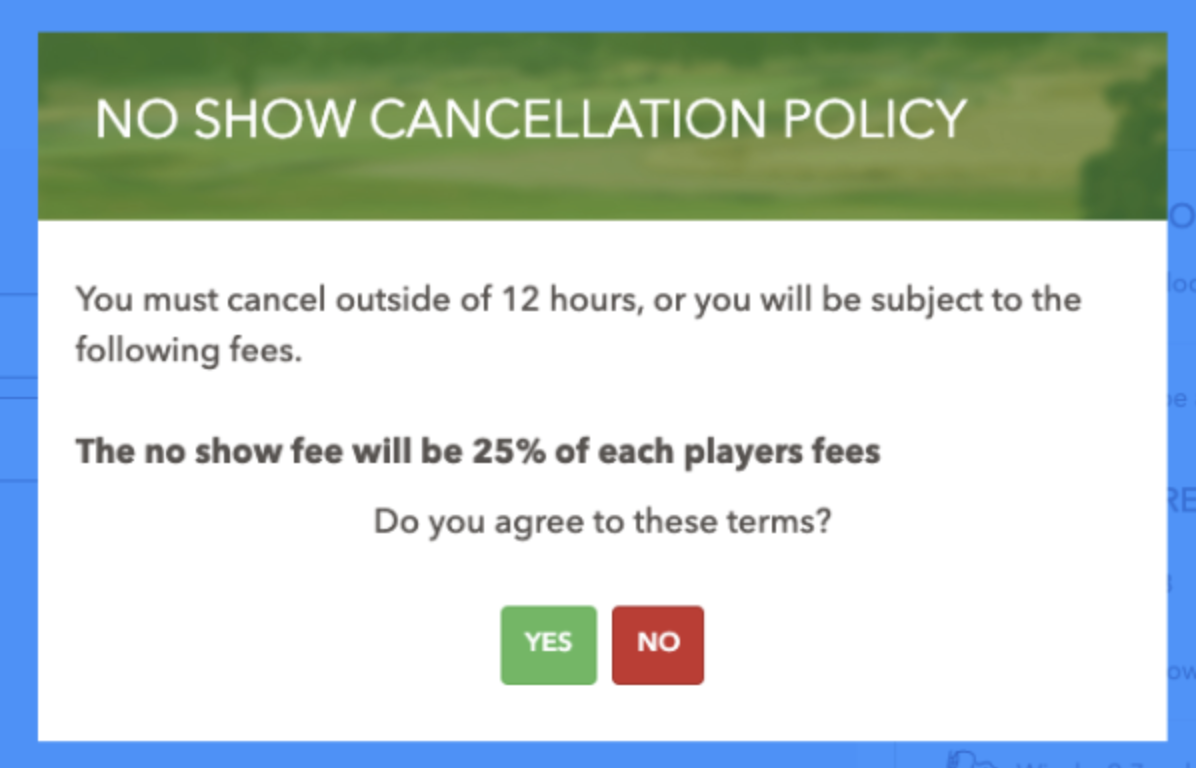
4. The No Show/Cancellation Policy pops up and they have to accept or deny the terms. If they choose NO they are sent back to the online tee sheet and the reservation won't be finalized. If they choose YES they will move forward in the reservation process.
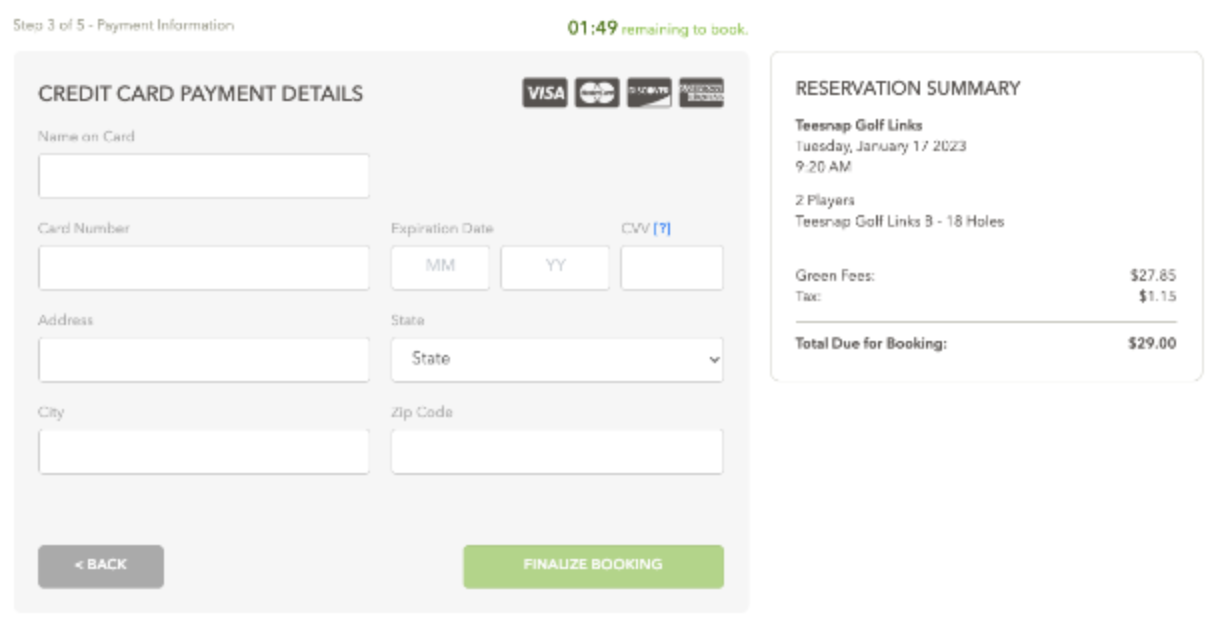
5. The golfer will enter their credit card information and these details will be saved as a credit card on file in the application. You will then be able to use this credit card on file to charge the cancellation fee in the checkout screen of the application.
6. The golfer will be able to invite a friend(s) and send the invite or skip the invitation.

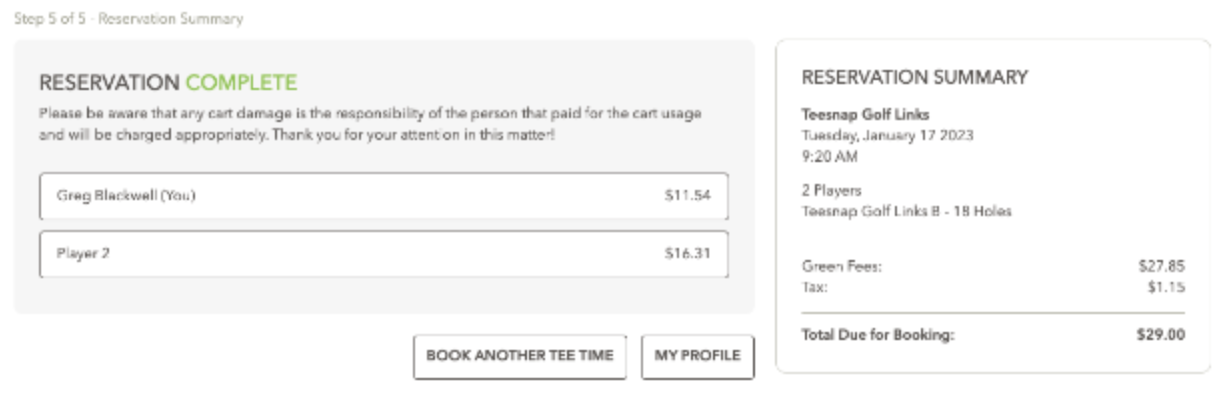
7. The golfer will see their reservation summary and the reservation is completed.
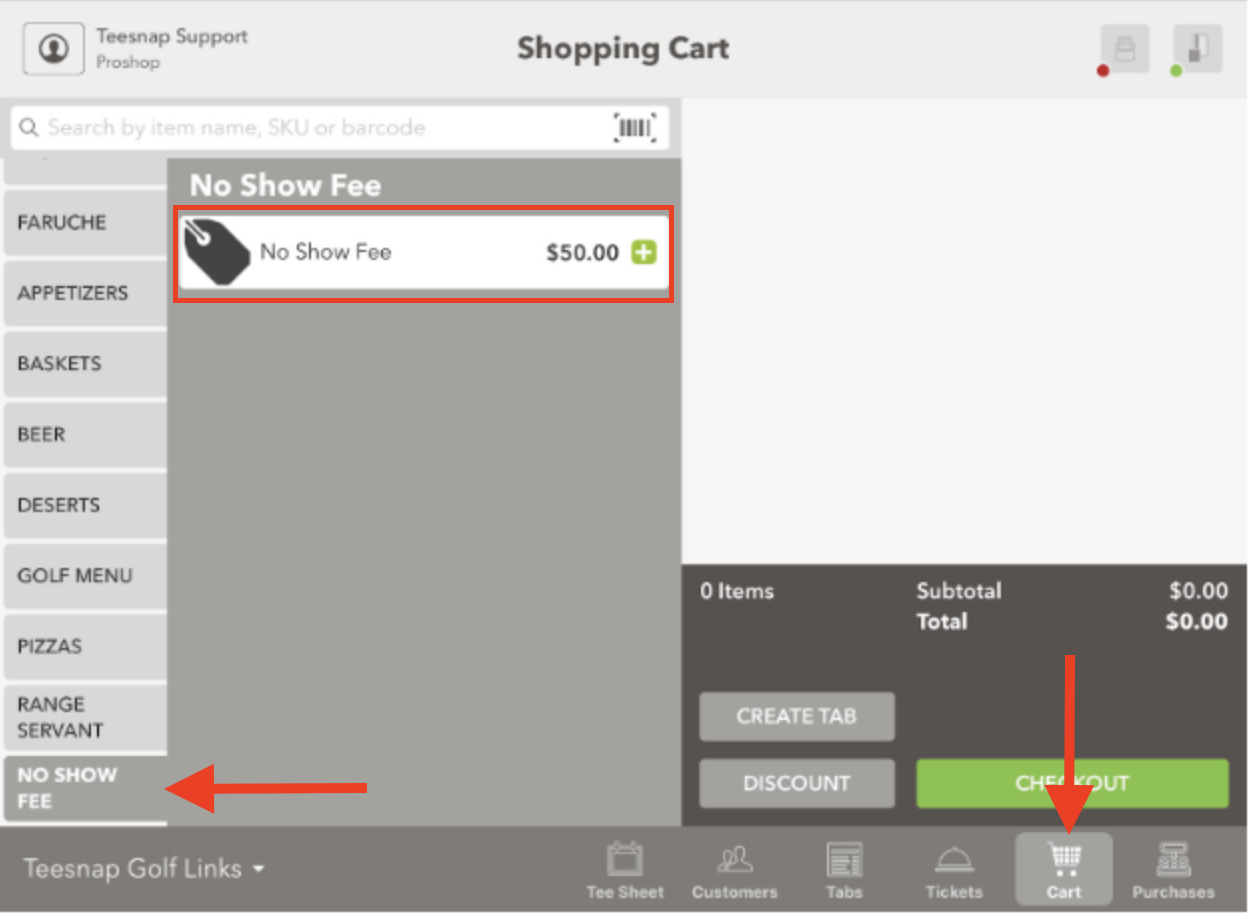
Next, we will show you how to process the no-show fee in the application. Before going to the application you will need to have at least one product set up in the admin portal. Here we set up a No Show Fee as the product:
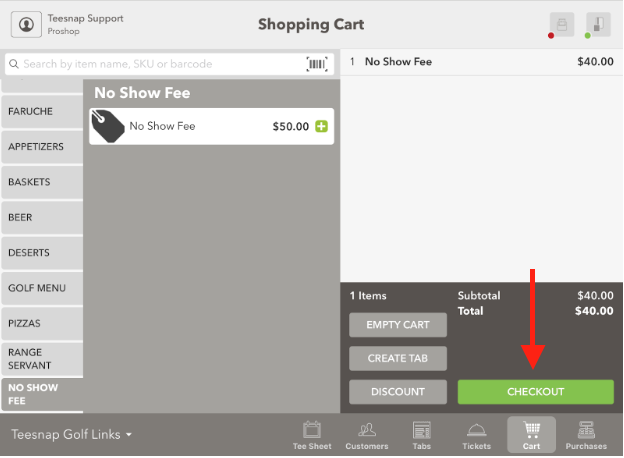
1. Click on the Cart icon and find the No Show Fee Product.
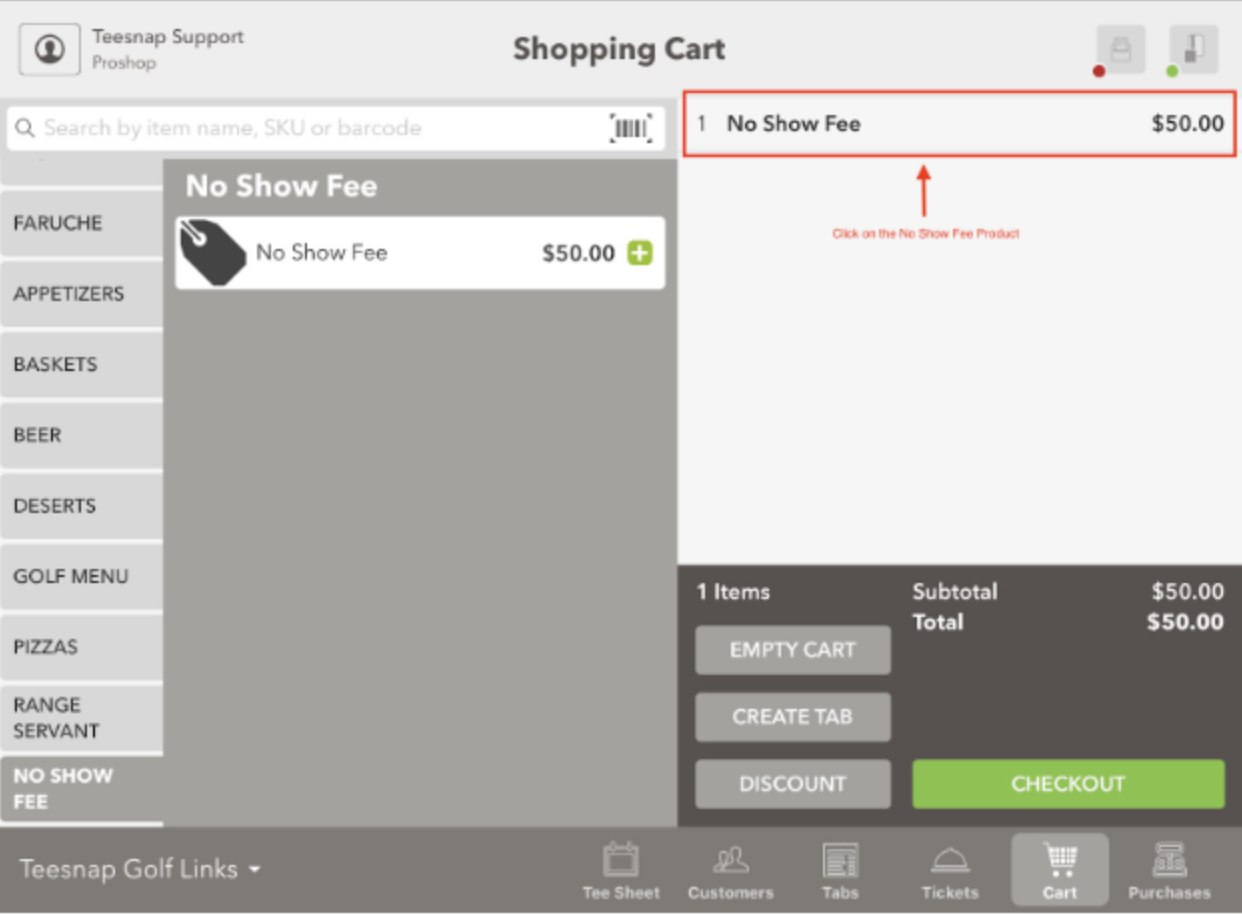
2. Click on the green plus symbol to add the product to the shopping cart. Then click on the product in the cart if you need to modify the price of the fee using the pricing override feature.
3. Click on the Override button
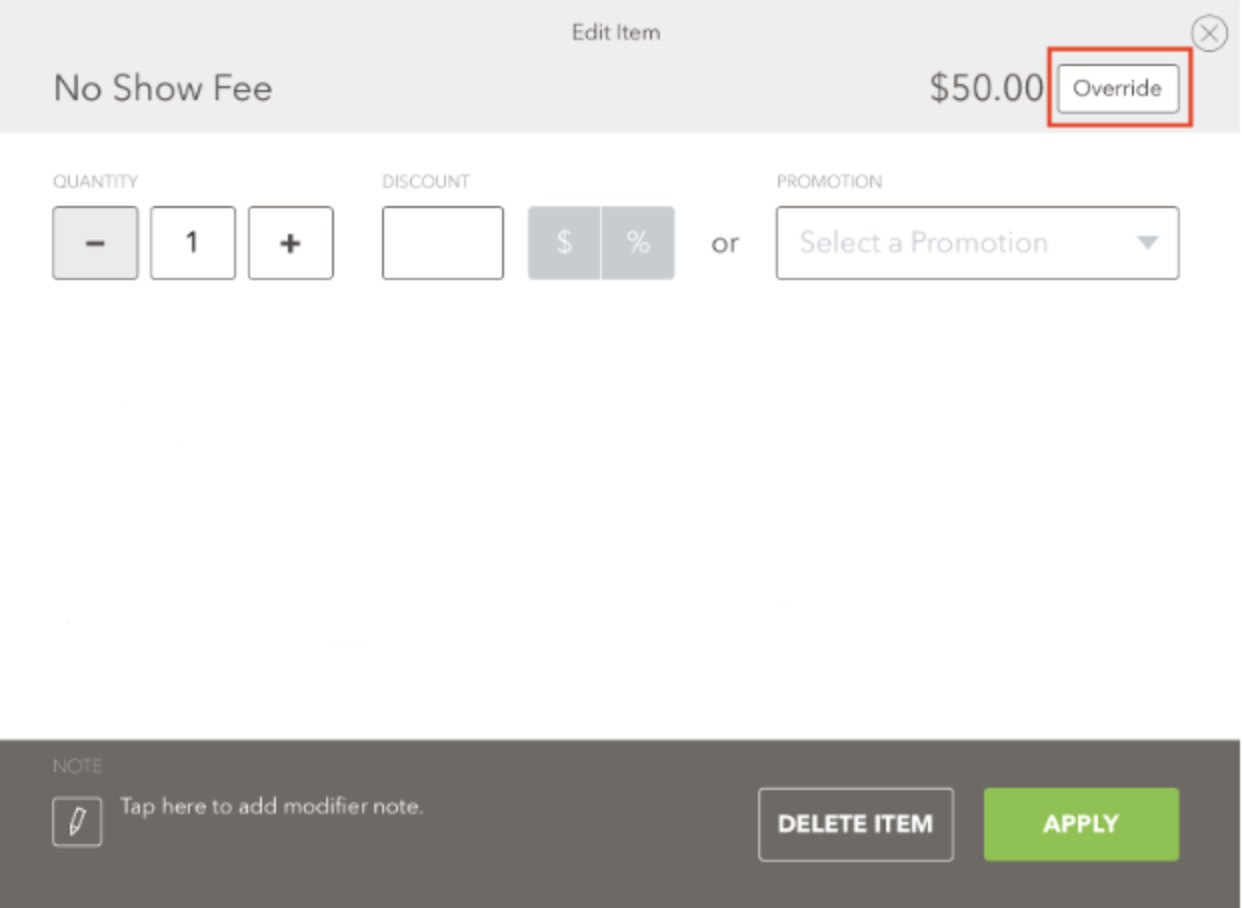
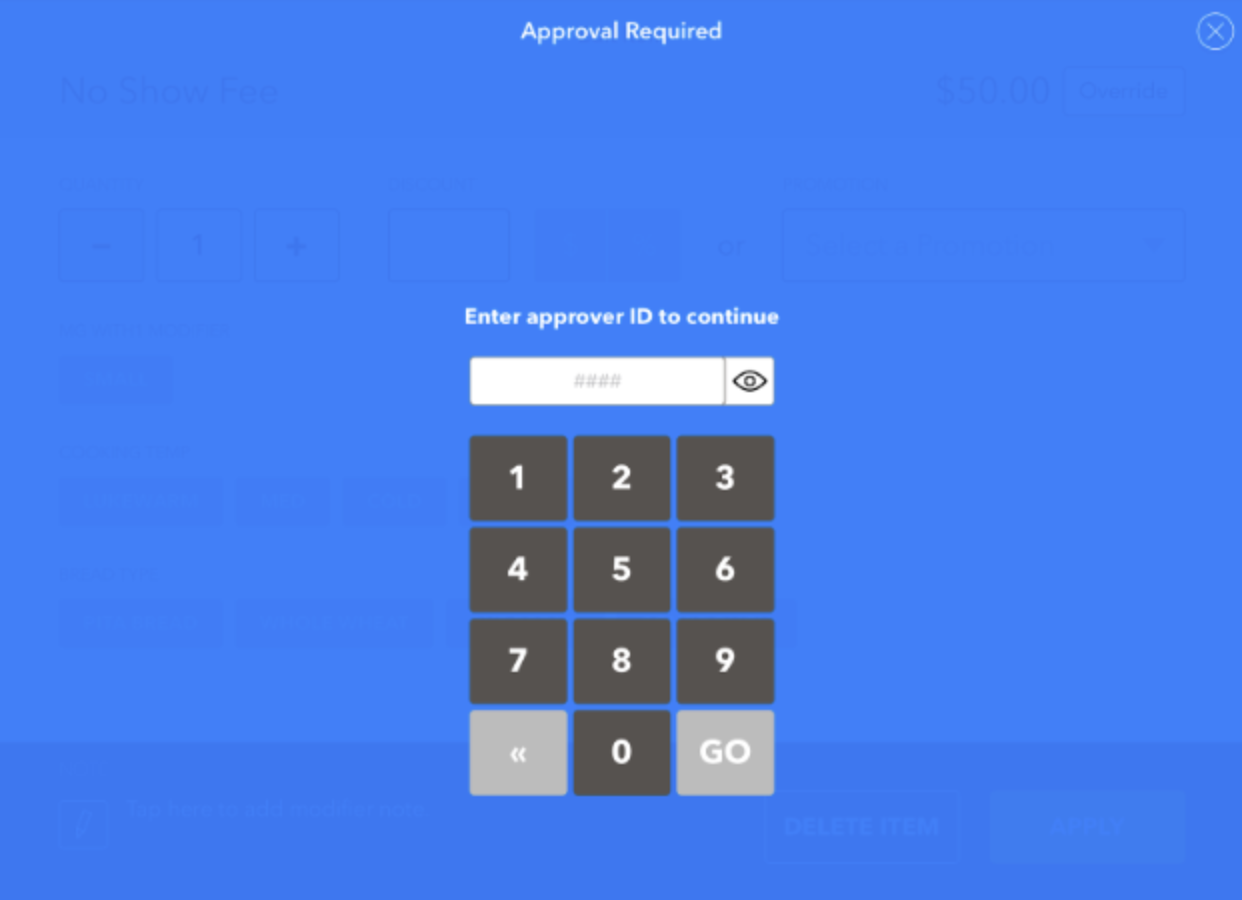
4. You will be required to enter your Mobile-ID. In some cases, the Override permissions are turned off for certain Roles. If this is the case you will need a Manager's ID for approval.
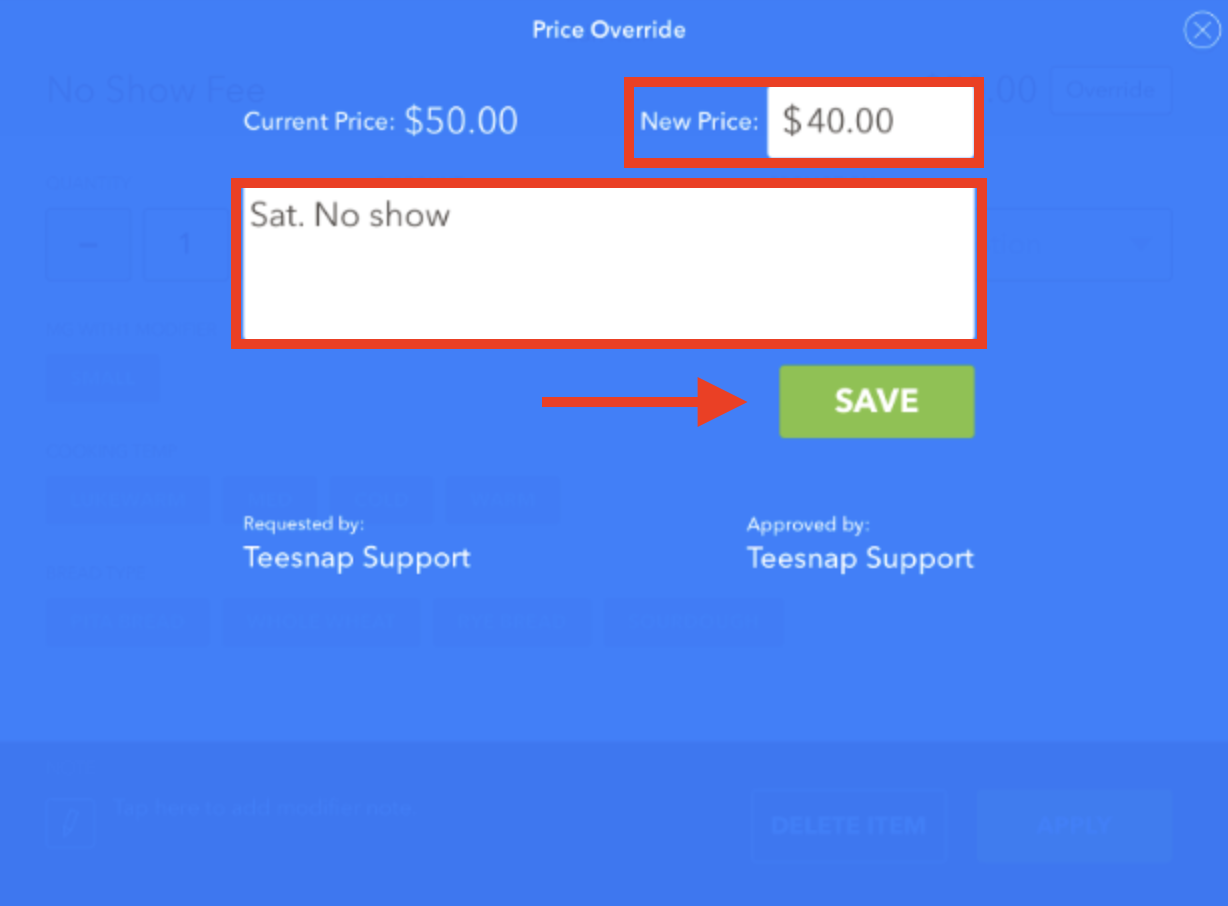
5. Type in the New Price and Reason for the price override then click Save
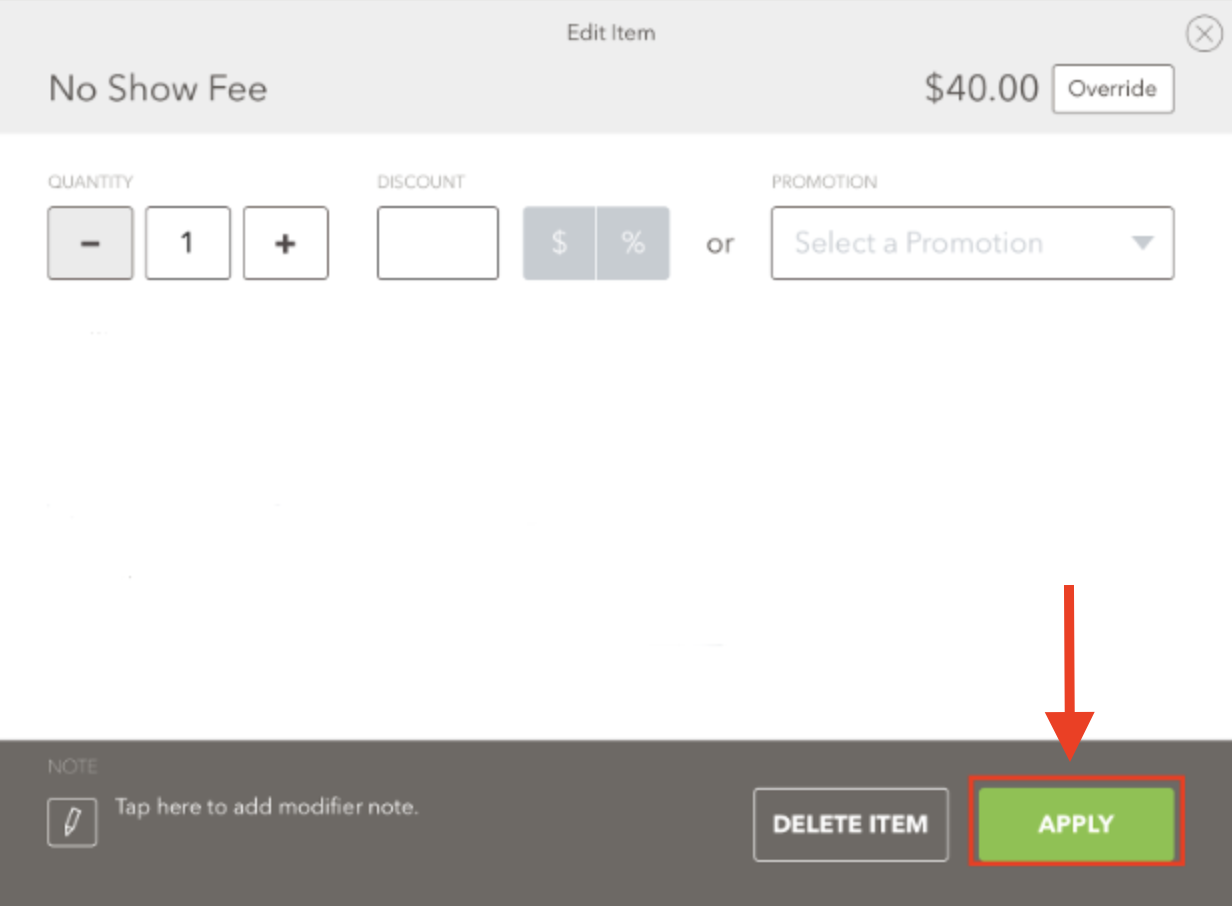
6. Click the Apply Button
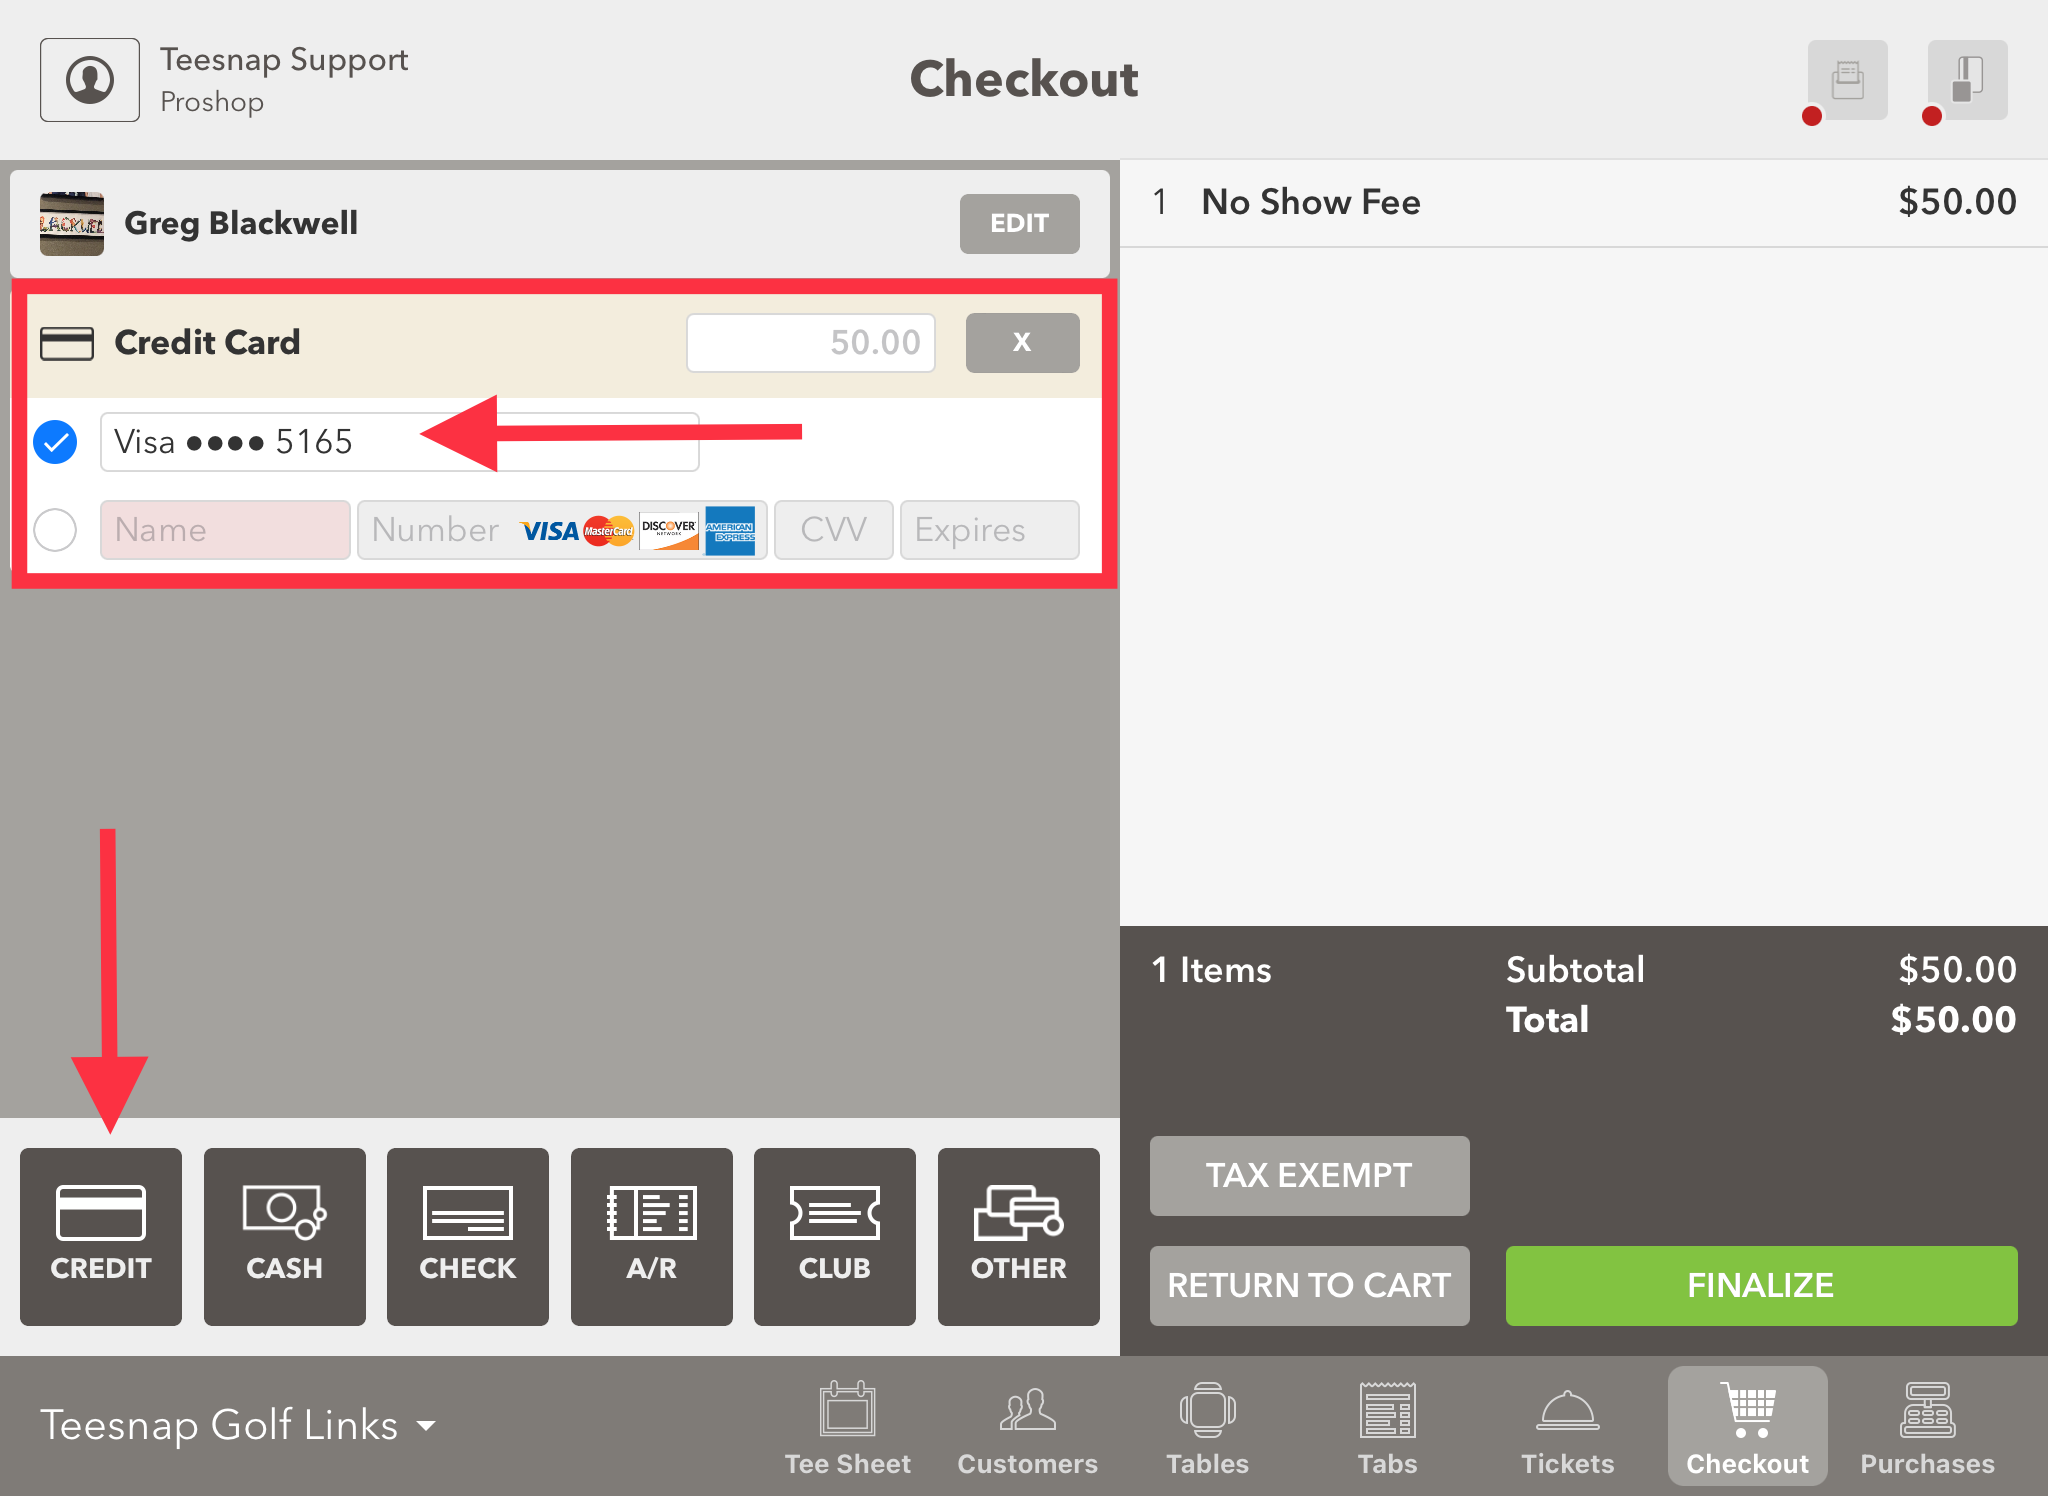
7. Now with the No Show Fee adjusted, click Checkout.
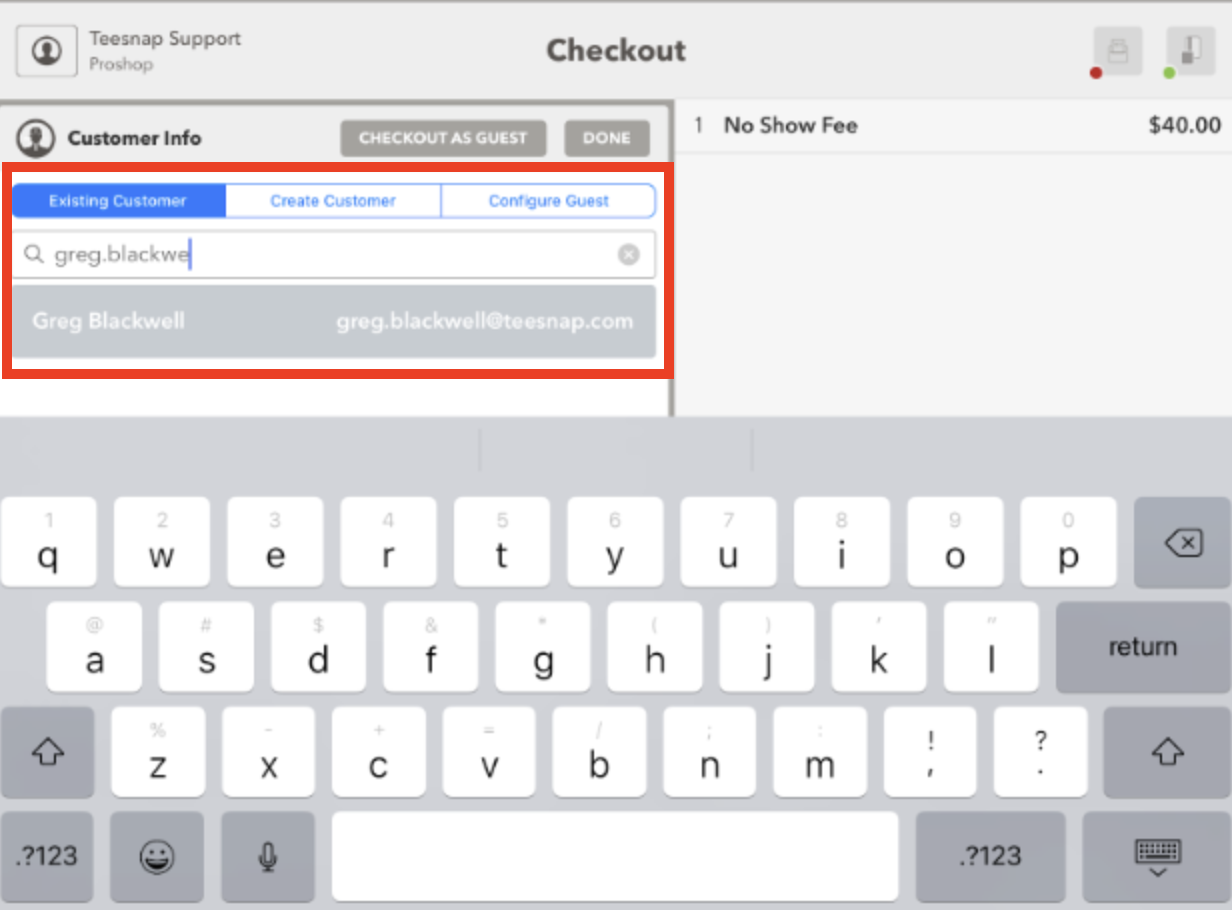
8. Search for the customer that did not show or cancel
9. Choose payment type Credit. Then select Card on File and Finalize the transaction