.png?width=240&height=55&name=Untitled%20design%20(86).png)
1. To add a SKU or UPC to a product, navigate to the Inventory tab in Teesnap Admin.
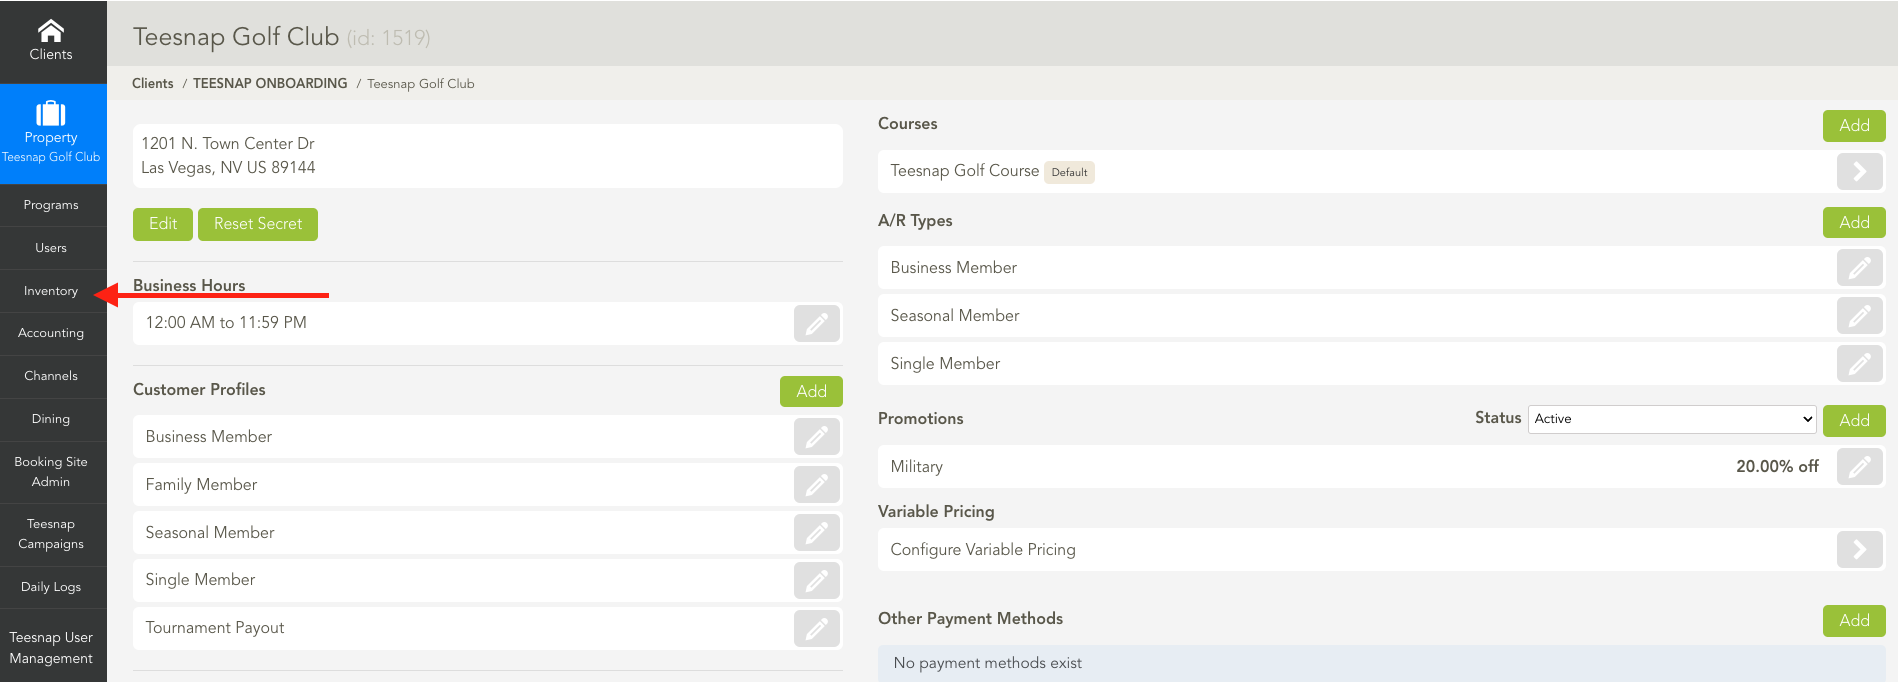
2. Once in the inventory tab, select the "Products" section.
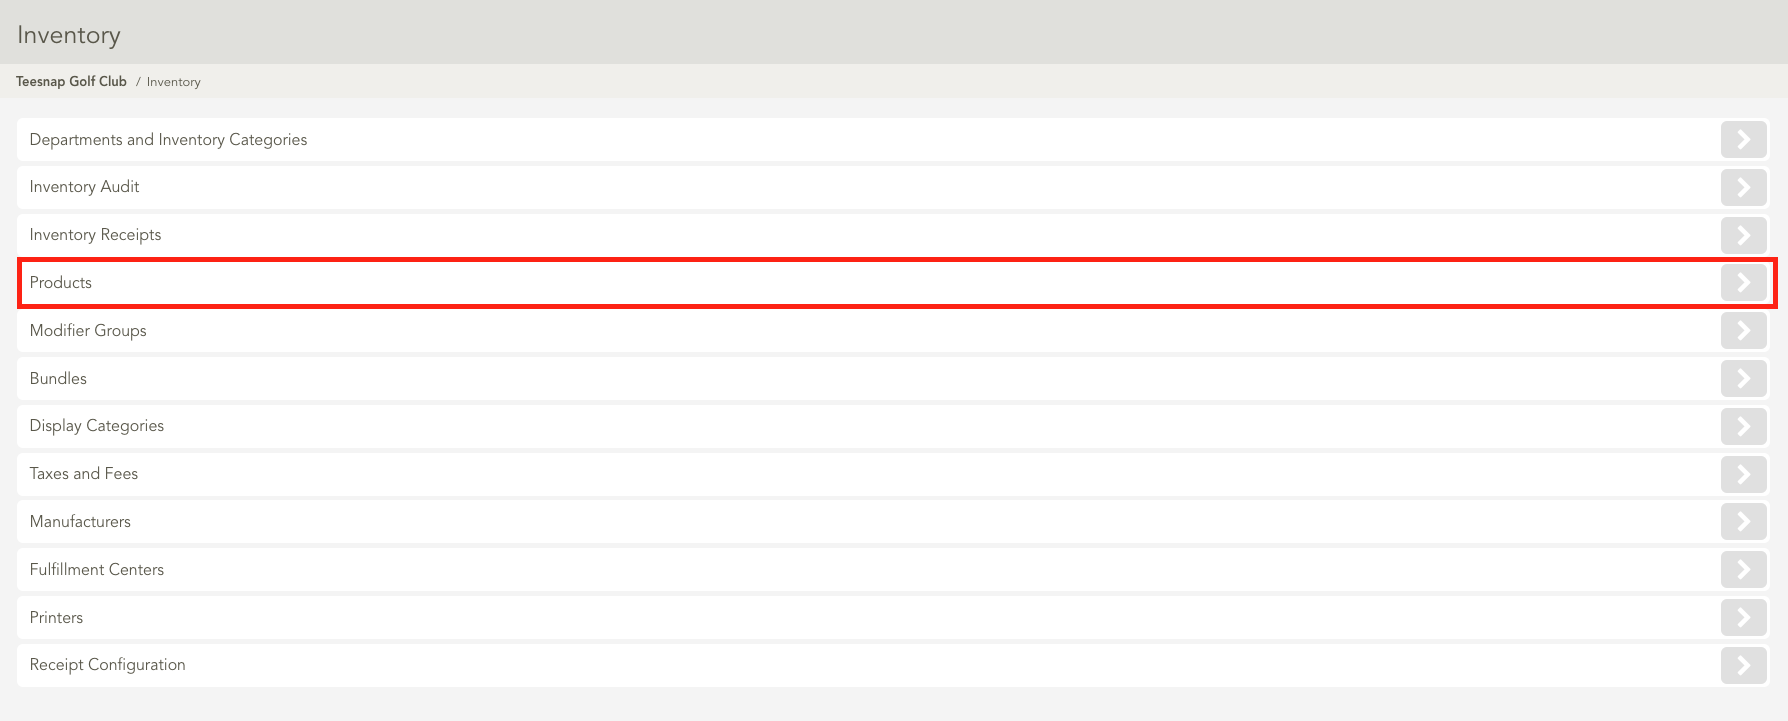
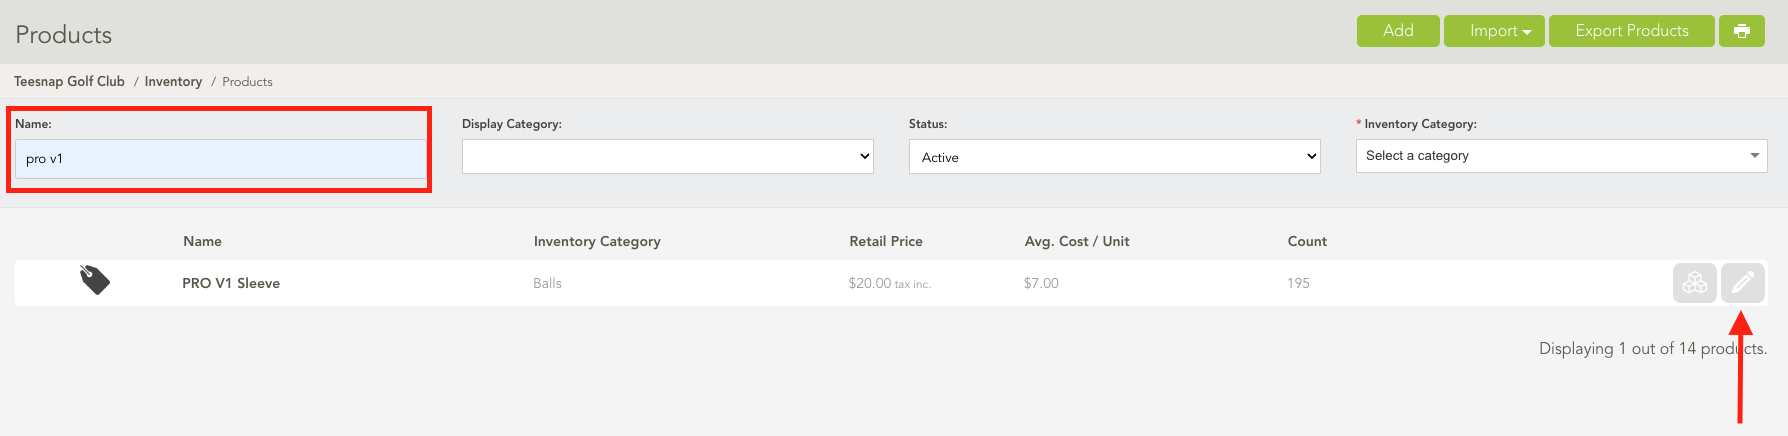
3. After opening the Products section, find the item you want to add a SKU or UPC to, then click the "Pencil" icon to edit.
4. Once in the "Edit Product" screen, select the "Inventory" tab.

5. Under the inventory tab, select Add SKU/UPC Codes. Enter in your custom SKU or add the UPC code from the product label.
UPCs must be in 12 Digit UPC-A format to be scannable.

6. To enter multiple SKUs or UPC codes for this product, select Add SKU/UPC Codes to insert another line. Repeat selecting Add SKU/UPC Codes to add as many additional lines as needed. Once complete select Save at the top right.

7. Once complete select Save at the top right.

Barcodes can be scanned in the checkout screen using the iPad camera or a Bluetooth scanner.
To learn how to print pricing labels, Click Here
If you have any questions, please do not hesitate to reach out to Teesnap Support by emailing us at support@teesnap.com or calling 844-458-1032.