.png?width=240&height=55&name=Untitled%20design%20(86).png)
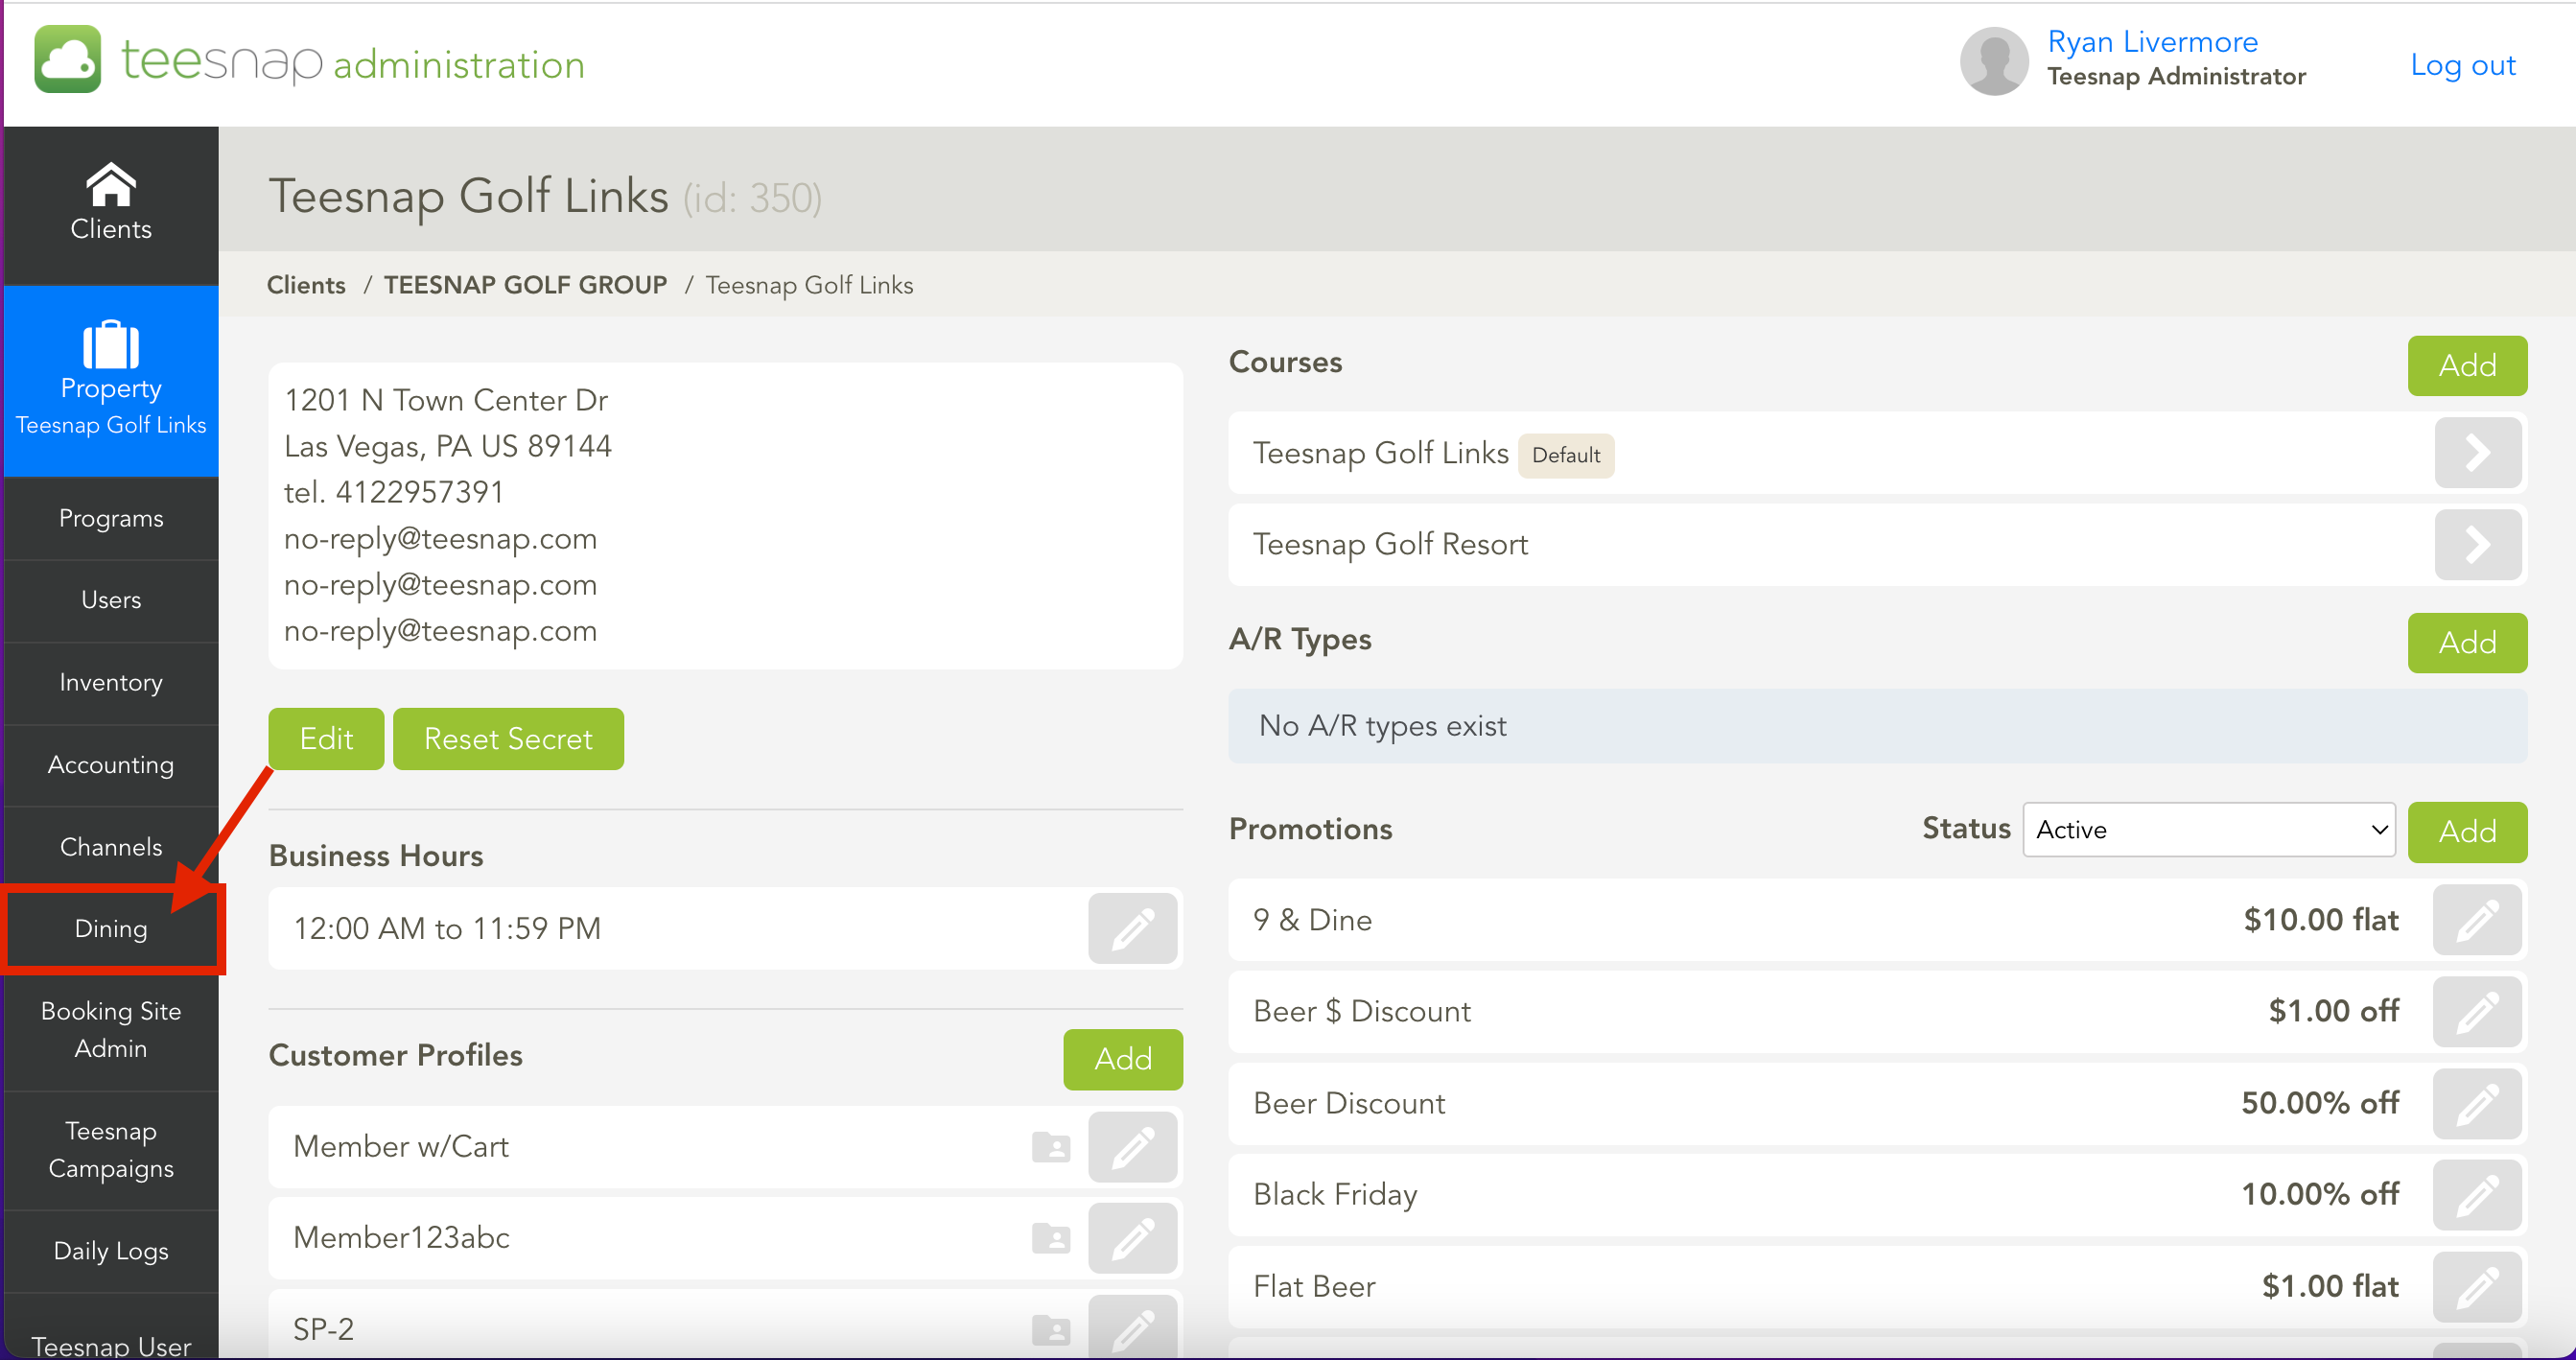
1. To add a floor/table layout, locate and open the "Dining" tab in Teesnap Admin.
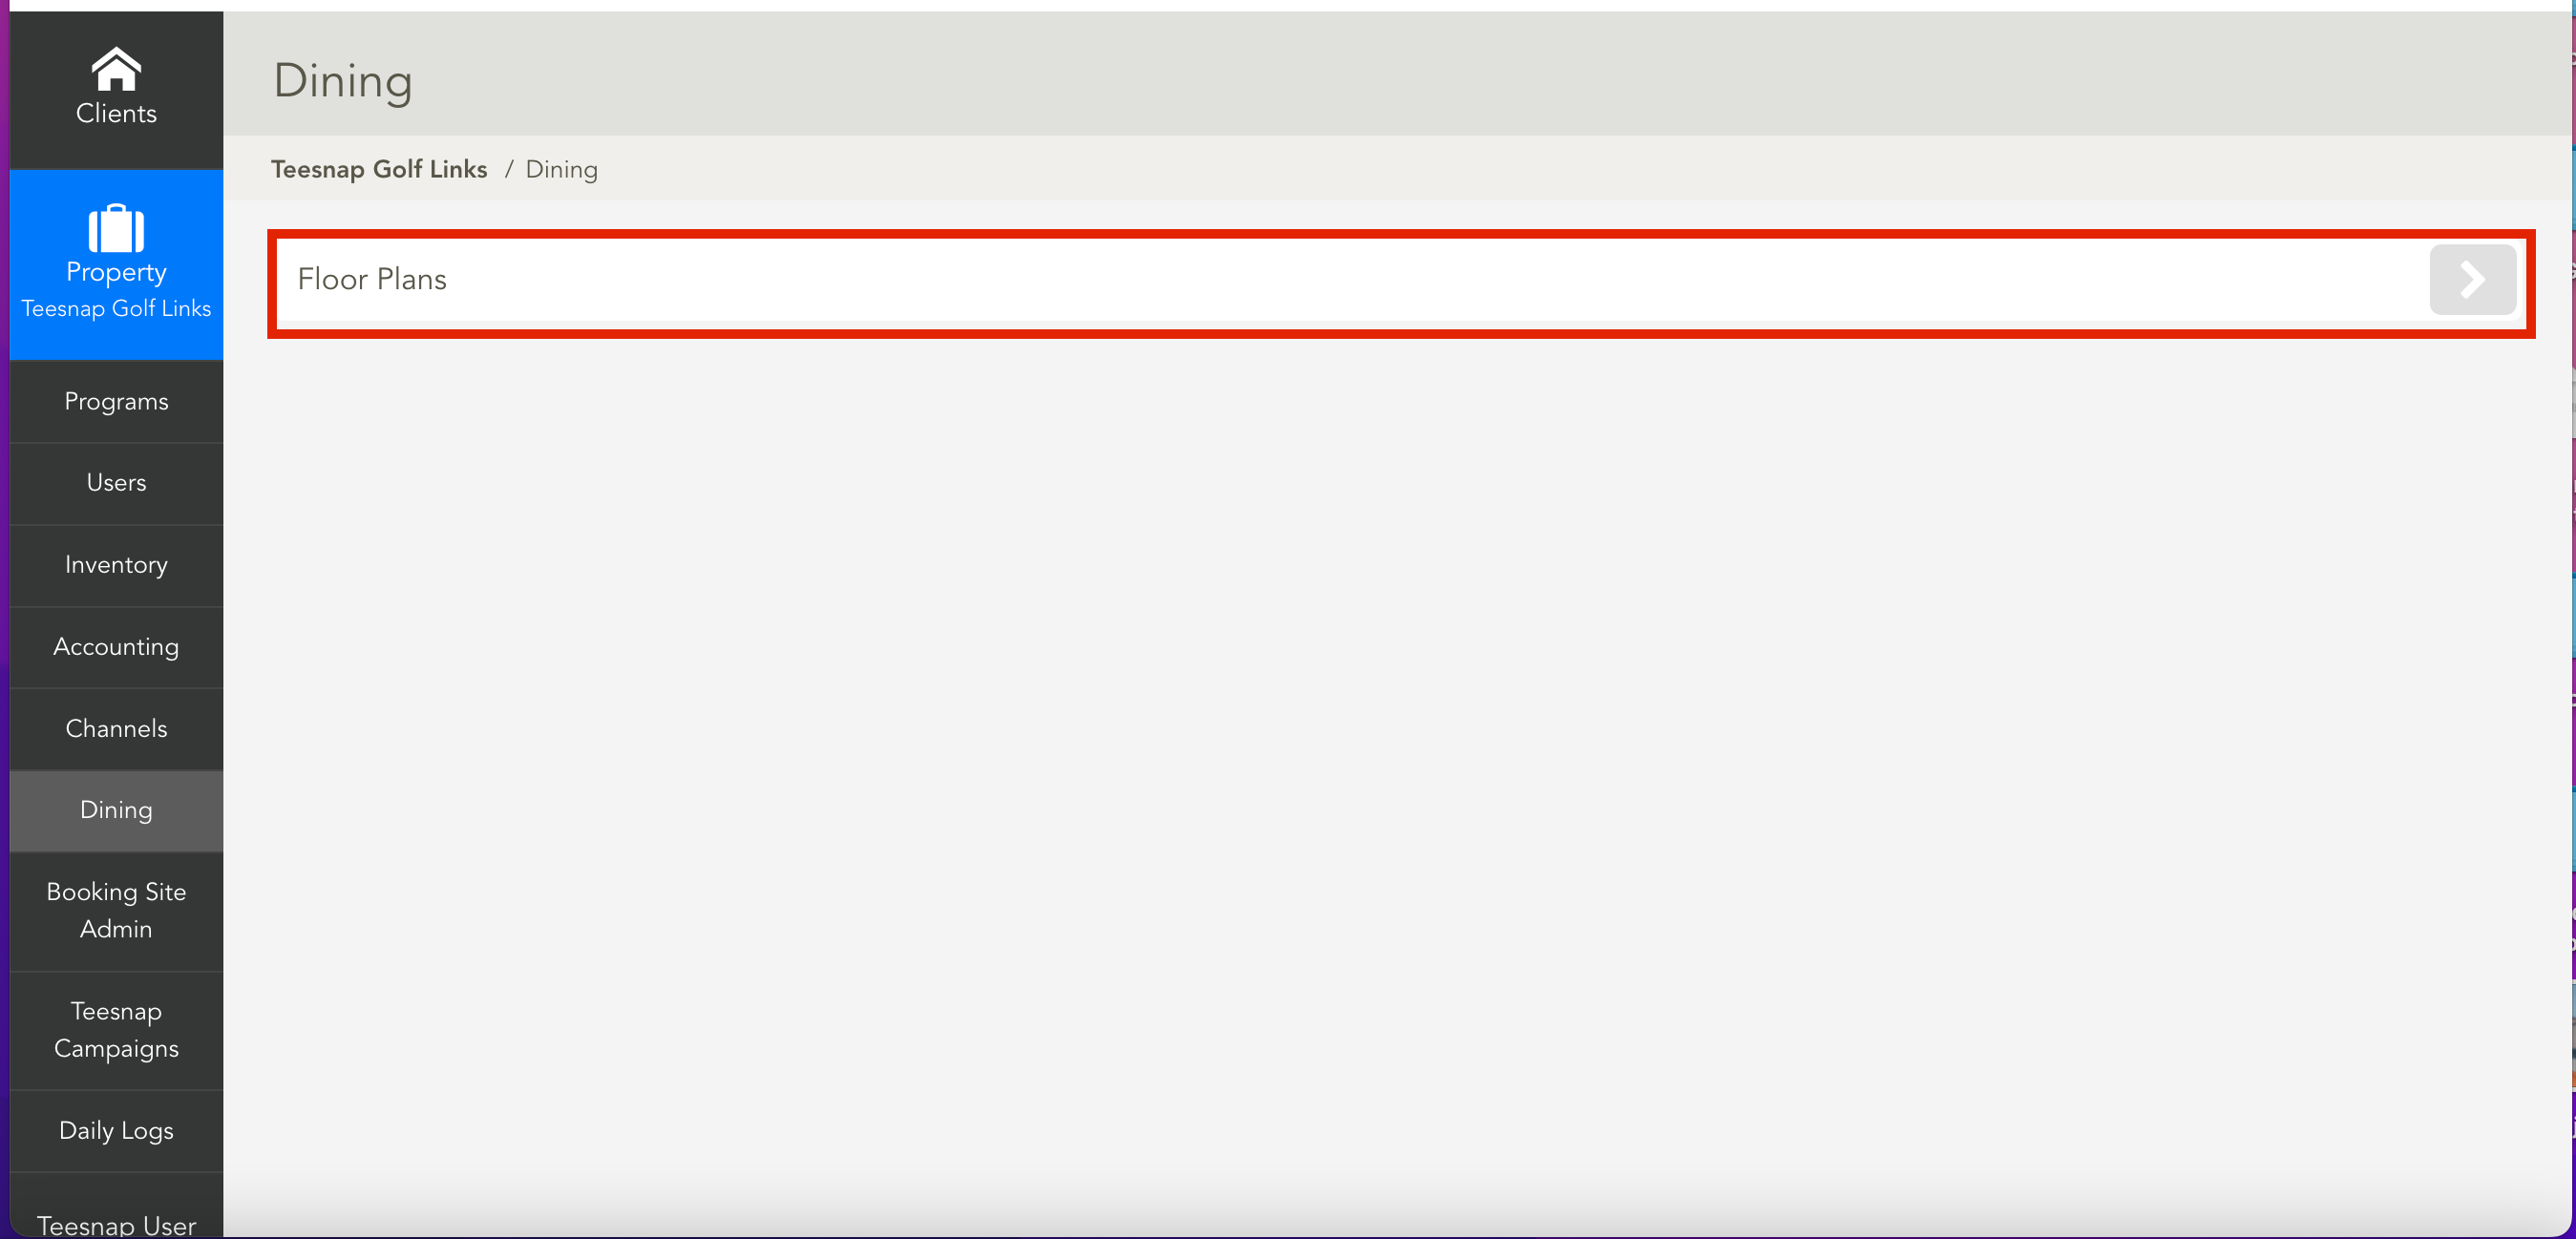
2. In the Dining tab, click Floor Plans.
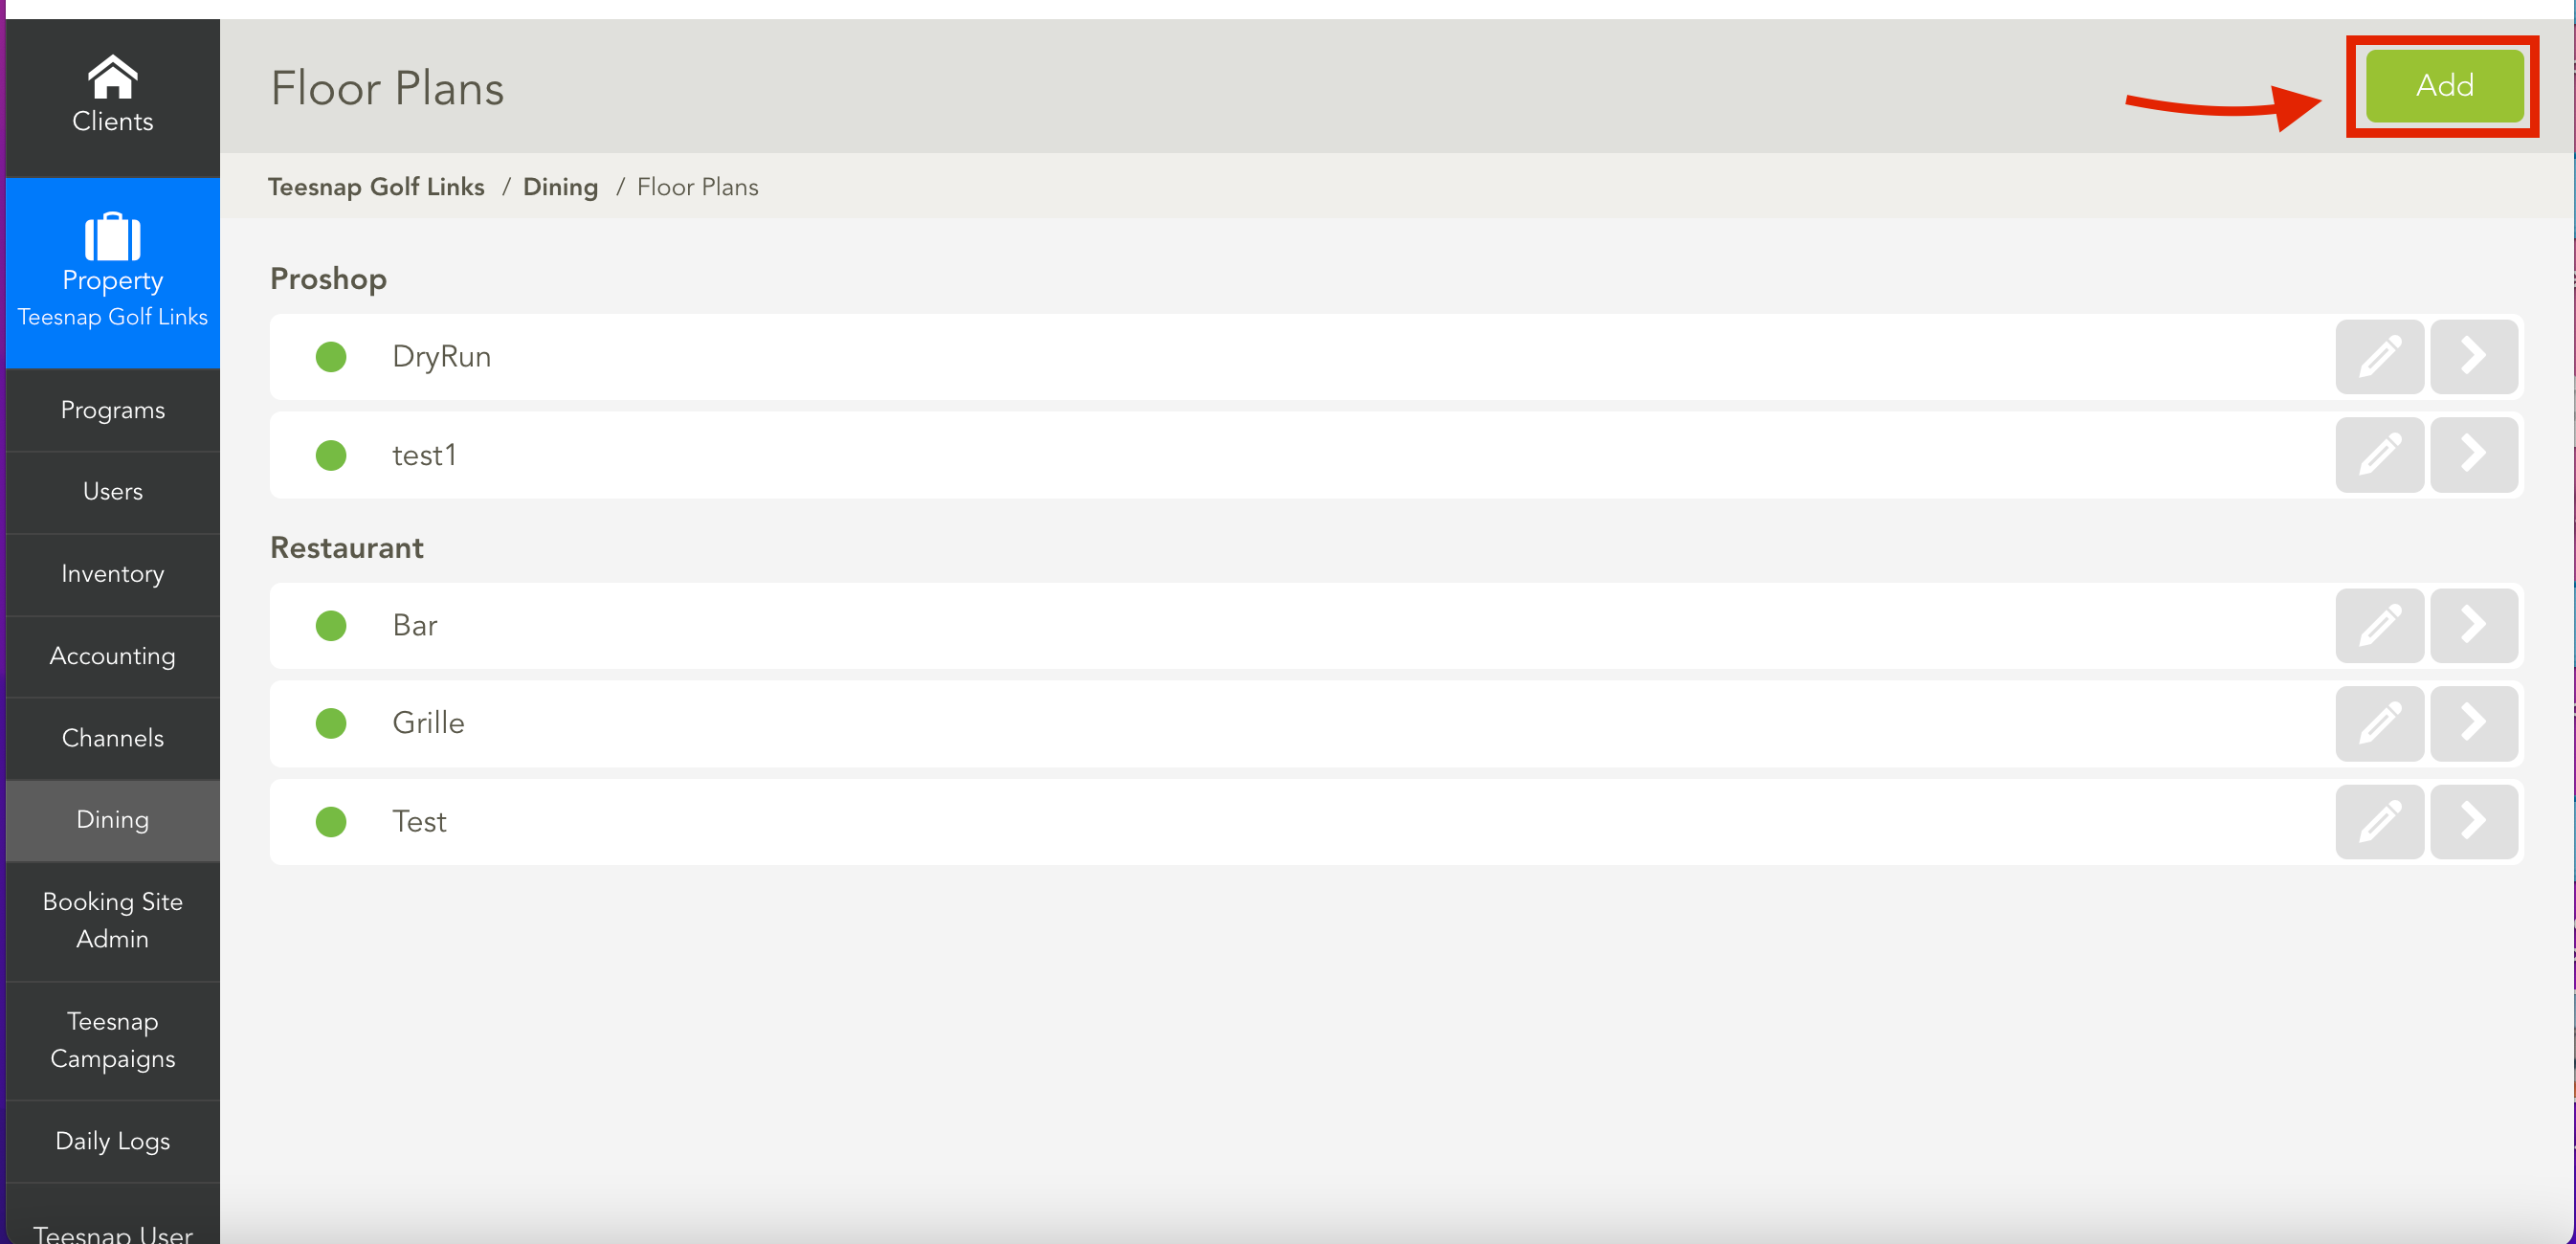
3. On the Floor Plans page, click Add.
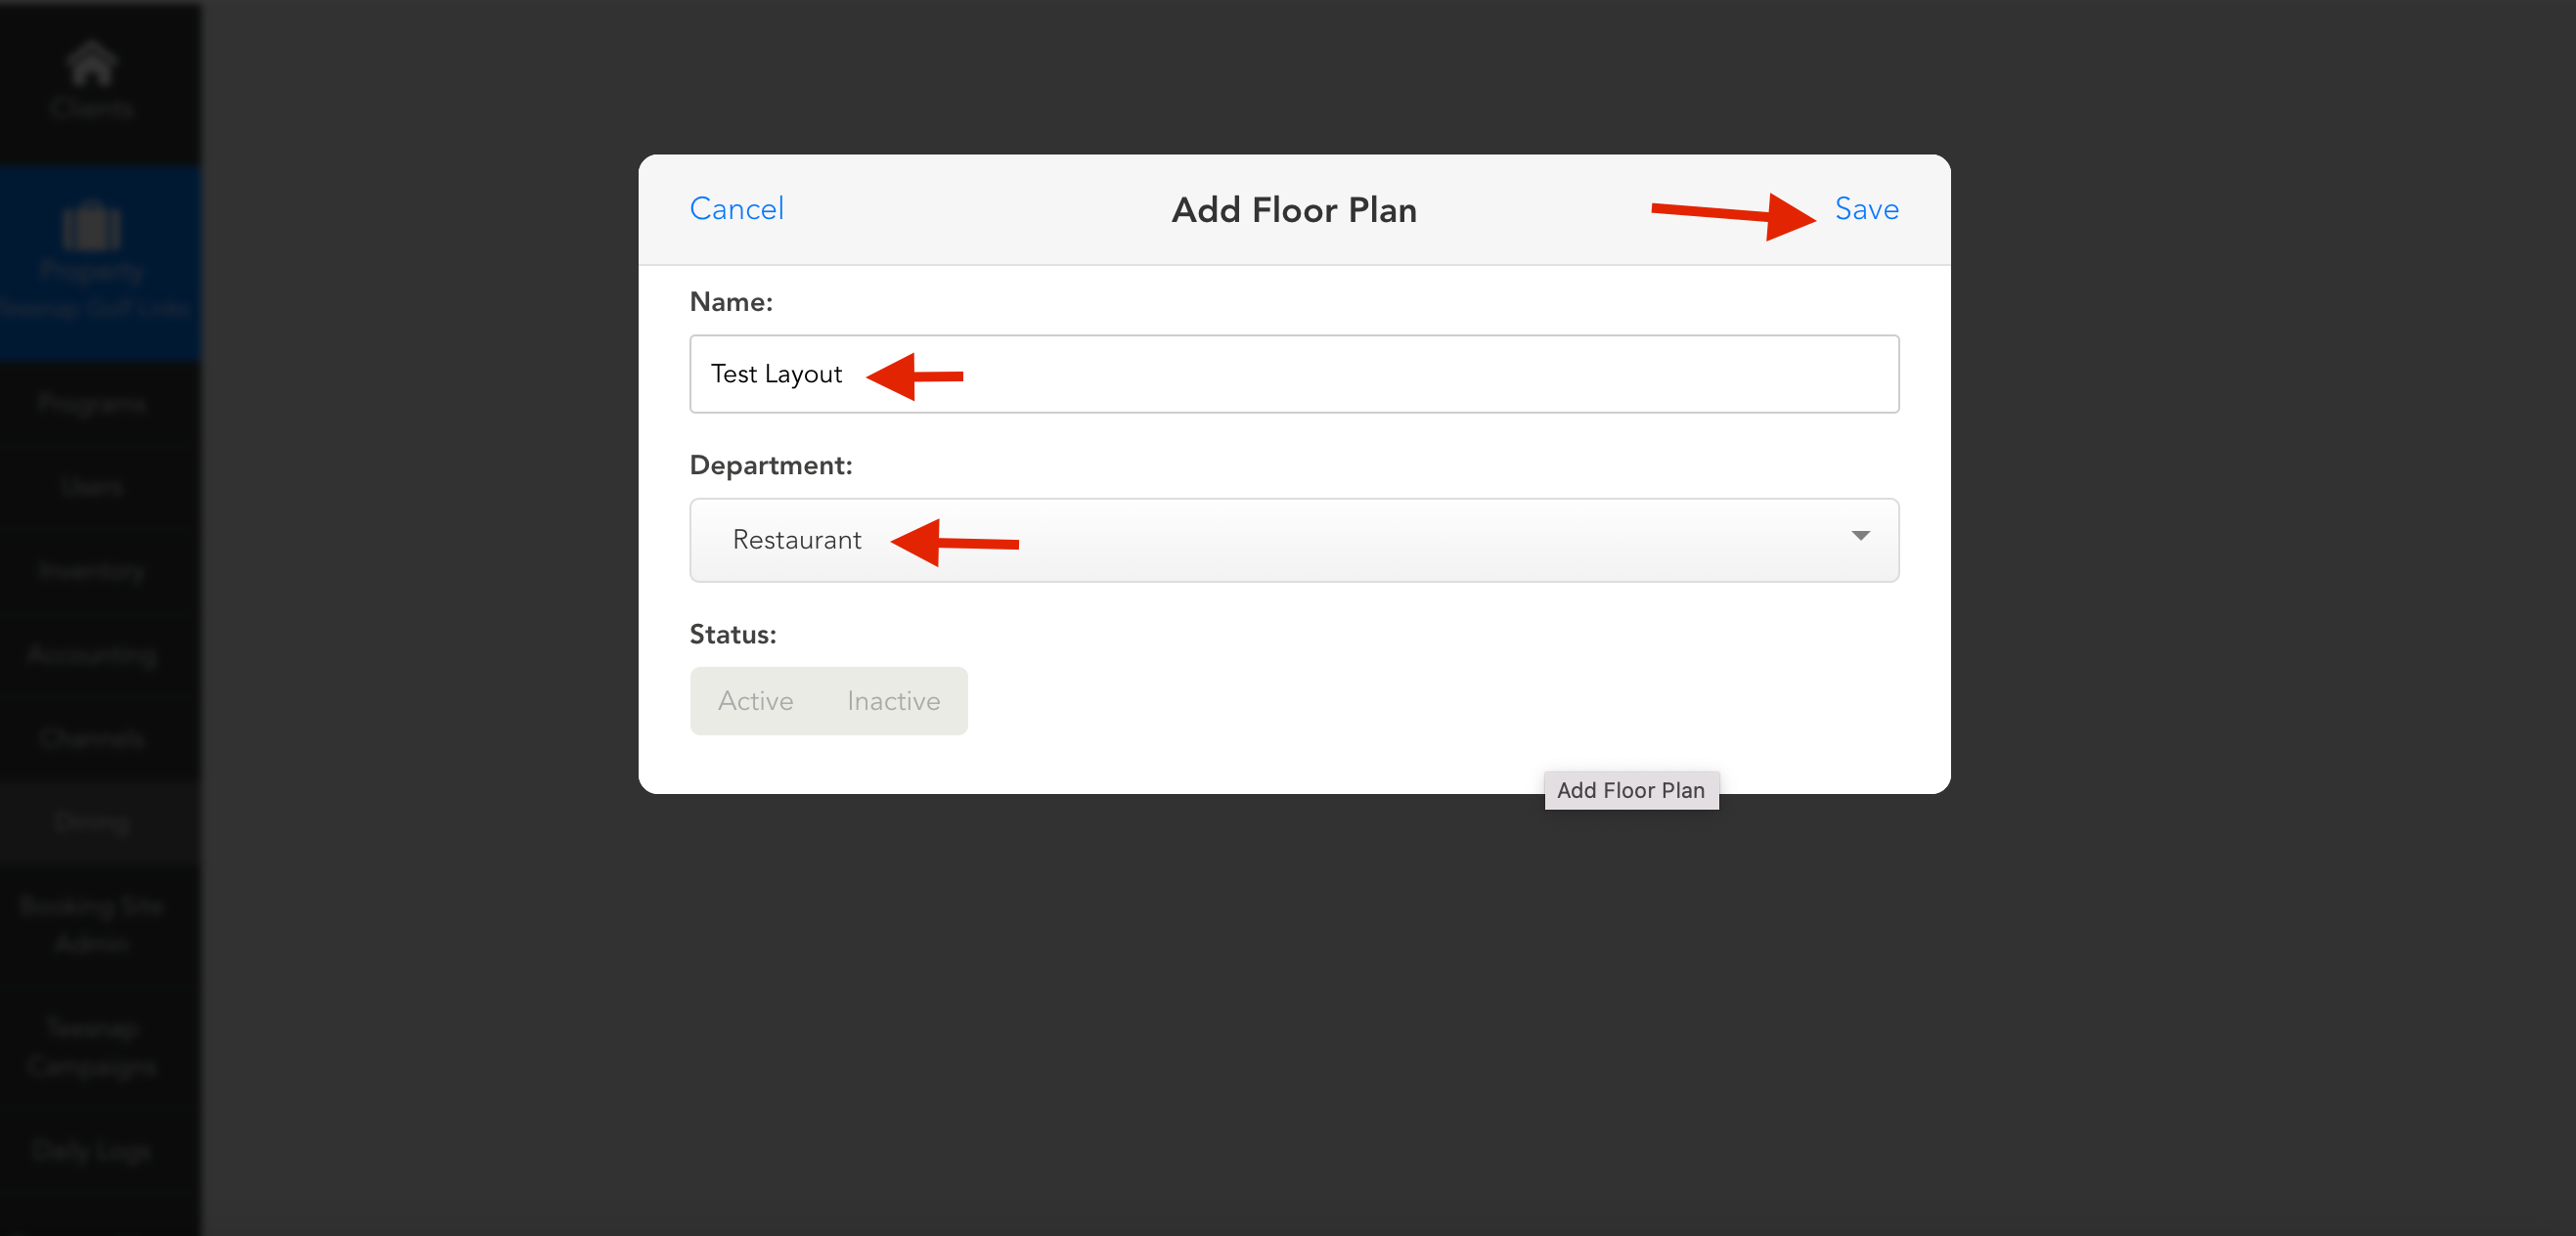
4. In the Add Floor Plan window, enter a name for the floor plan and select a department. The layout will appear on the iPad only for the department you choose.
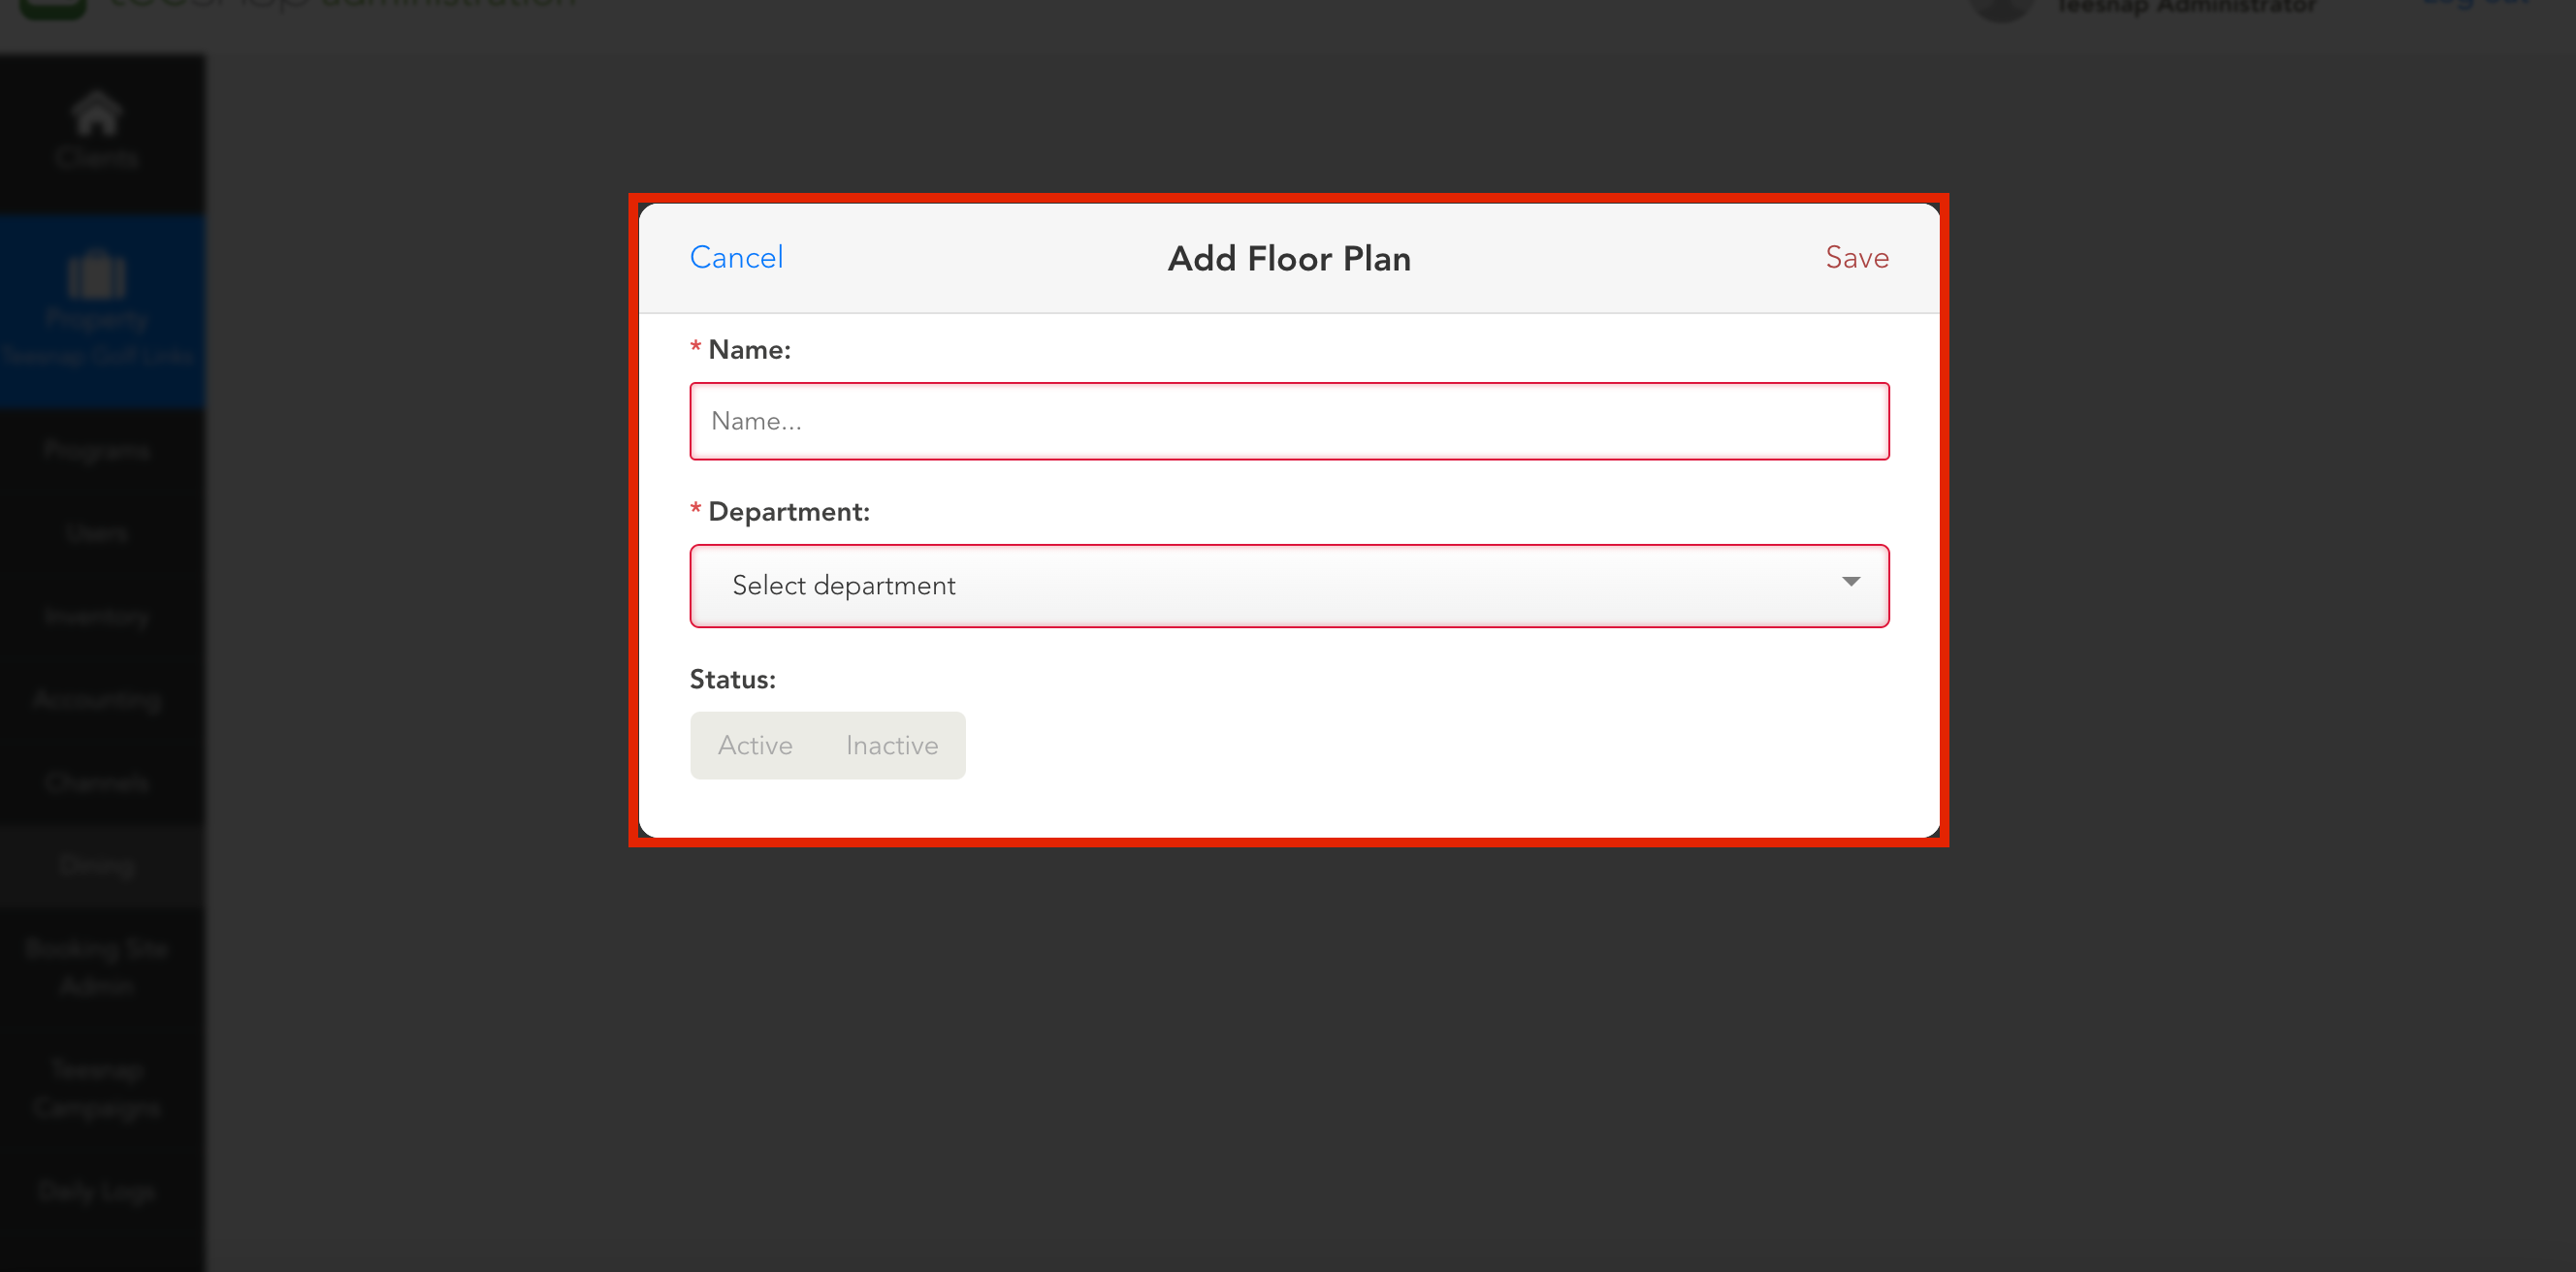
5. Once you've named the layout and selected a department, click on "Save" to create a dining layout.
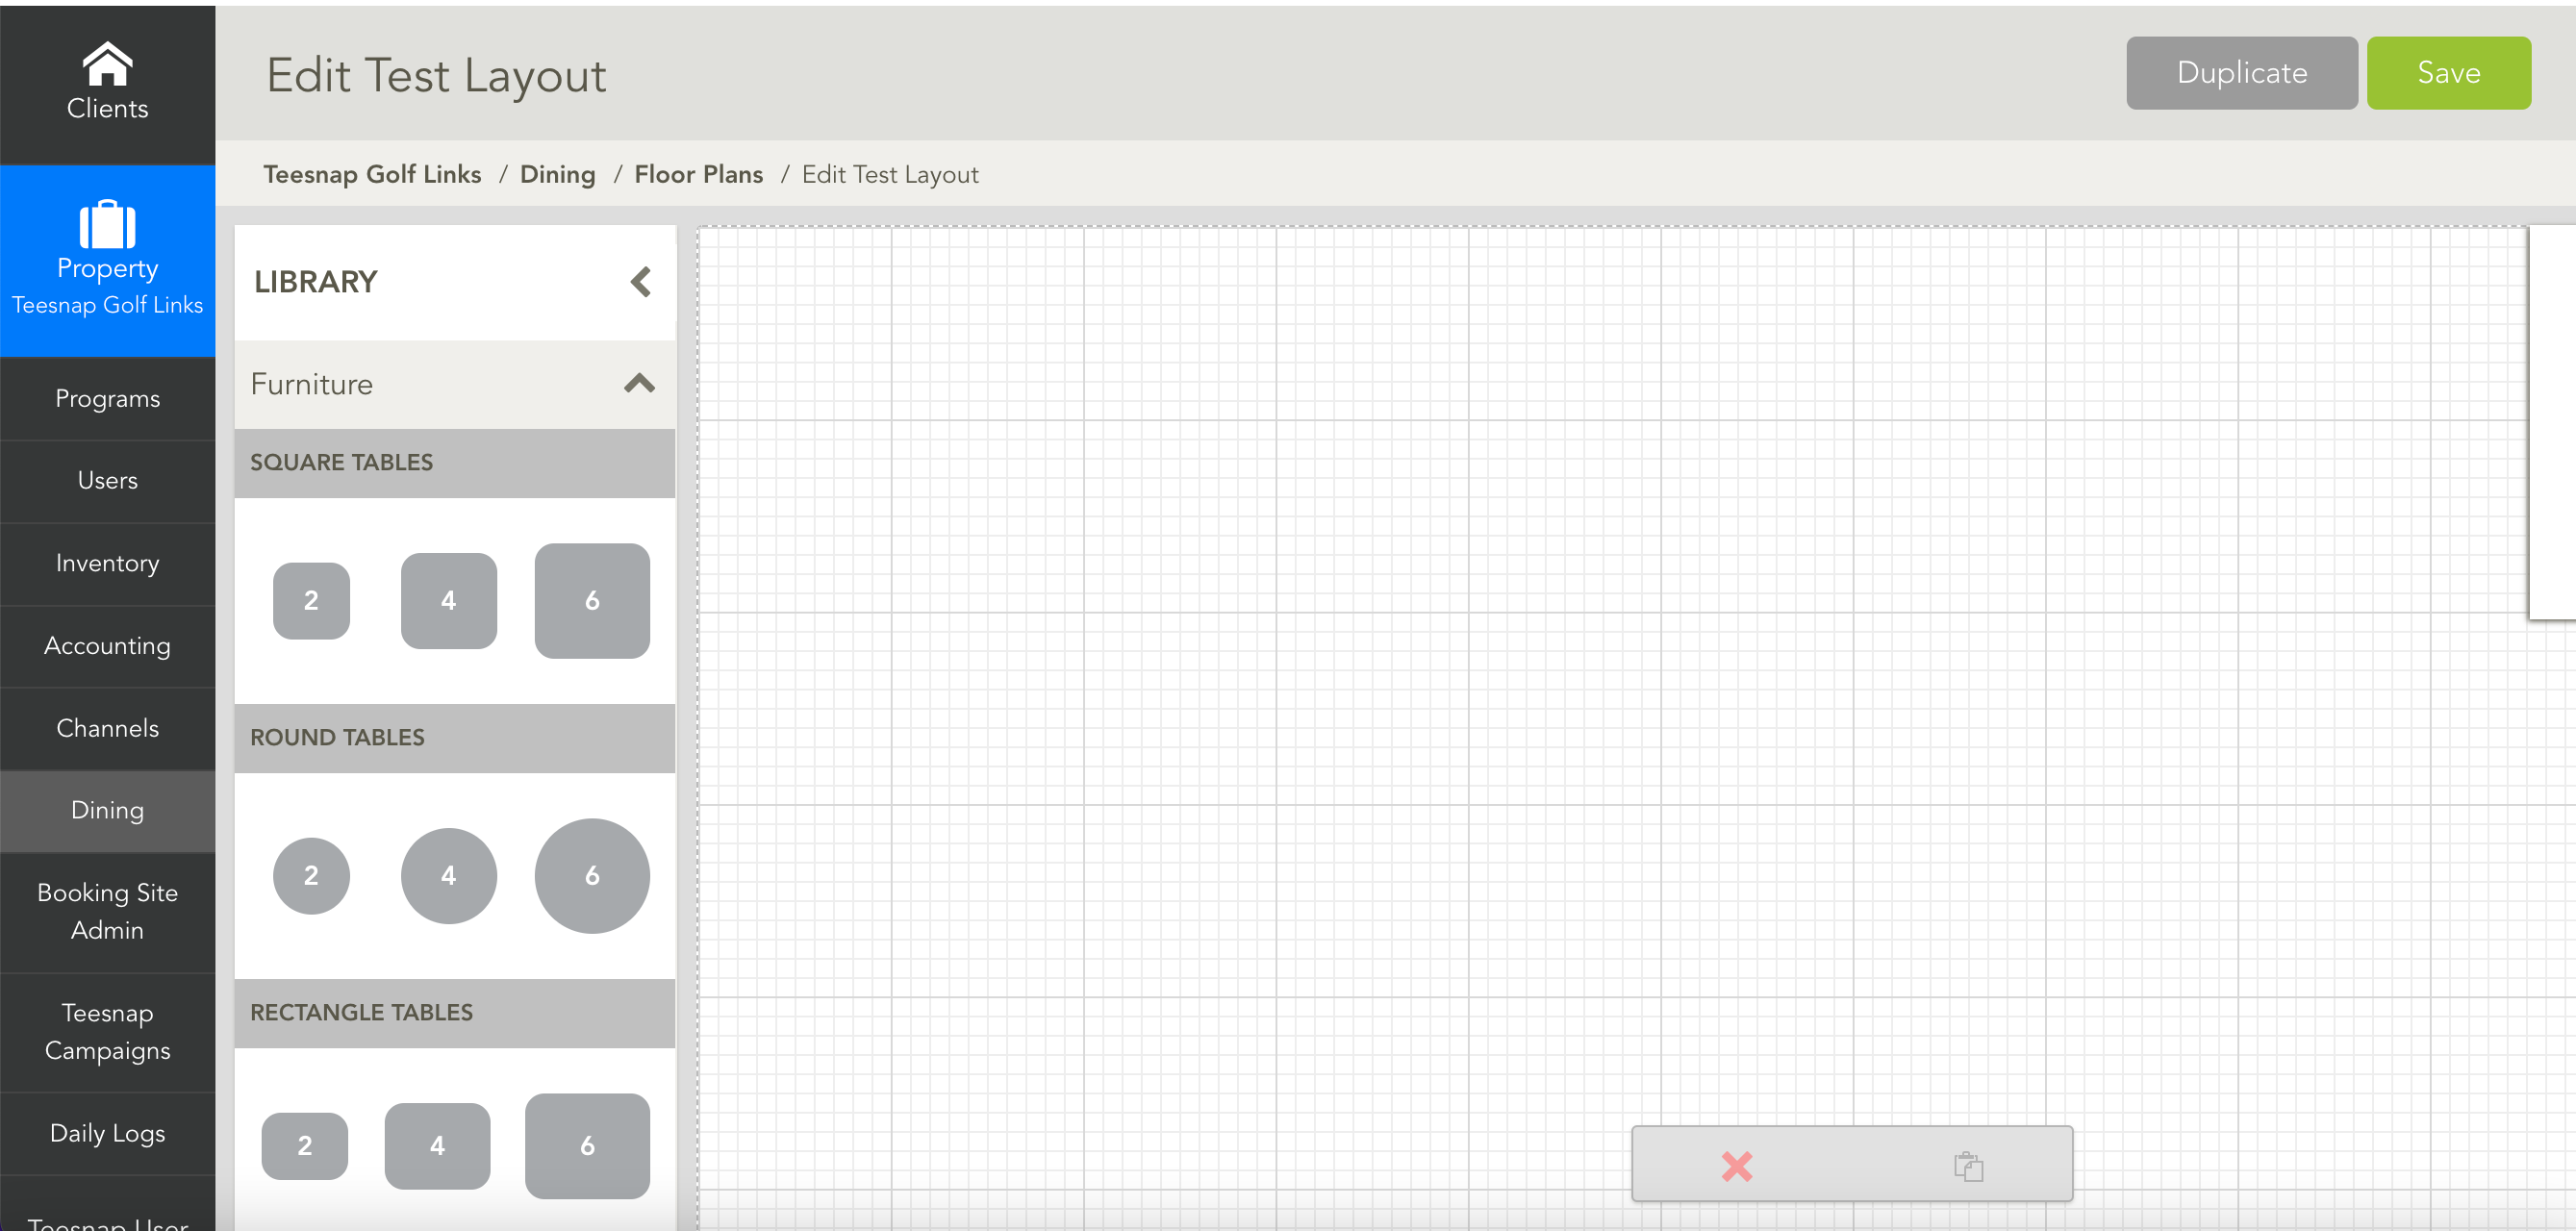
6. This is the dining layout page, where you can select tables and set the default number of covers for each table.
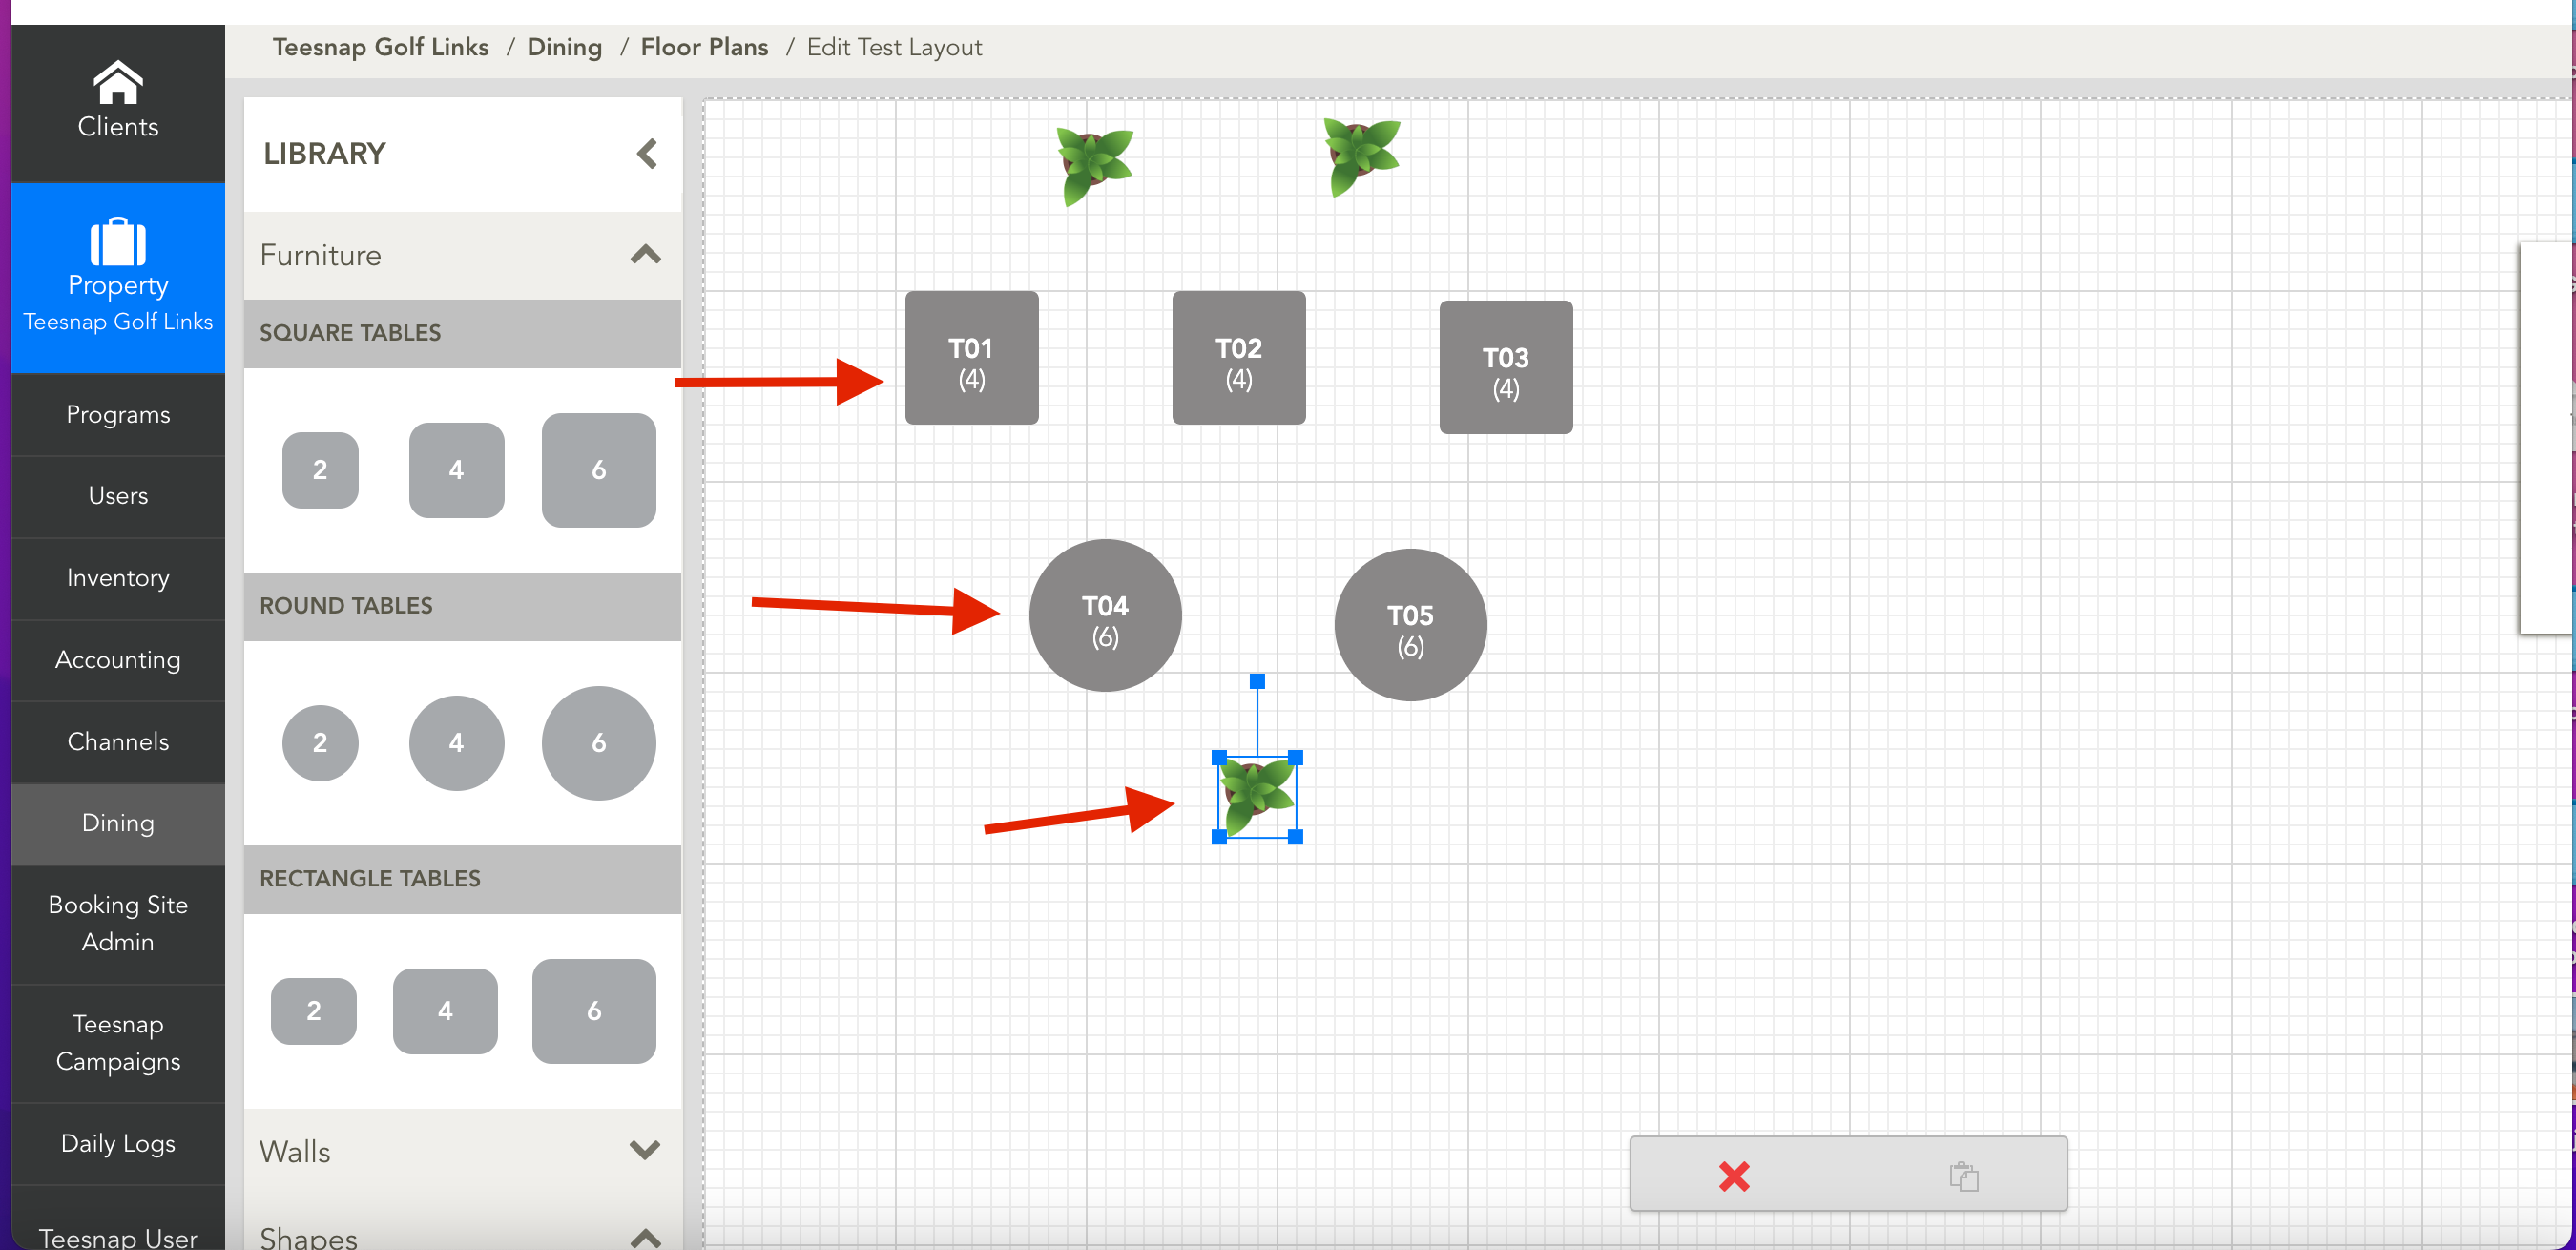
7. Select tables with the desired number of covers and add shrubs, walls, or other shapes to customize the floor plan.
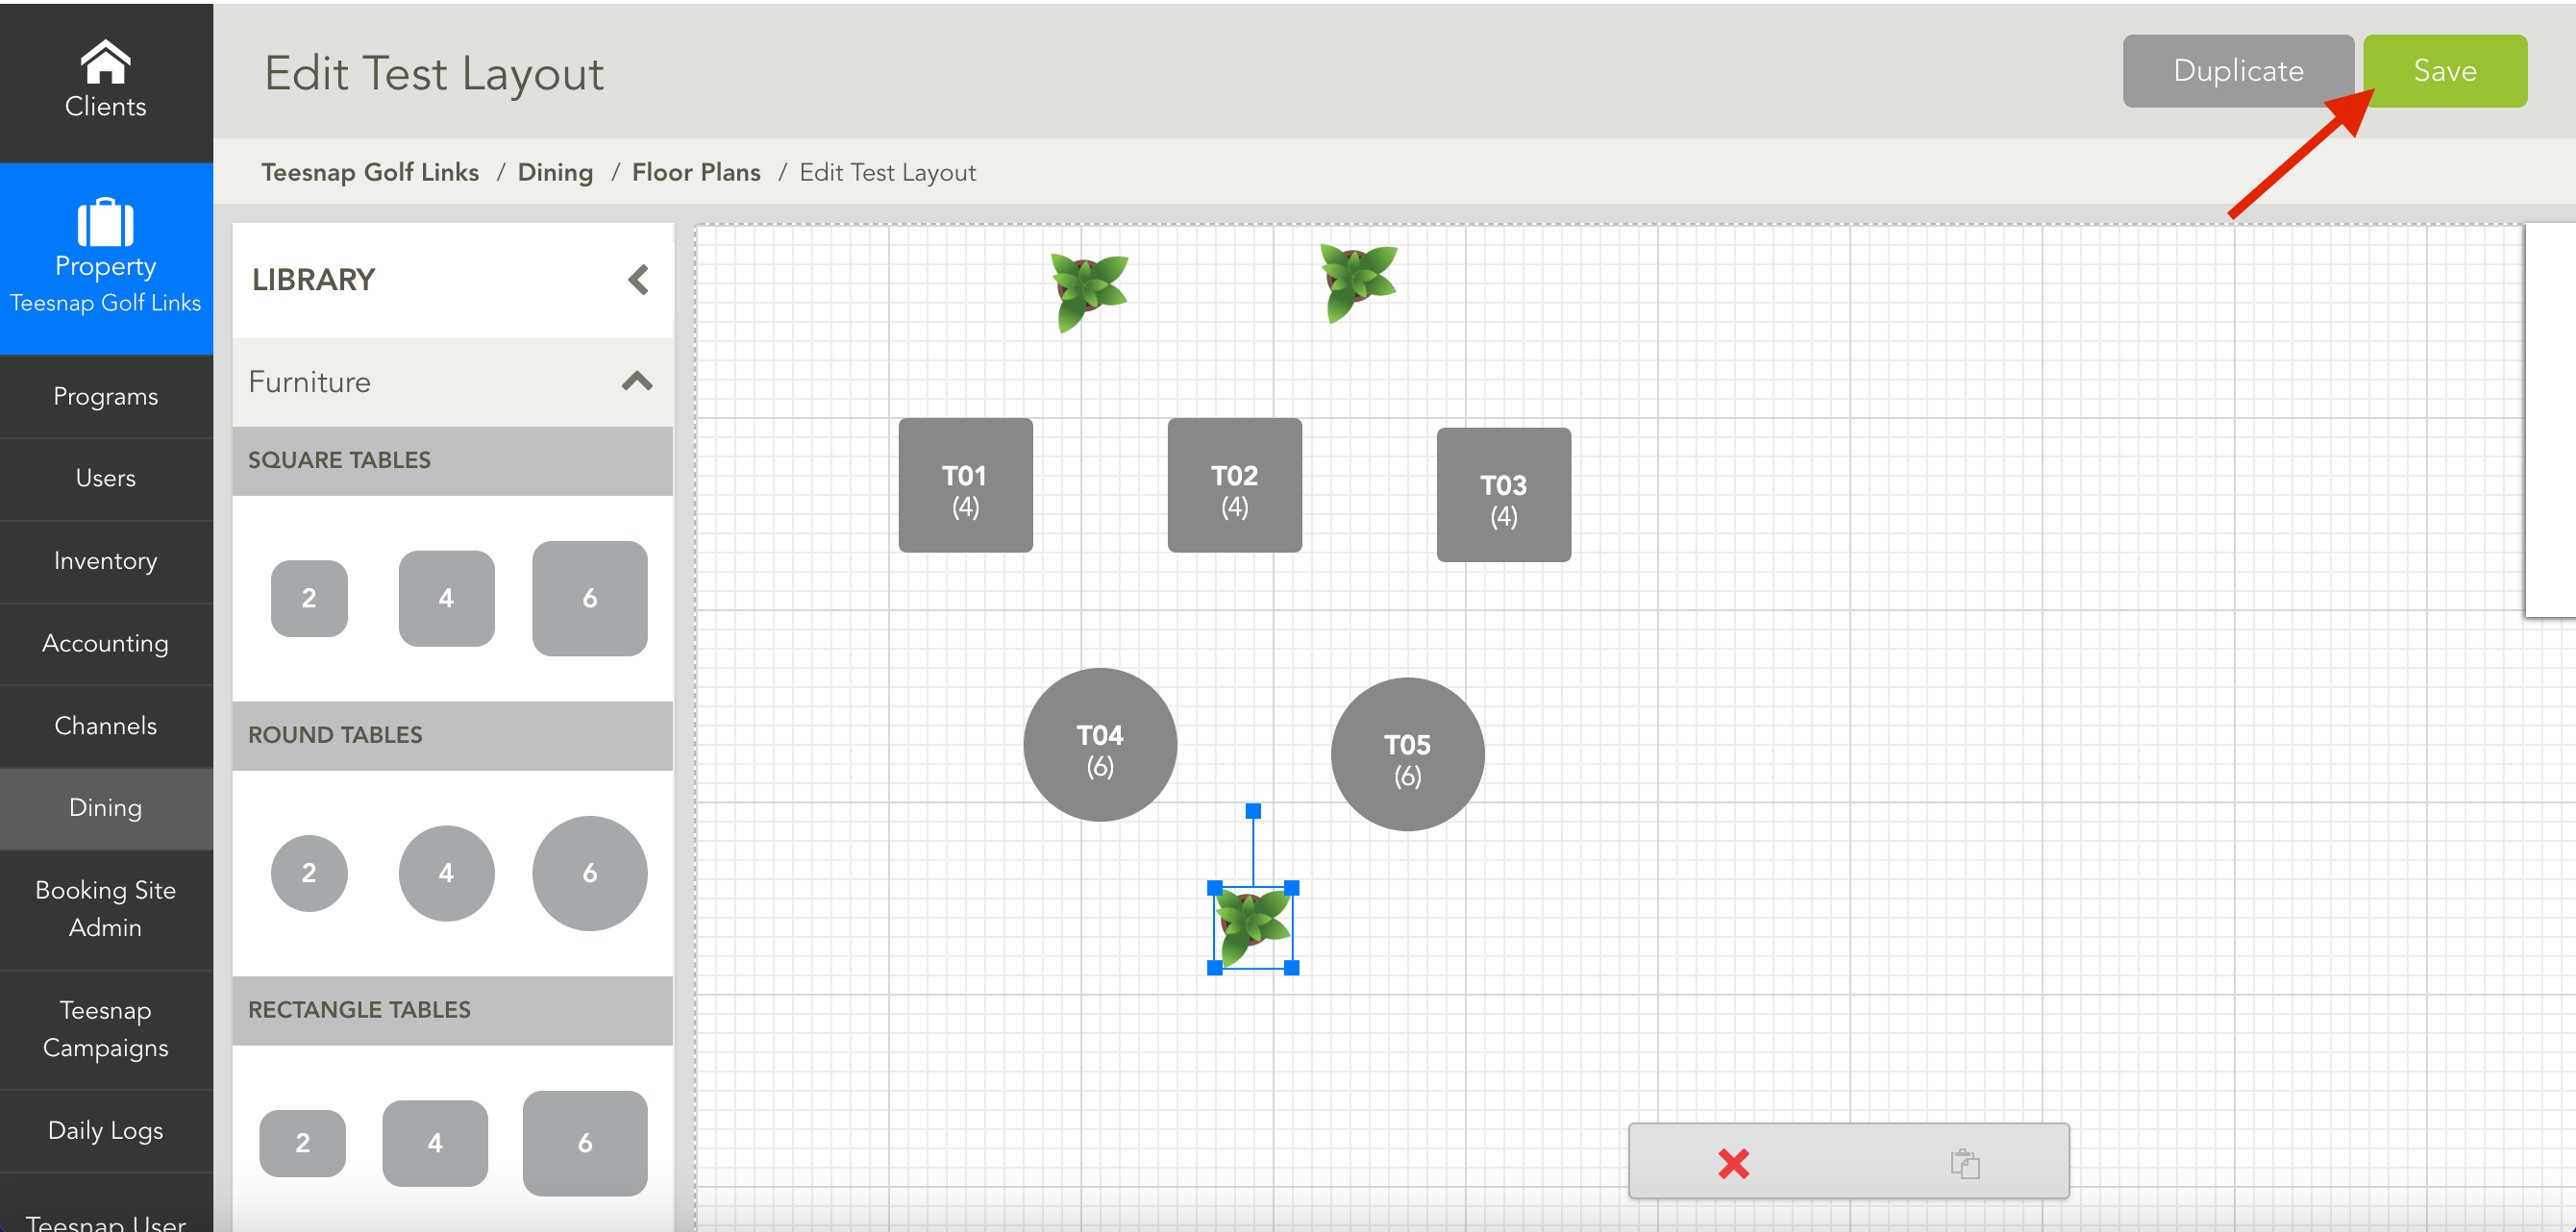
8. Once you’re satisfied with the floor plan, click Save to continue.
9. After you click Save, you’ll return to the Floor Plans page. In this example, the Test Layout floor plan is not yet active, which is indicated by the absence of a green circle next to its name. To activate the layout, click the pencil icon.
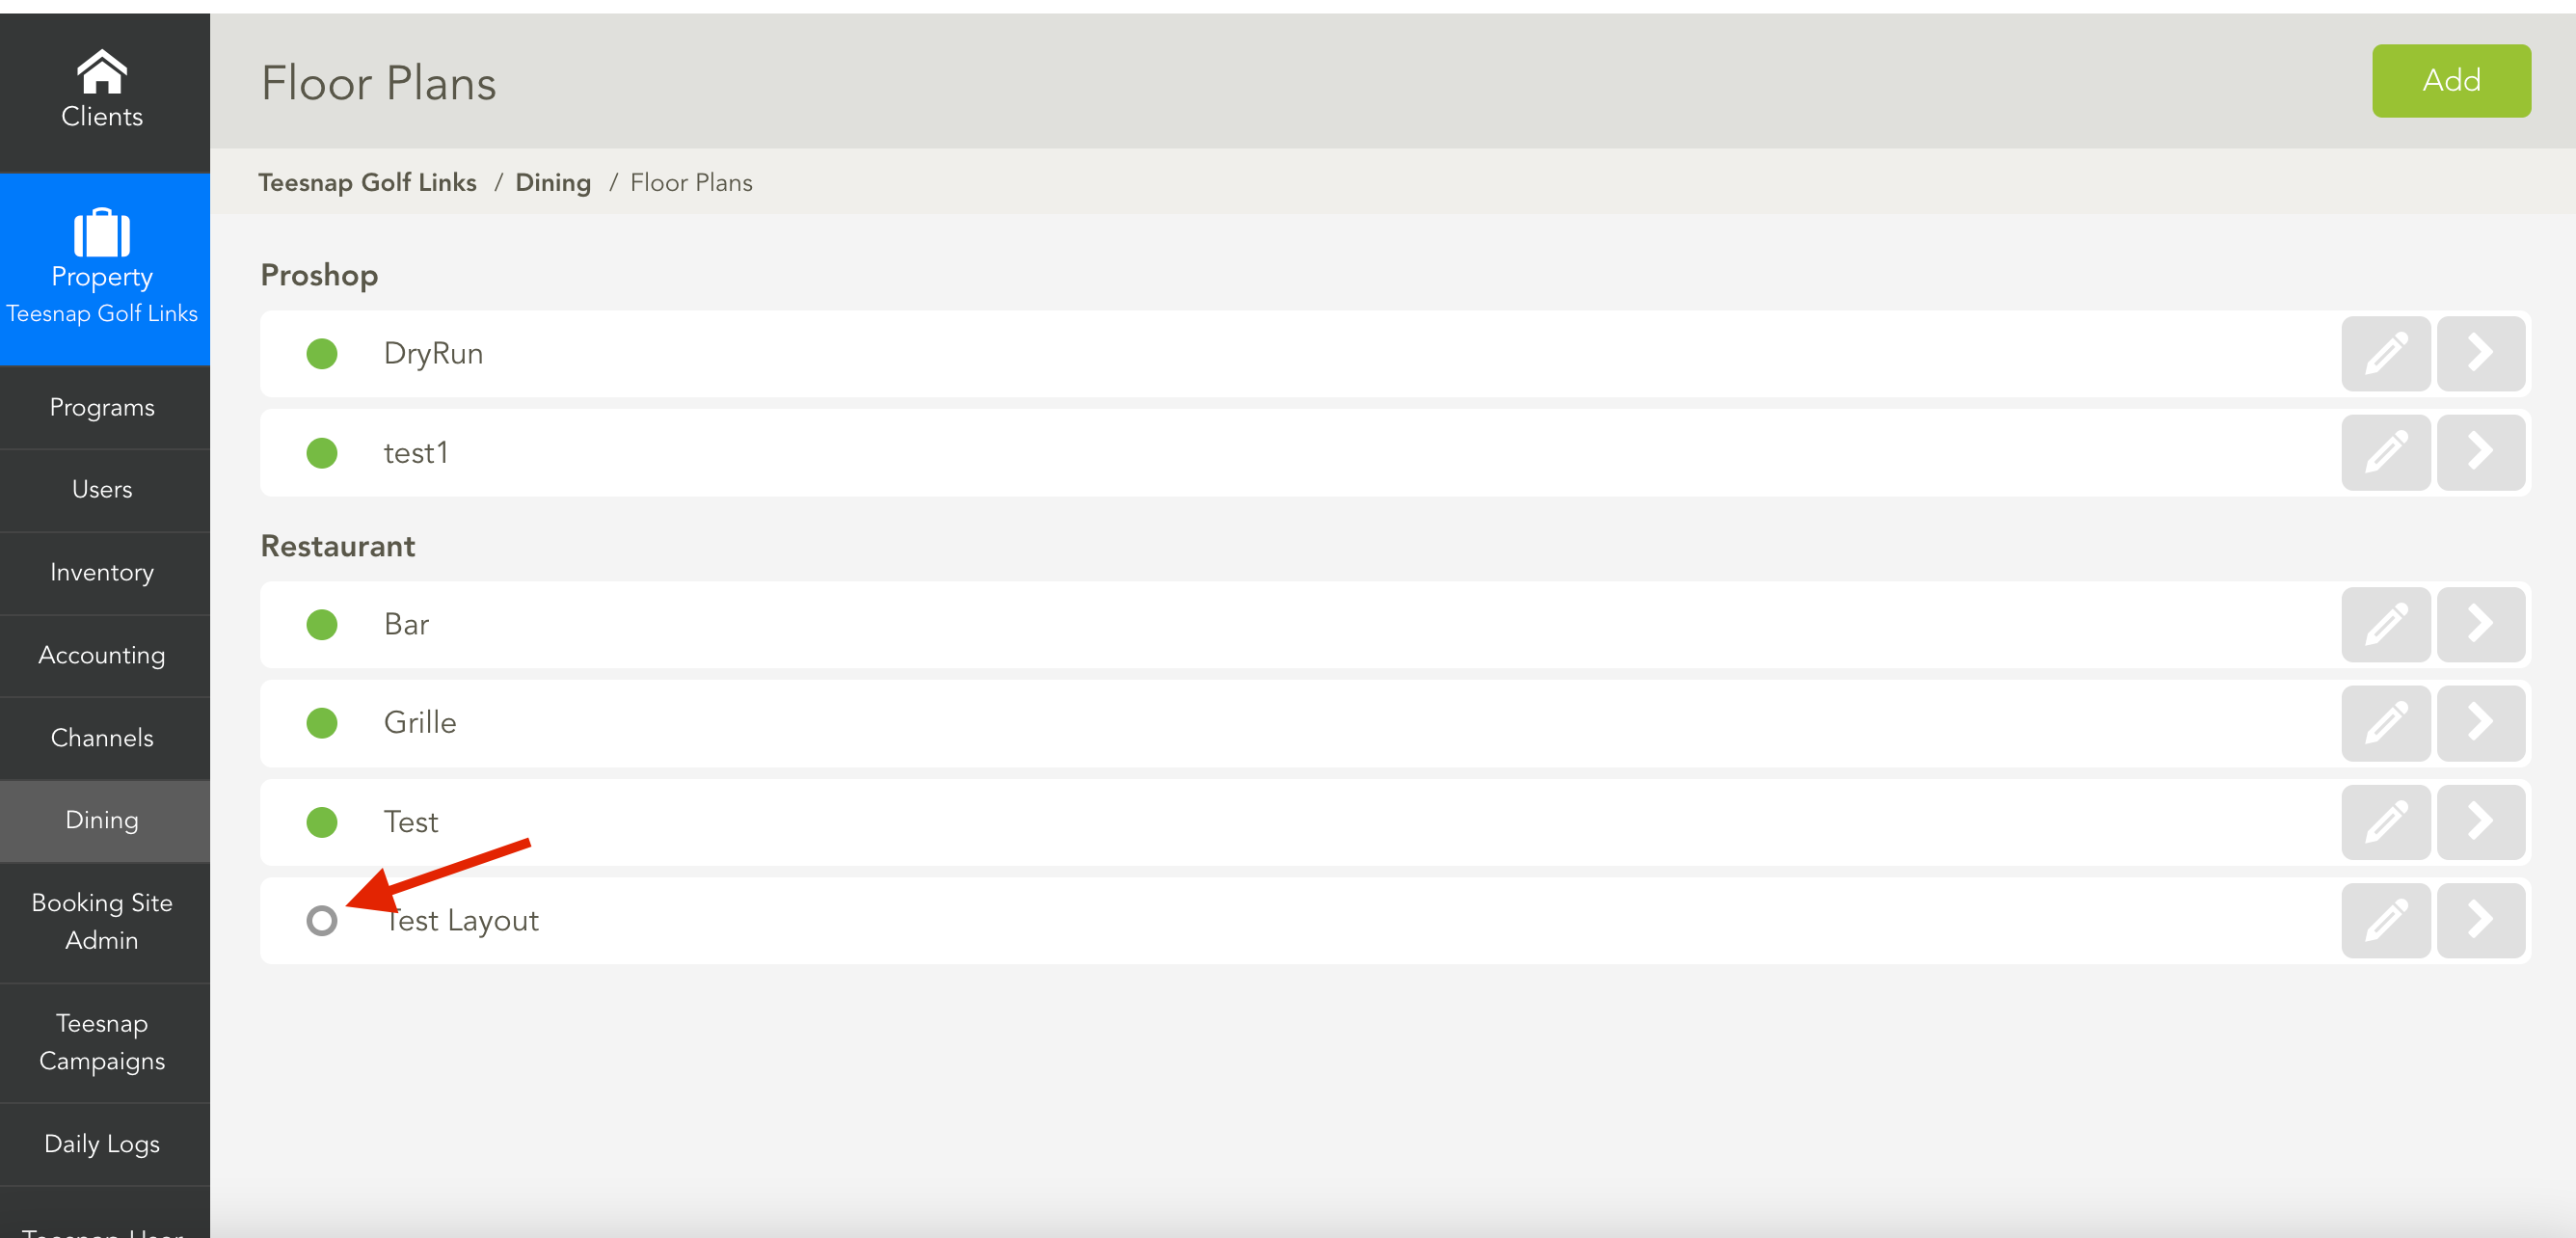
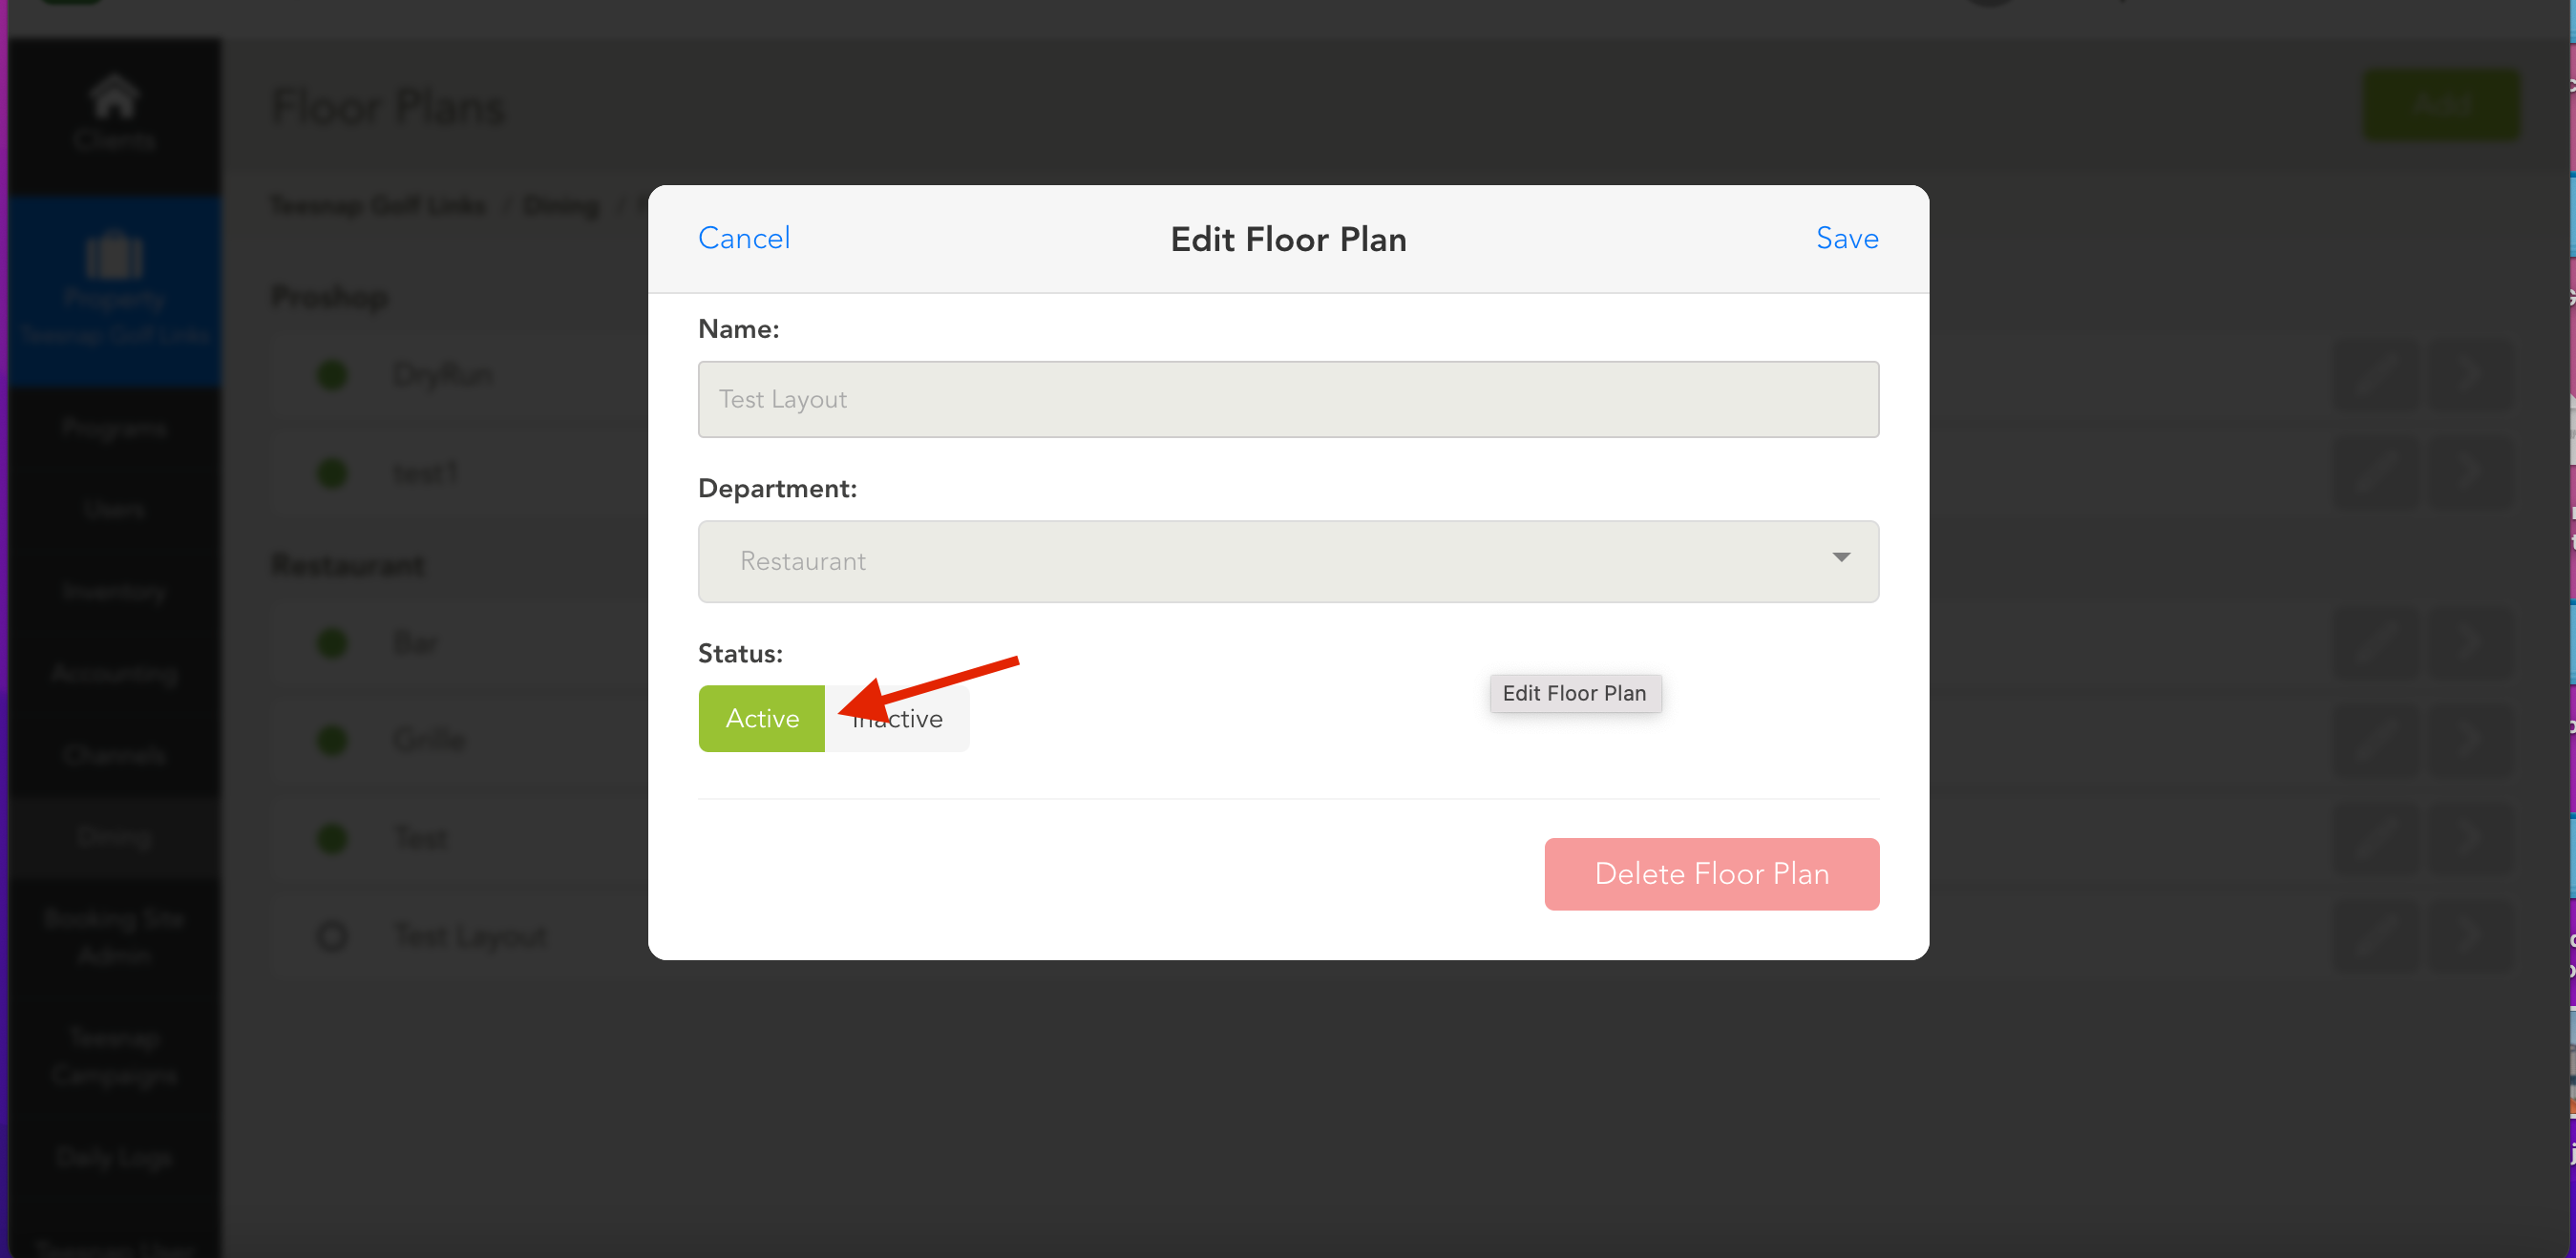
10. After clicking the pencil icon, set the floor plan status to Active, then click Save to activate it.
11. The floor plan is now active and will be available in the Dining tab on the iPad when you’re logged in to the correct department. 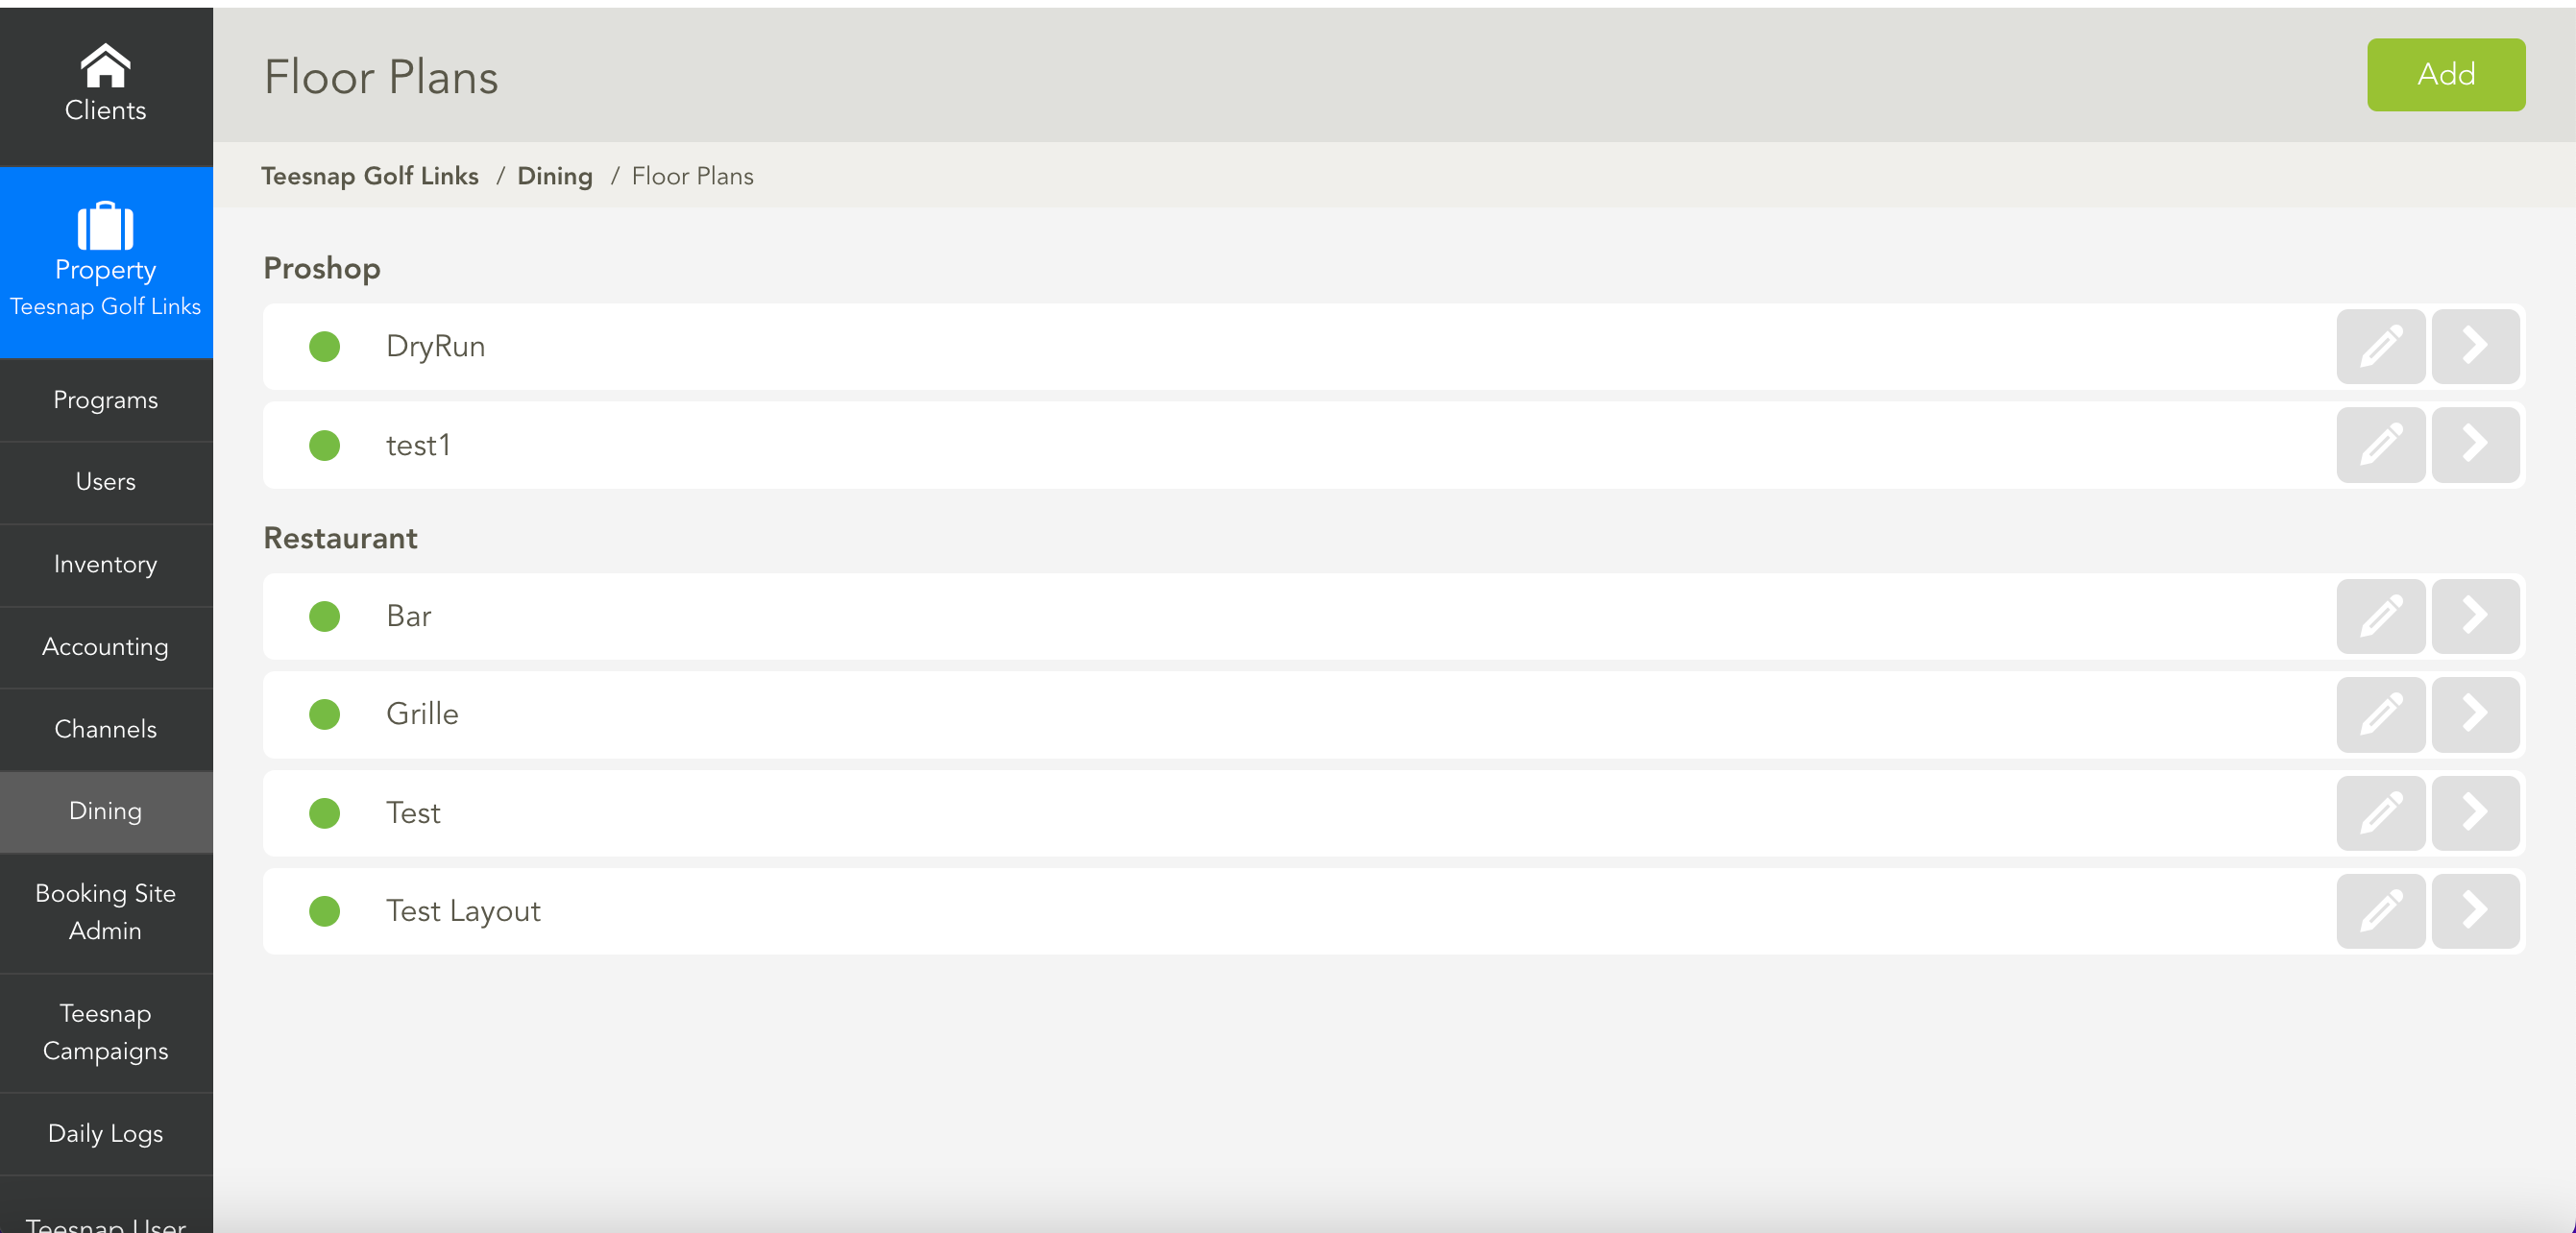
If you have any questions, please do not hesitate to reach out to Teesnap Support by emailing us at support@teesnap.com or calling 844-458-1032