.png?width=240&height=55&name=Untitled%20design%20(86).png)
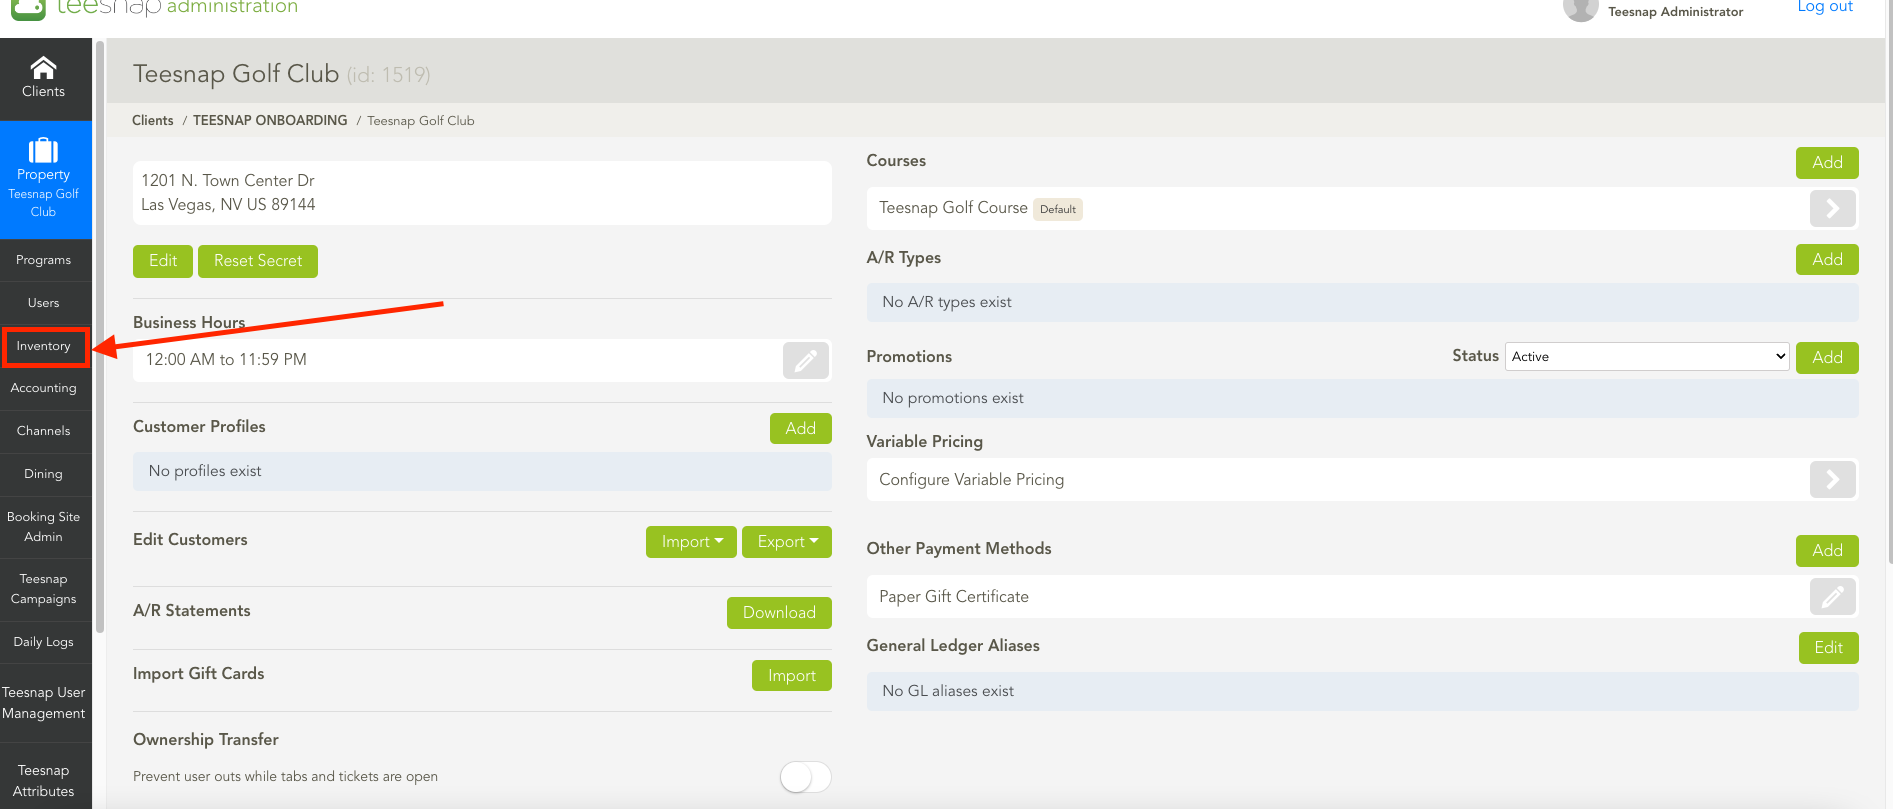
1. In the administration portal click on INVENTORY on the left side of the page.
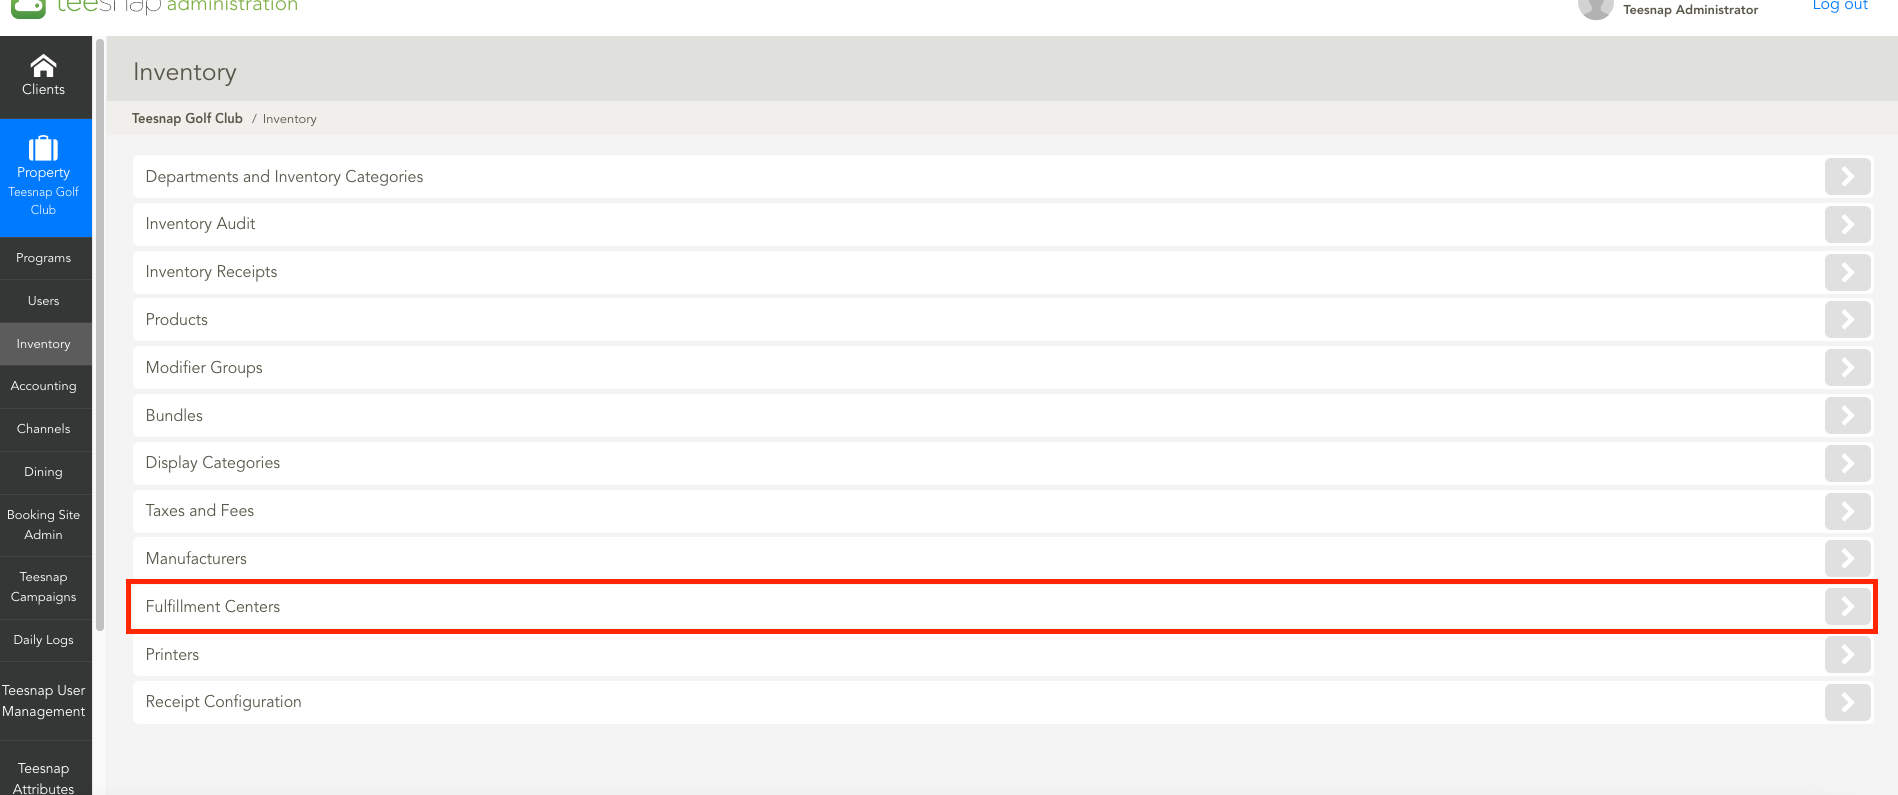
2. Select FULFILLMENT CENTERS in the inventory list highlighted in the red box.
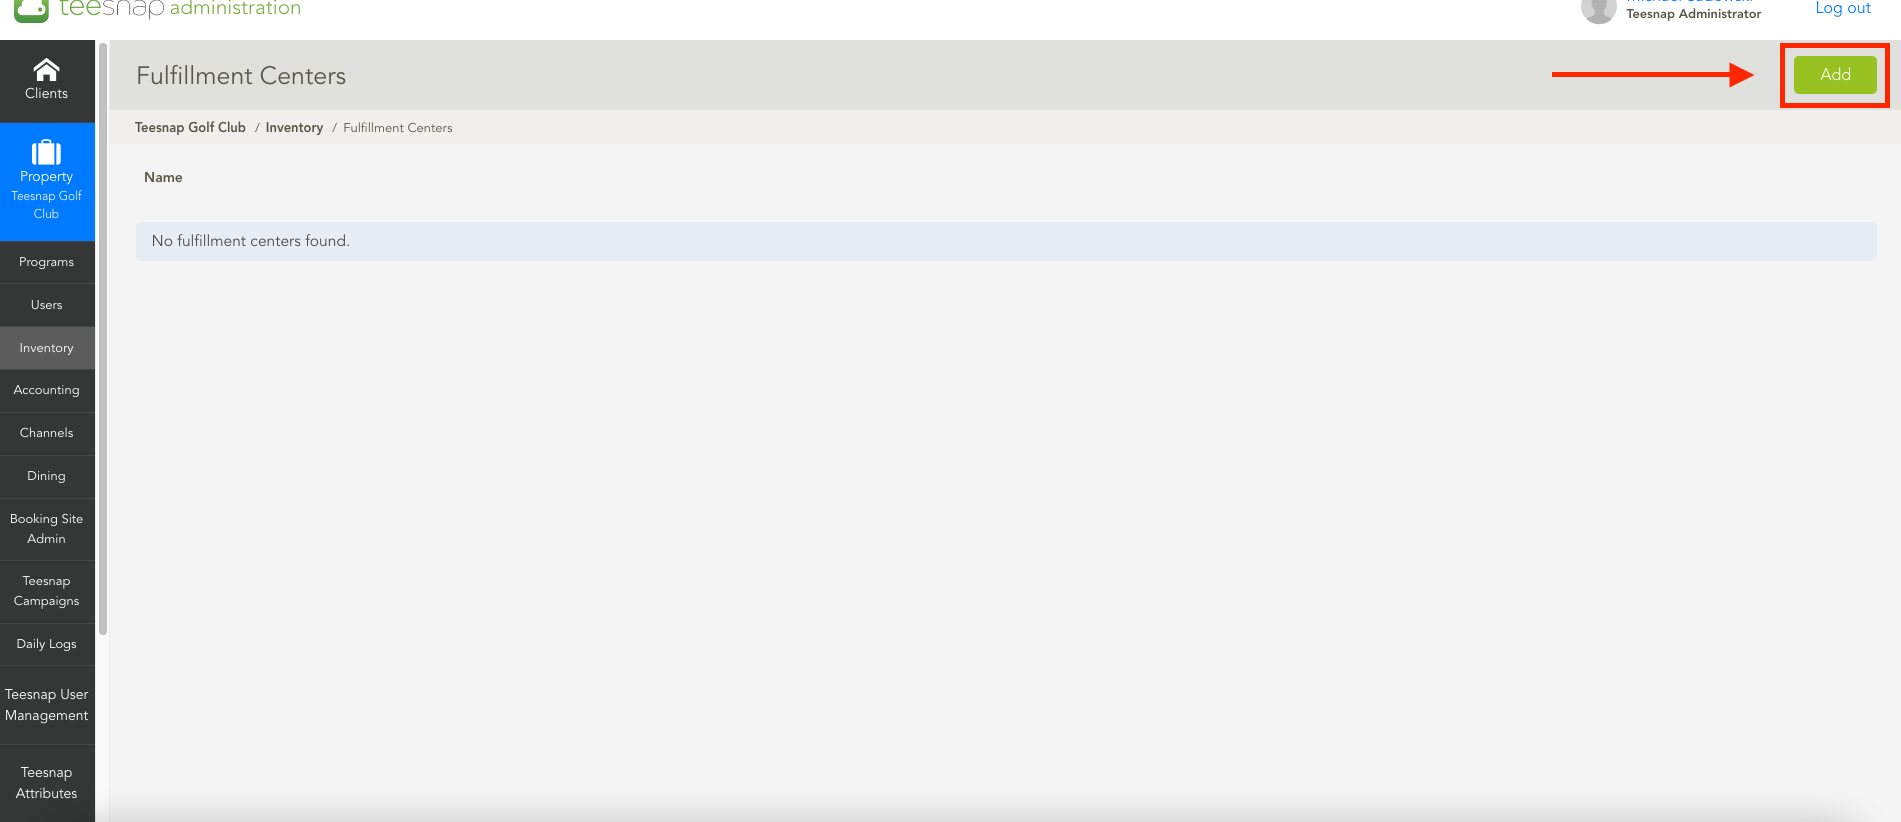
3. To ADD a fulfillment center click ADD on the top-right portion of the page.
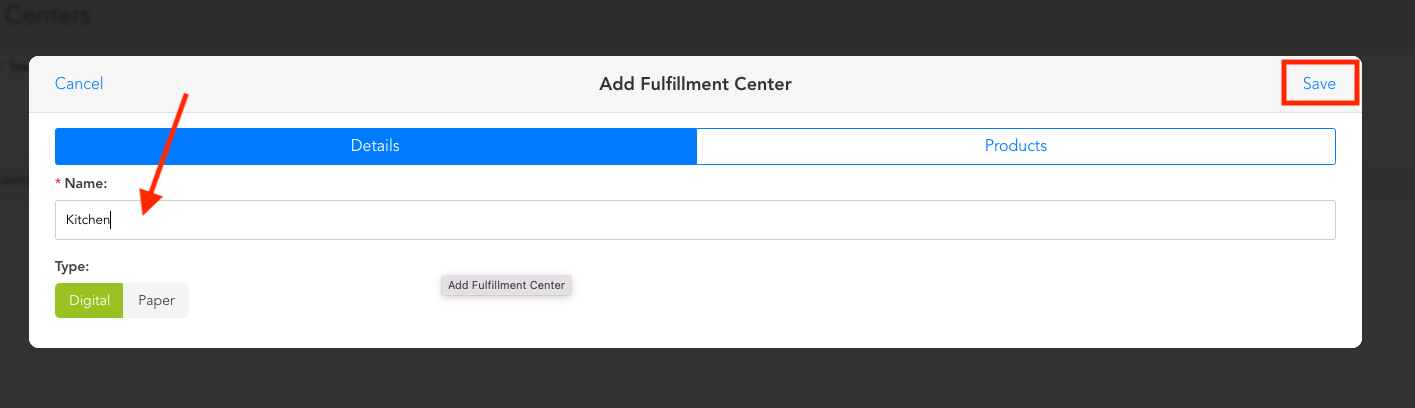
4. The "add fulfillment center" window will appear. Here is where you will add a name and designate whether digital/paper for receipt purposes. In our example, we used "kitchen", other commonly used center names include bar, hot side, cold side, etc. This is simply where your food/drink item will be prepared. If you have existing f&b products in the system you can click on the products tab here and search and add them to your center. Be sure to click SAVE before proceeding.
5. After clicking save you will return to the fulfillment center window where you can see the fulfillment centers you added. You can also edit them here by clicking the grey pencil icon on the right side of the tab.

If you have any questions, please do not hesitate to reach out to Teesnap Support by emailing us at support@teesnap.com or calling 844-458-1032