.png?width=240&height=55&name=Untitled%20design%20(86).png)
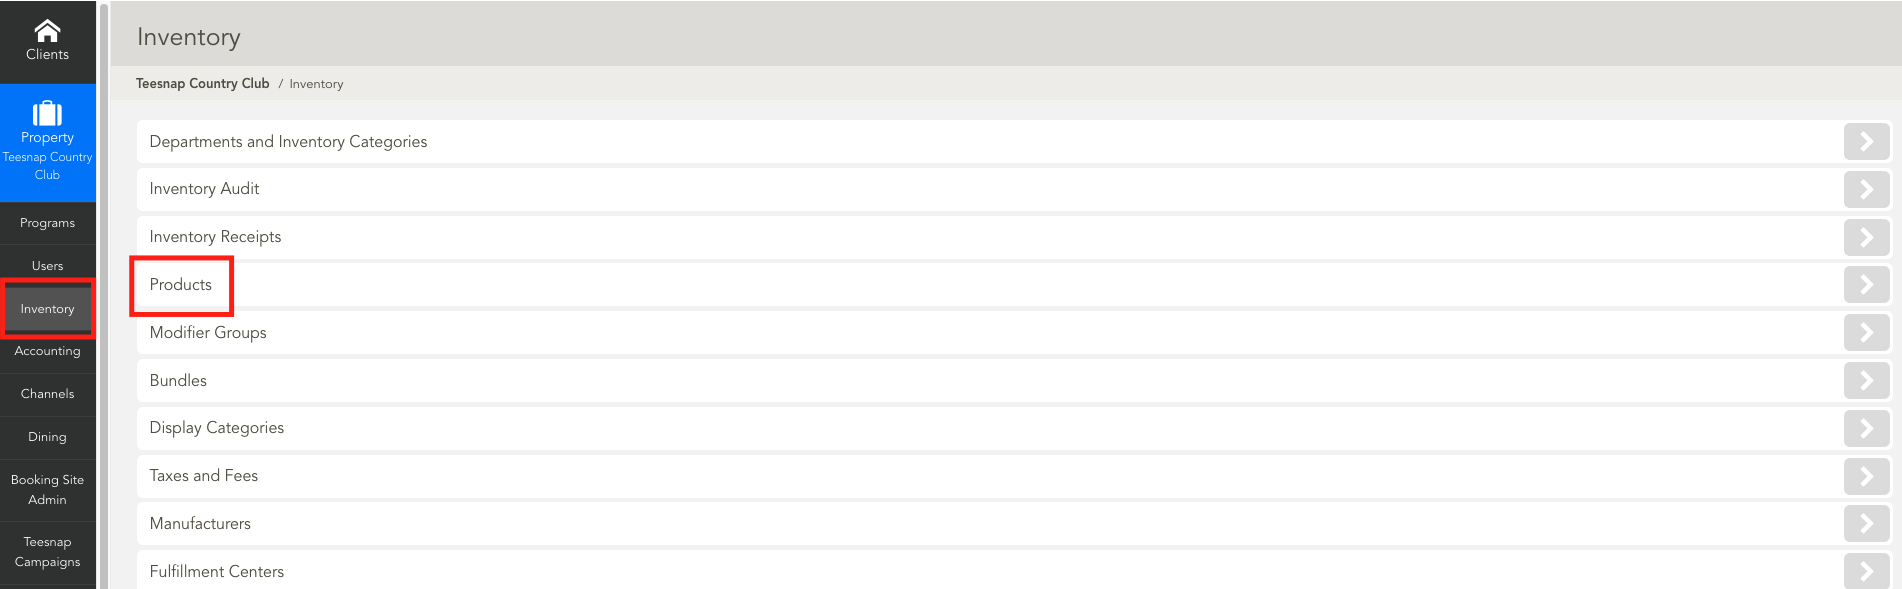
1. In the administration portal start by clicking on INVENTORY and then PRODUCTS.
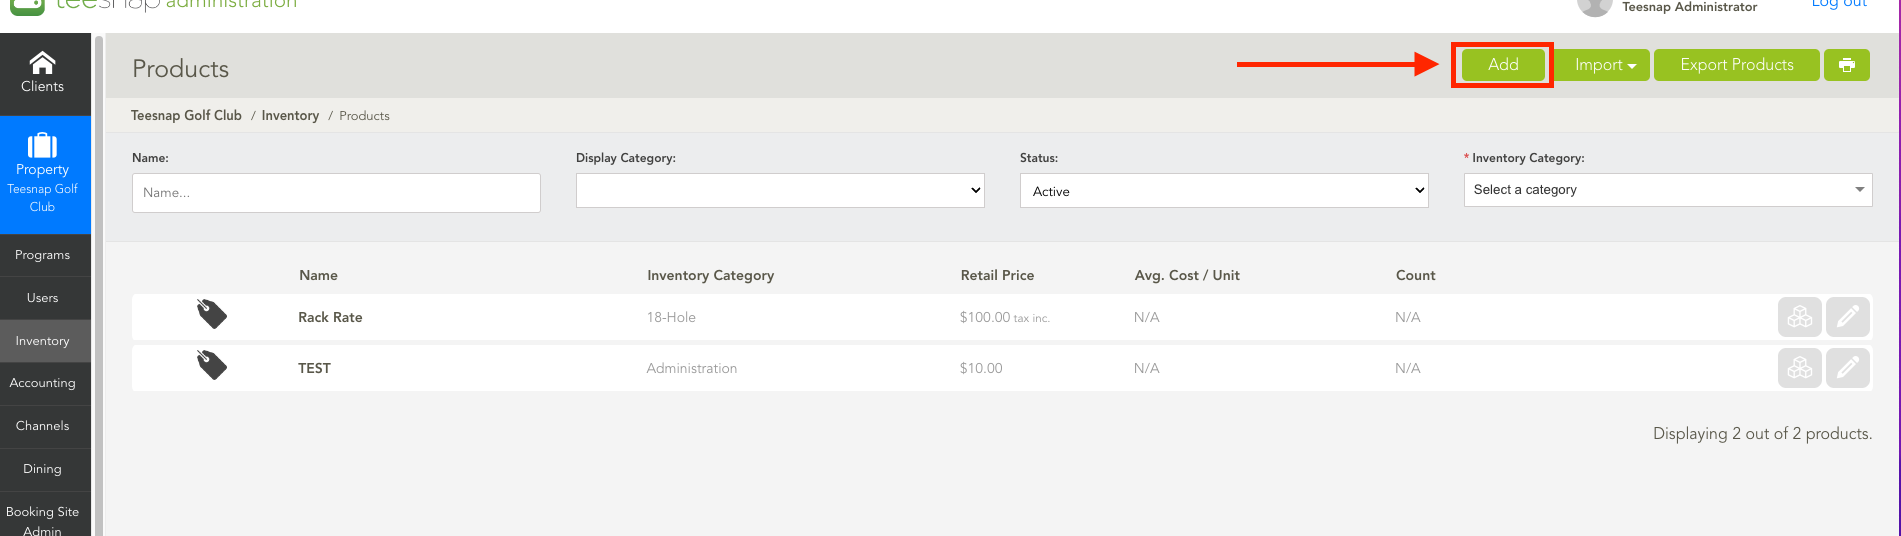
3. To add a new product click ADD on the upper right-hand side of the page.
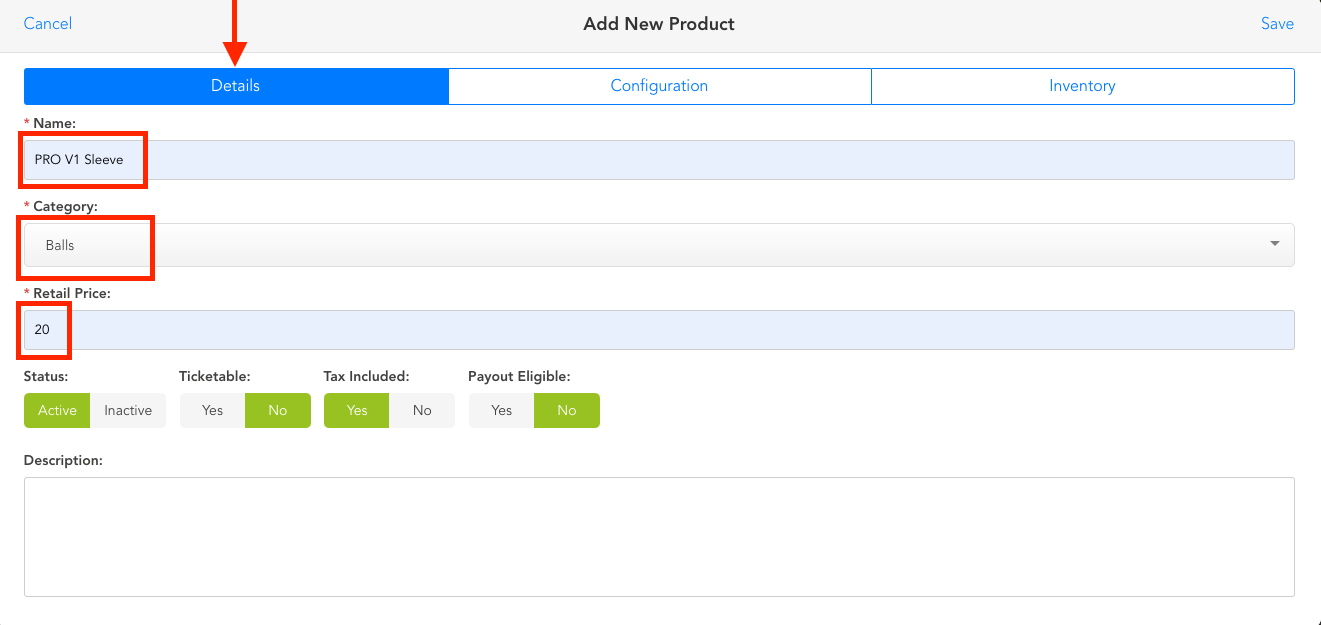
4. The add new product window will appear - start in the details column. Enter a product name, category, and retail price. You will also have options at the bottom to make the product active/inactive, ticketable (f&b), tax-inclusive, and payout eligible. You will then click CONFIGURATION next to details.
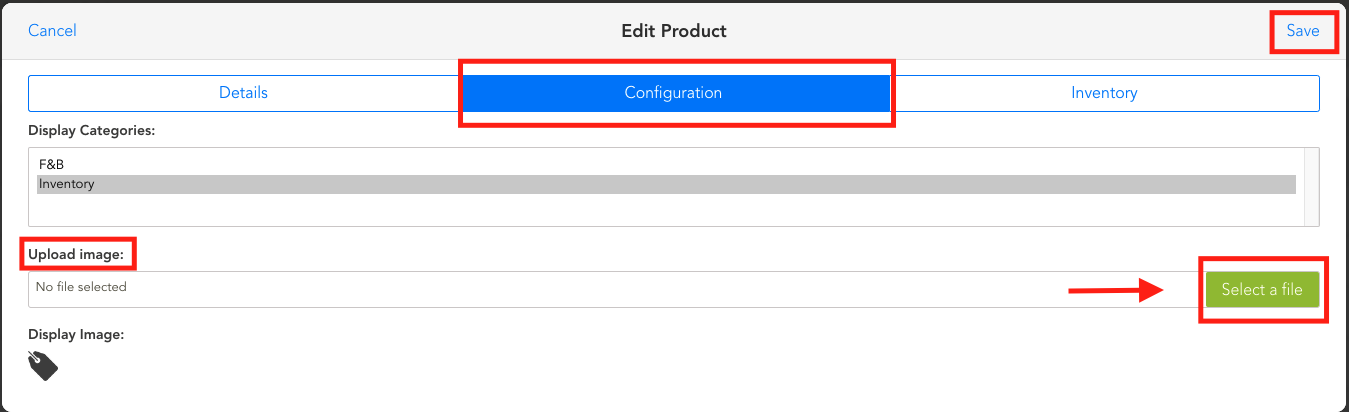
5. The configuration options will appear with the ability to choose a display category and upload a product image. Select a category to display the product on the iPad and click the INVENTORY tab to continue.
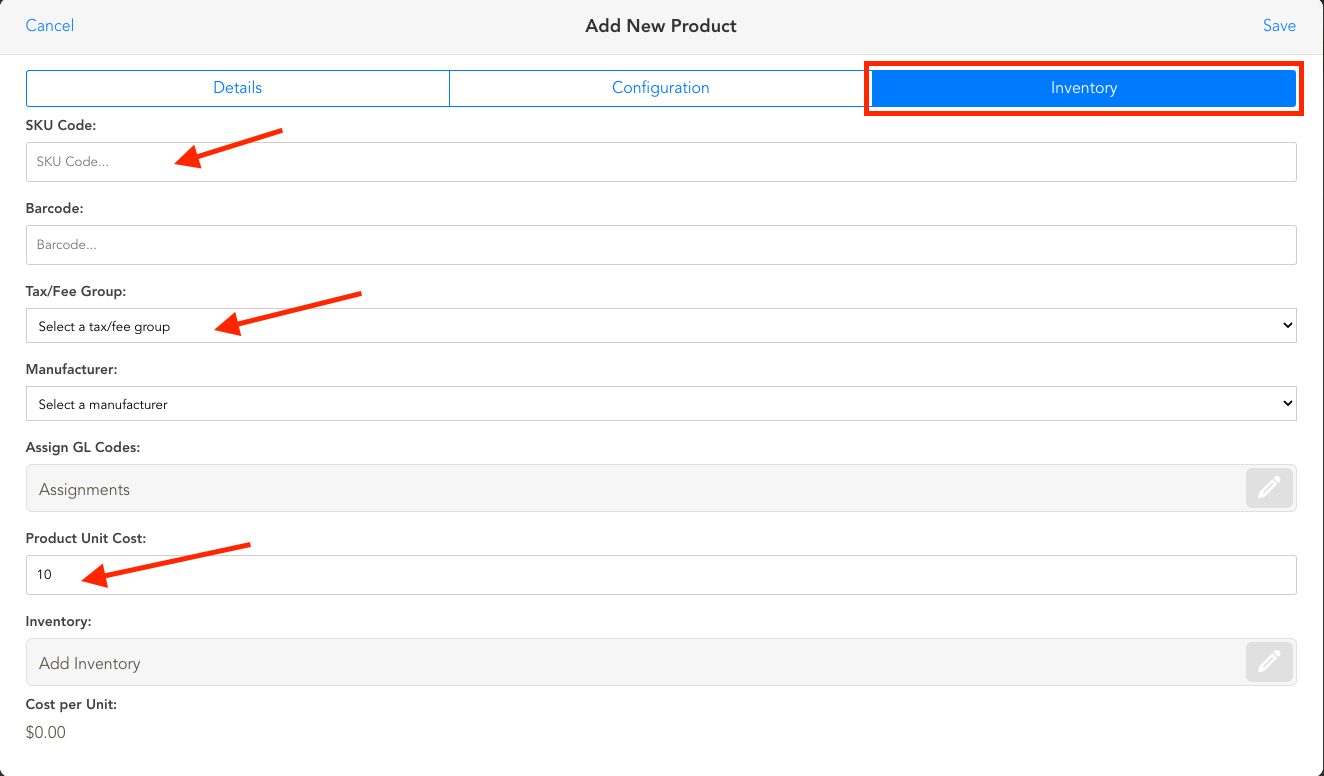
6. Here you can enter SKU codes (optional), select your tax/fee group (necessary to add tax to a product), manufacturer, and unit costs. Be sure to click SAVE before proceeding.
7. You will return to the products page where you can see the product added to the list. Repeat these steps to add more products to your inventory.
If you have any questions, please do not hesitate to reach out to Teesnap Support by emailing us at support@teesnap.com or calling 844-458-1032