.png?width=240&height=55&name=Untitled%20design%20(86).png)
1. In the administration portal click on INVENTORY on the left-hand side of the page.

2. Select "departments and inventory categories" at the top of the list to add a department.
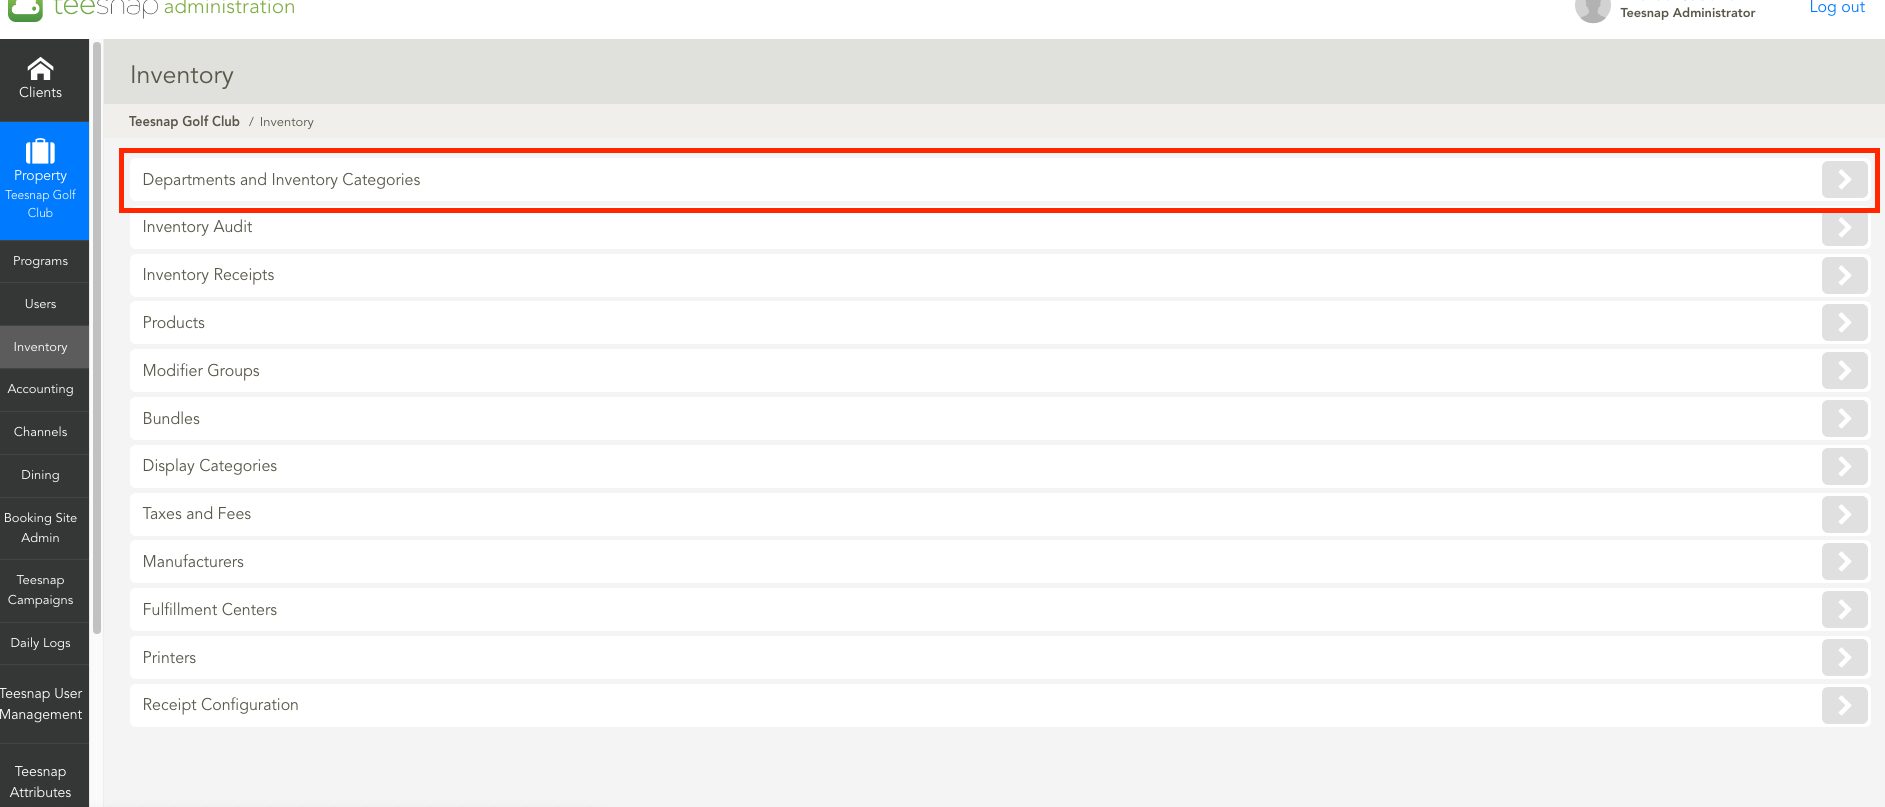
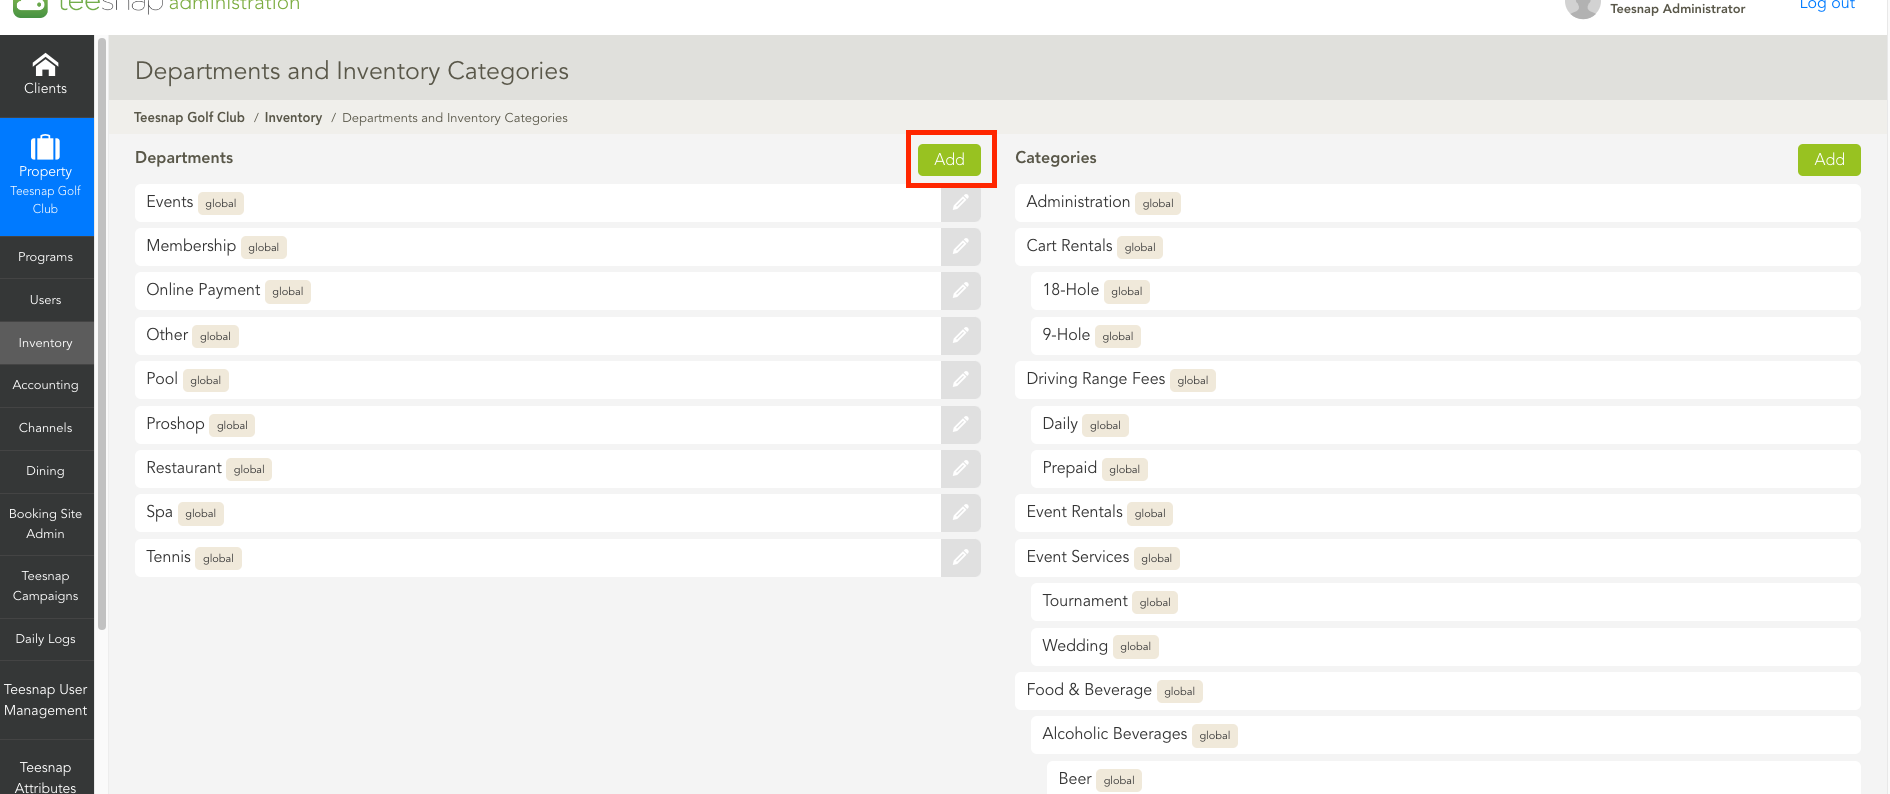
3. Here you will see the system default departments labeled "global". You can click on the grey pencil on any of these to toggle on/off visibility on the iPad. To add a new department click ADD in the red square.
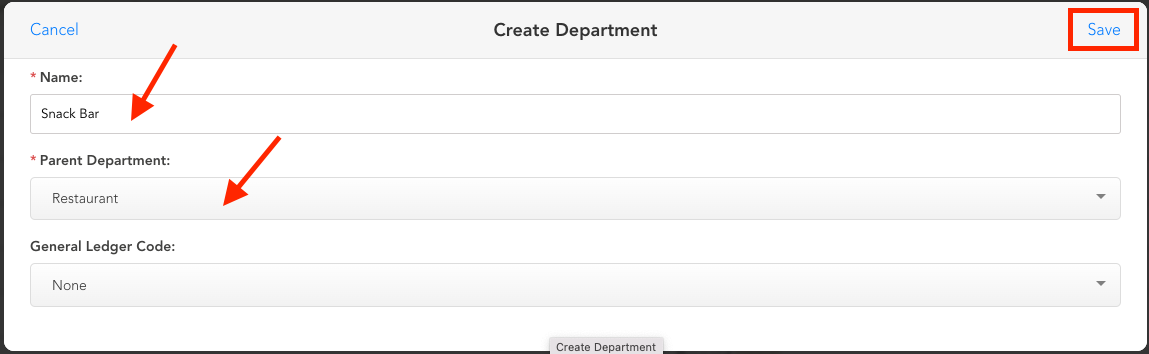
4. The Create Department window will appear. In our case, we are going to add a "snack bar" under the restaurant parent department. This will allow us to track sales specific to the snack bar on the reporting end. Click SAVE in the upper right before proceeding.
5. You will return to the departments and inventory categories page where you can see your department added underneath the applicable parent department. 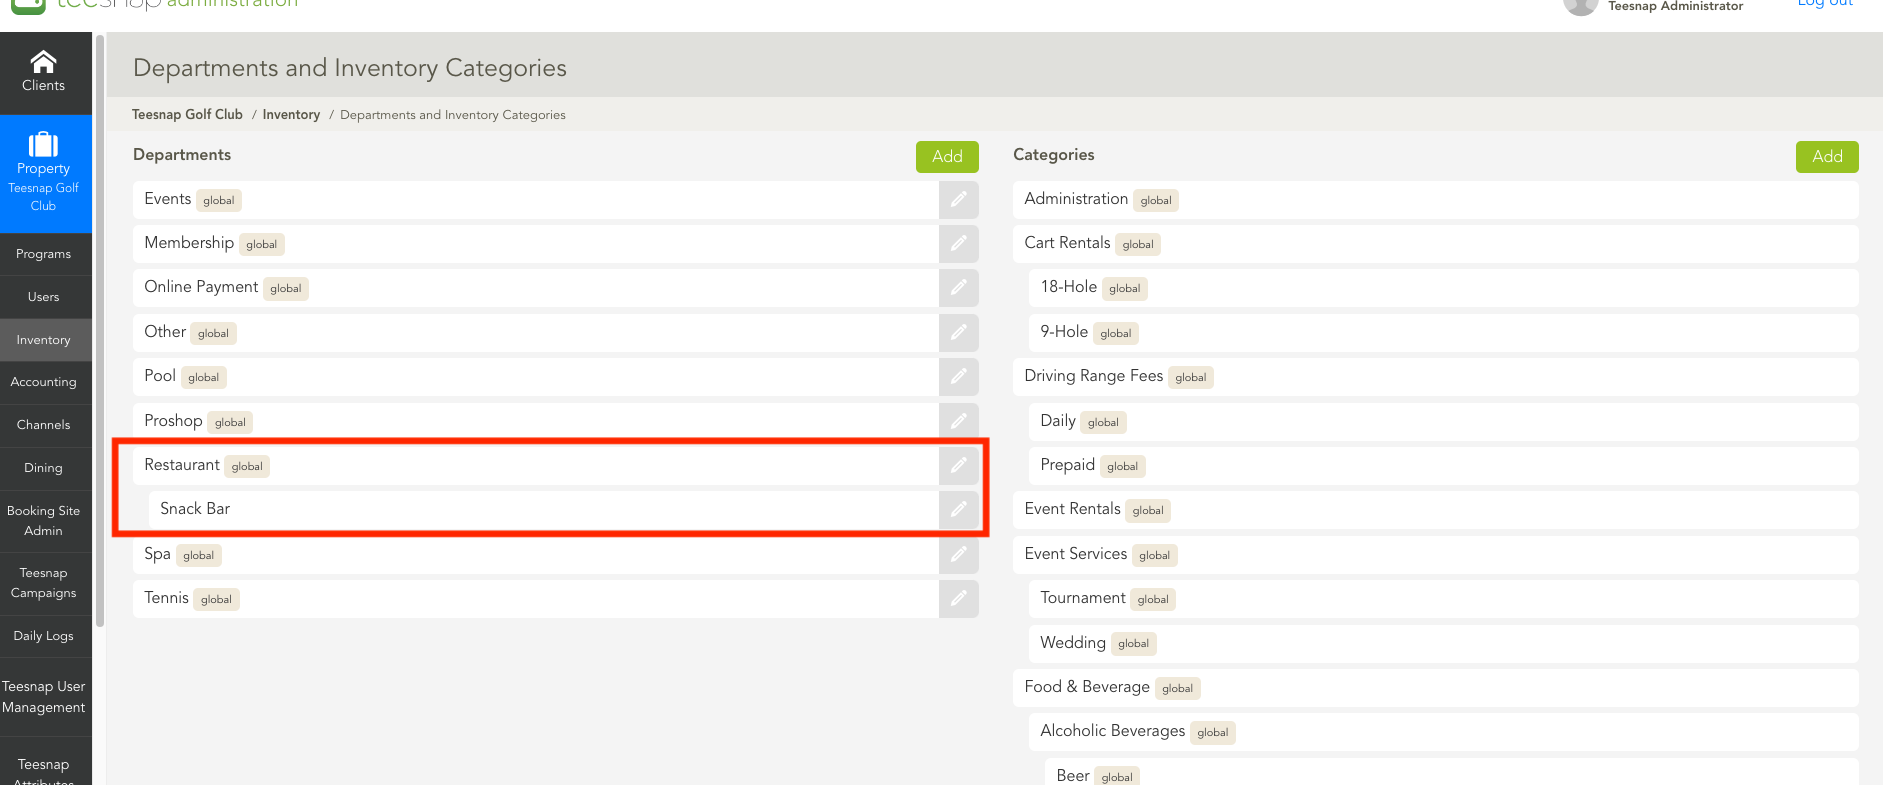
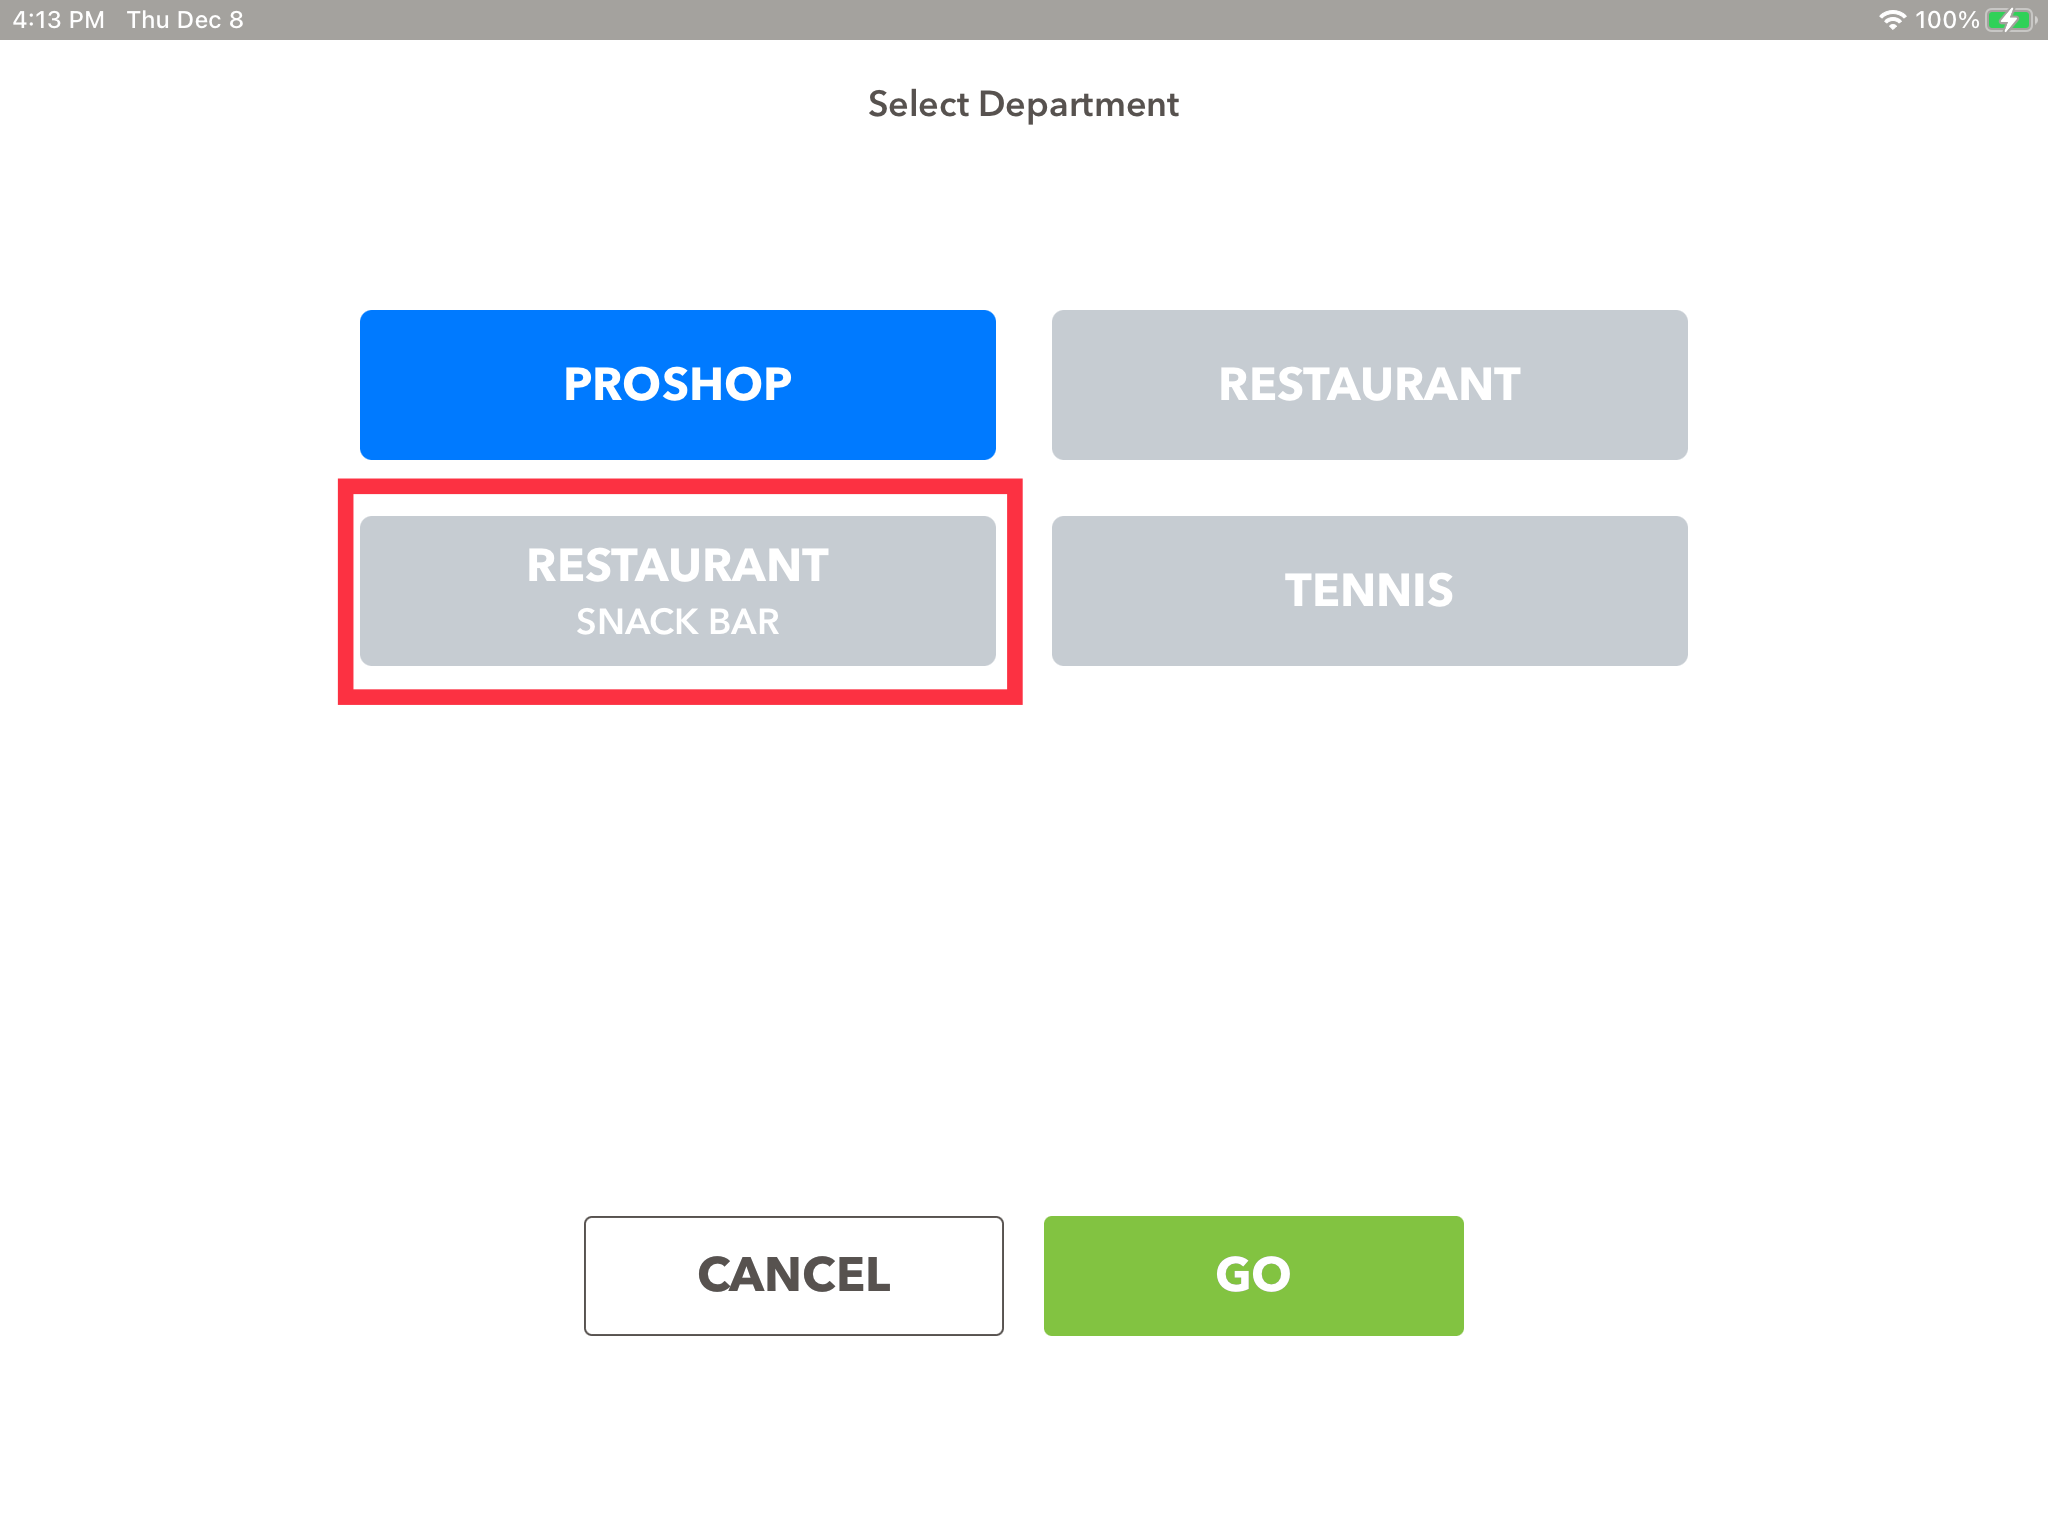
6. To view your newly added department return to the iPad where you will see the snack bar option available. Repeat these steps to add other departments.
If you have any questions, please do not hesitate to reach out to Teesnap Support by emailing us at support@teesnap.com or calling 844-458-1032.