.png?width=240&height=55&name=Untitled%20design%20(86).png)
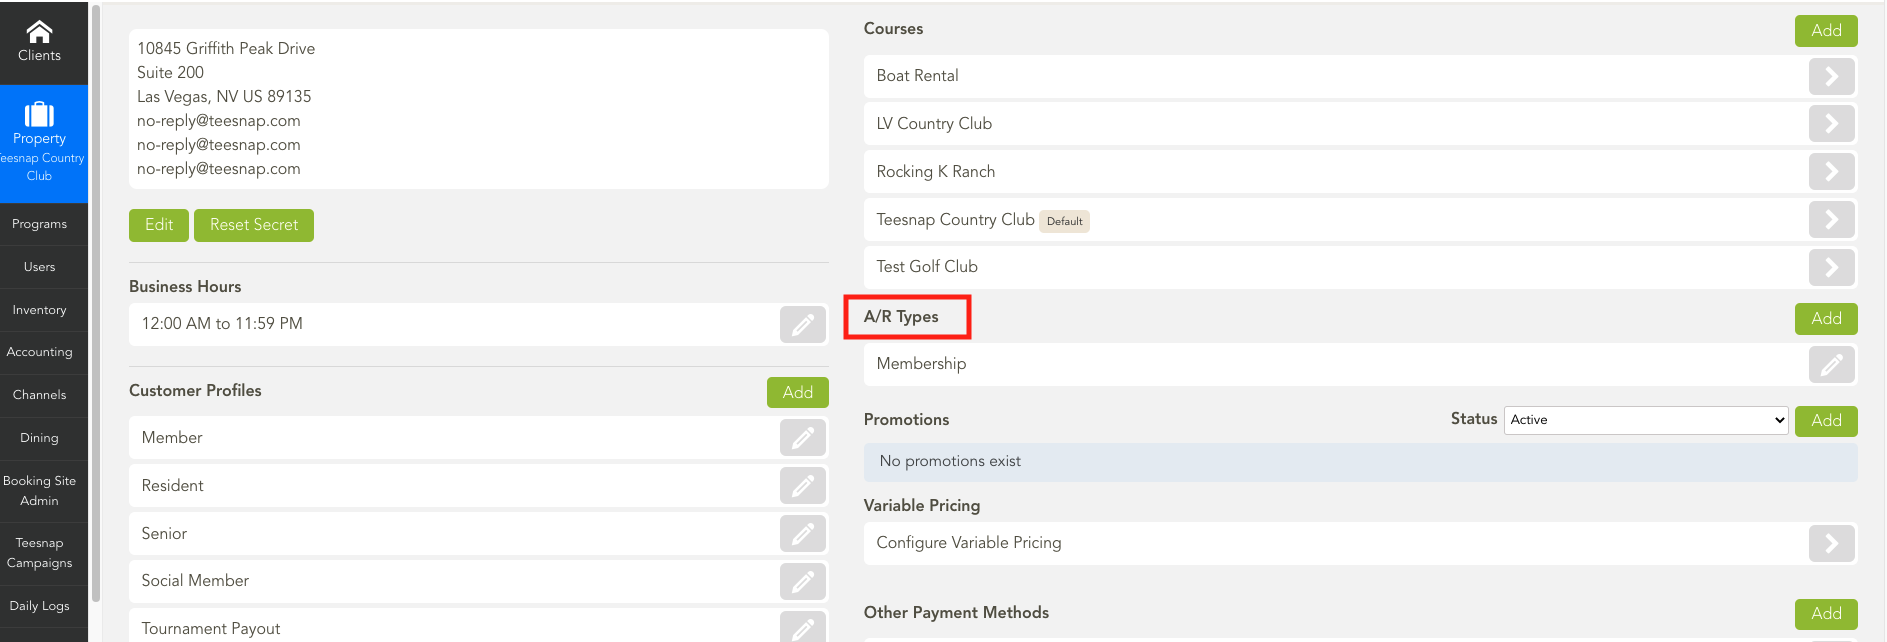
1. Log in to the Admin Portal. On the Property Page, you will see A/R Types.
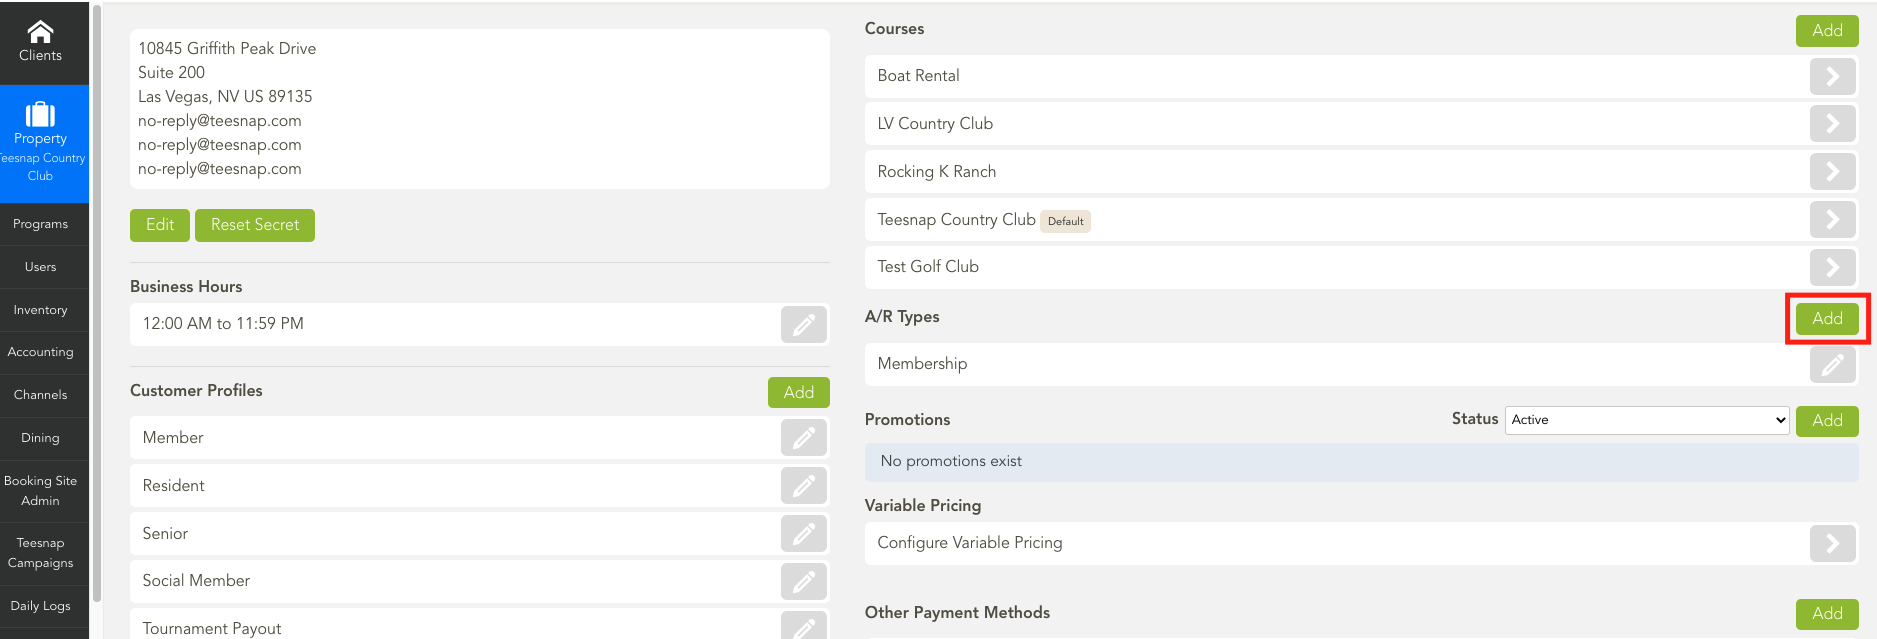
2. To add a new A/R Type simply select the green Add Icon.
3. Now type in your new A/R Type Name. When complete select Save.

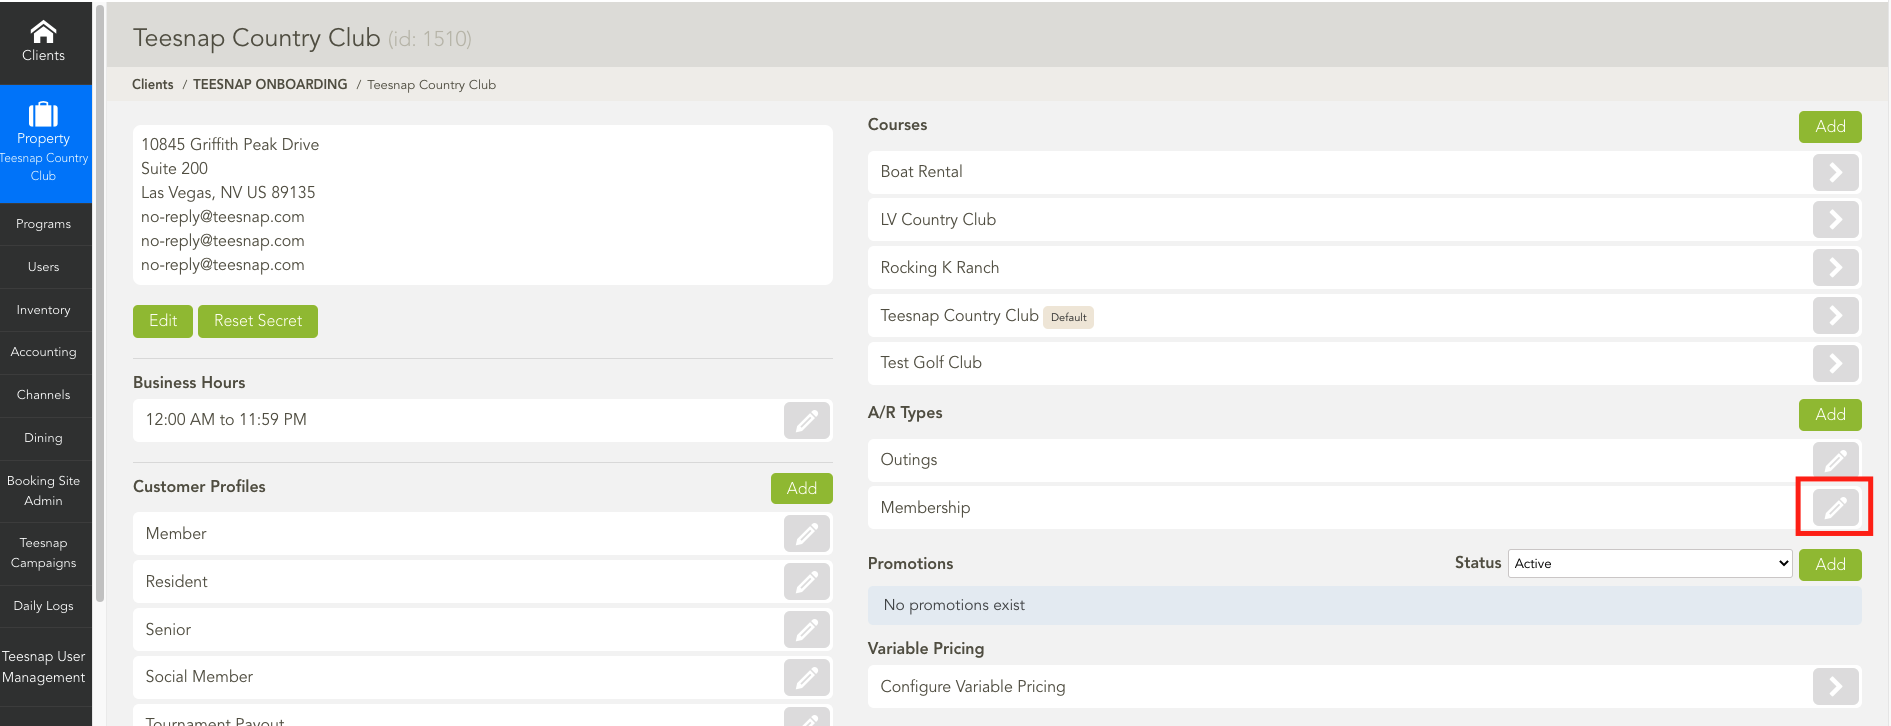
4. To Edit an existing A/R Type simply select the Pencil Icon and edit the name.
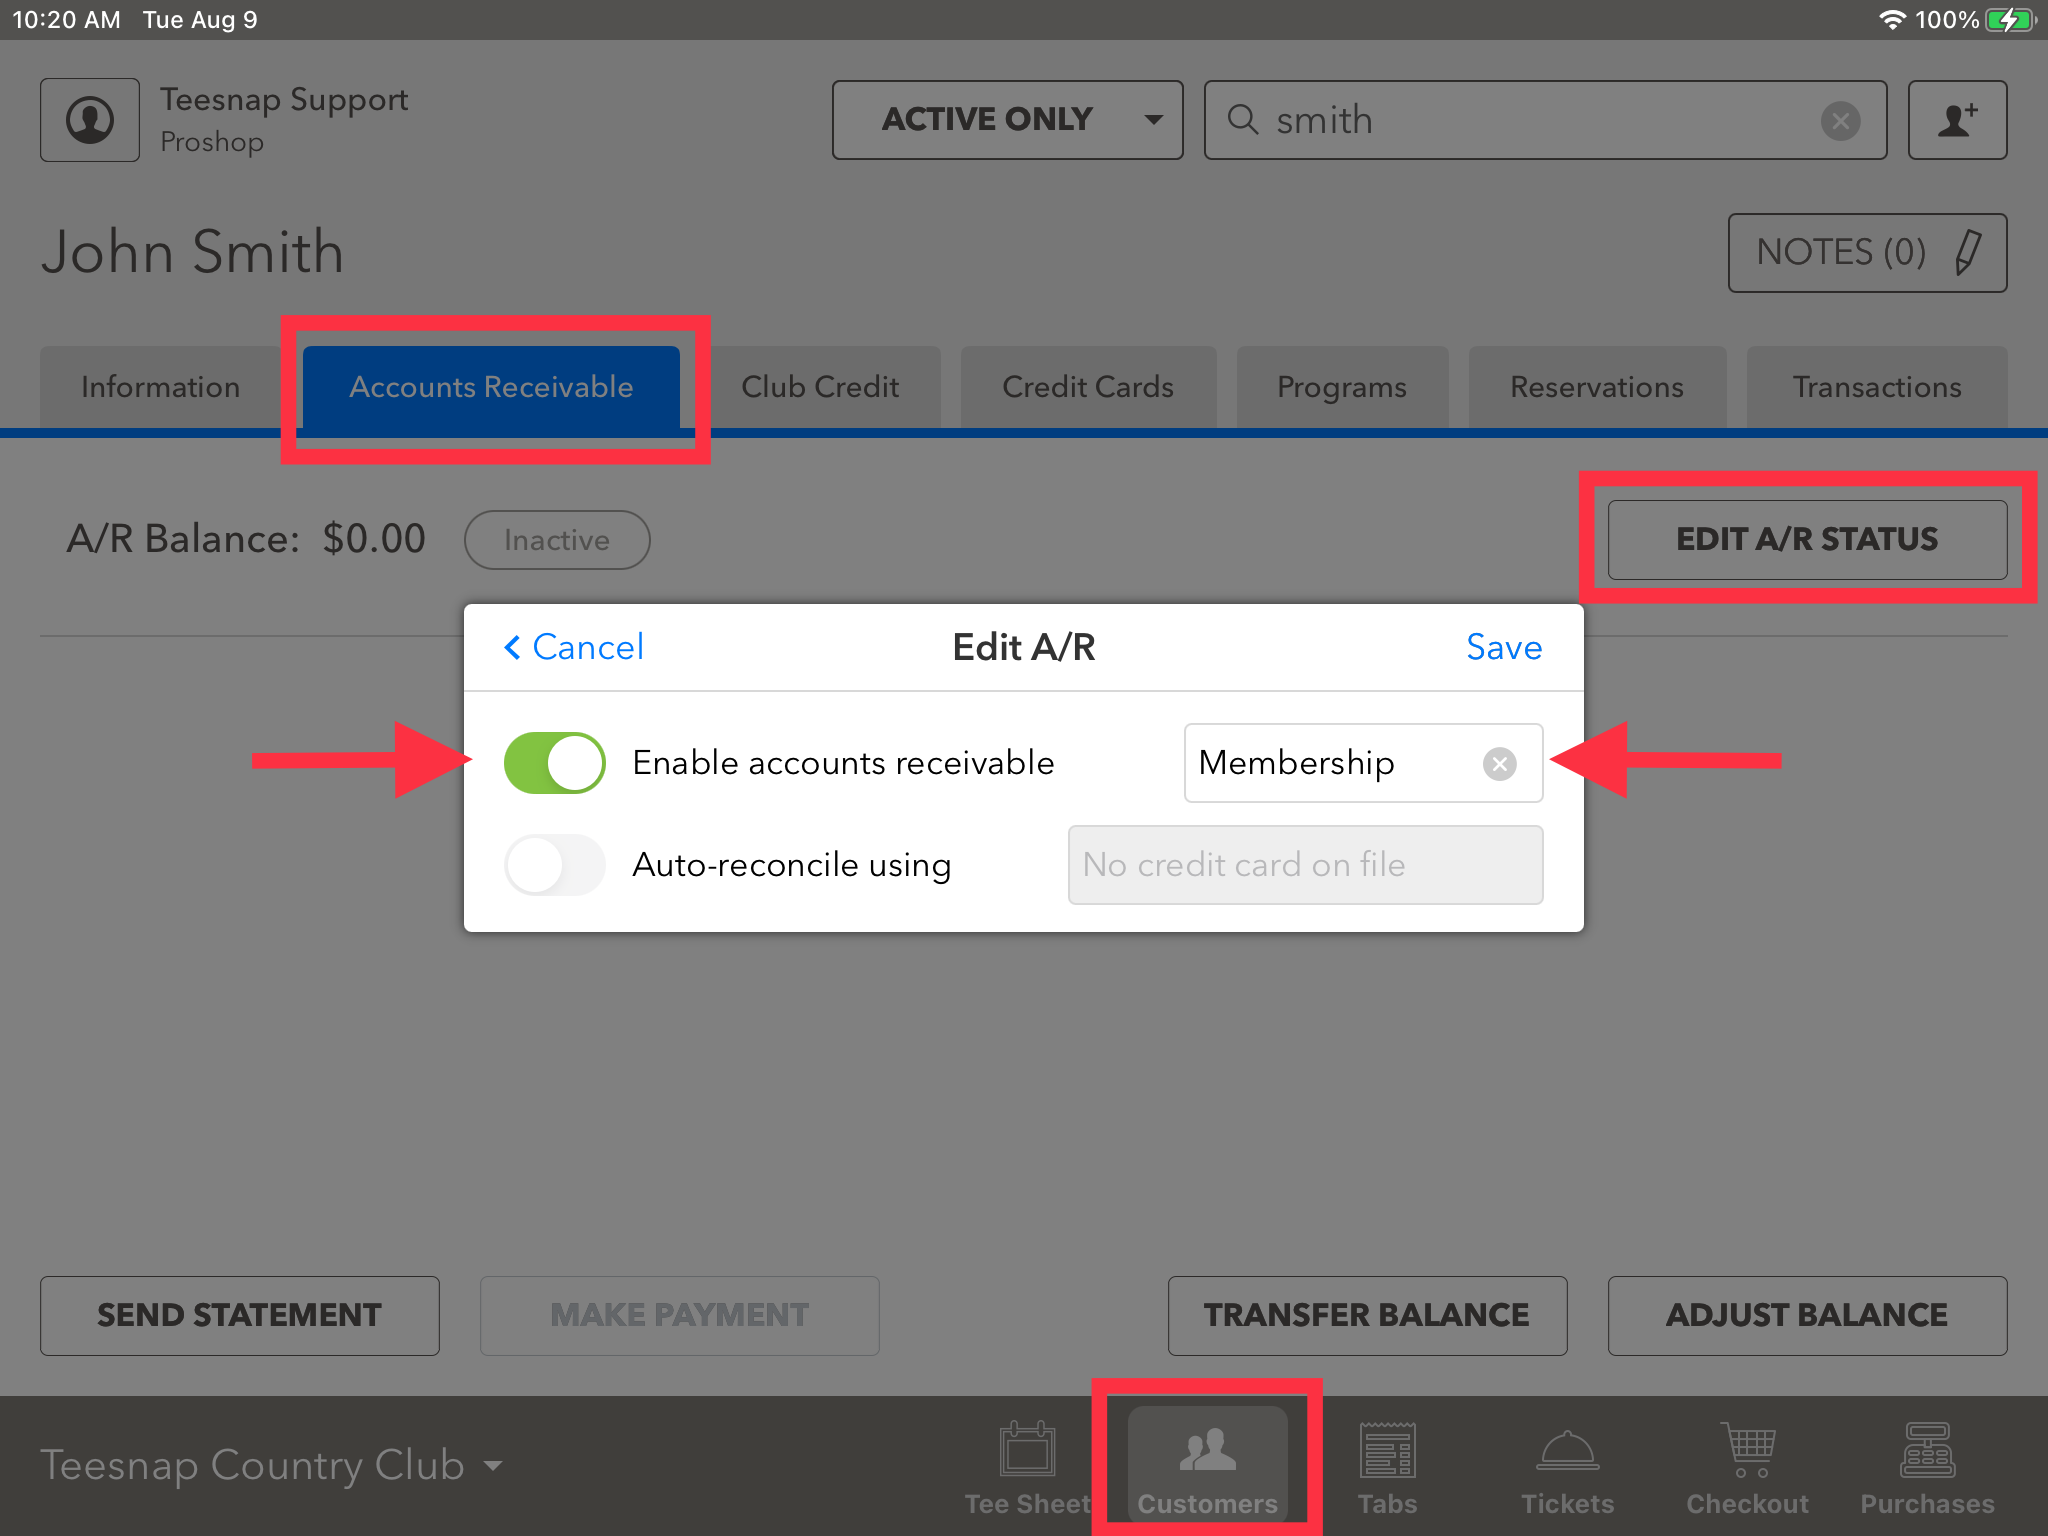
5. Now on the iPad under Customers and Accounts Receivable you can Edit the customer Status to Enable A/R and select from the A/R Types you have created.
If you have any questions, please do not hesitate to reach out to Teesnap Support by emailing us at support@teesnap.com or calling 844-458-1032