How to Add Inventory Sub-Categories
This article will show you how to add inventory subcategories.
Inventory subcategories can be used to get a more granular view of your sales and inventory reporting. You may also want to add additional subcategories if the pre-created categories do not suffice.
1. Head over to the admin portal and select Inventory then Departments and Inventory Categories

2. On the right-hand side of your screen you will see the preloaded Categories. To add a new category, select the Green Add button in the top right-hand corner.
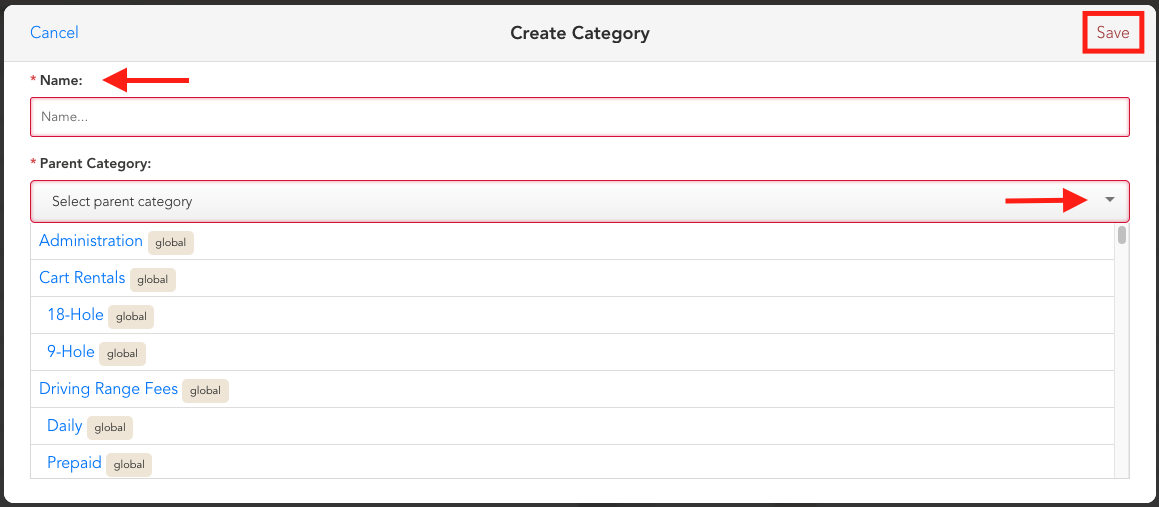
3. In the Name box enter the new Sub-Category Name. You must select one of the Parent Categories for your new sub-category to roll into. Then click Save in the top right.

4. To view the subcategory breakdown in reports, expand the report to sub-category 1 and sub-category 2. For an even more granular view, expand the report to the Product/Rack Rate as well.

If you have any questions, please do not hesitate to reach out to Teesnap Support by emailing us at support@teesnap.com or calling 844-458-1032.
.png?width=240&height=55&name=Untitled%20design%20(86).png)