How to Assign GL Codes to Inventory Categories
This article describes the procedure for assigning GL codes to Inventory Categories in the Teesnap Admin Portal.
It is necessary to assign your GL codes to the different Inventory Categories in order for the QuickBooks/Accounting export to be useful. If this is not done, sales falling under unassigned Categories will show up as "Undefined" in the export file and will not post to a GL code when an import is attempted.
This article assumes that GL codes have already been added to the system, either manually or via an import. For more information check out this article.
To assign your GL codes to Inventory Categories, log into the Teesnap Admin Portal at Teesnap Admin
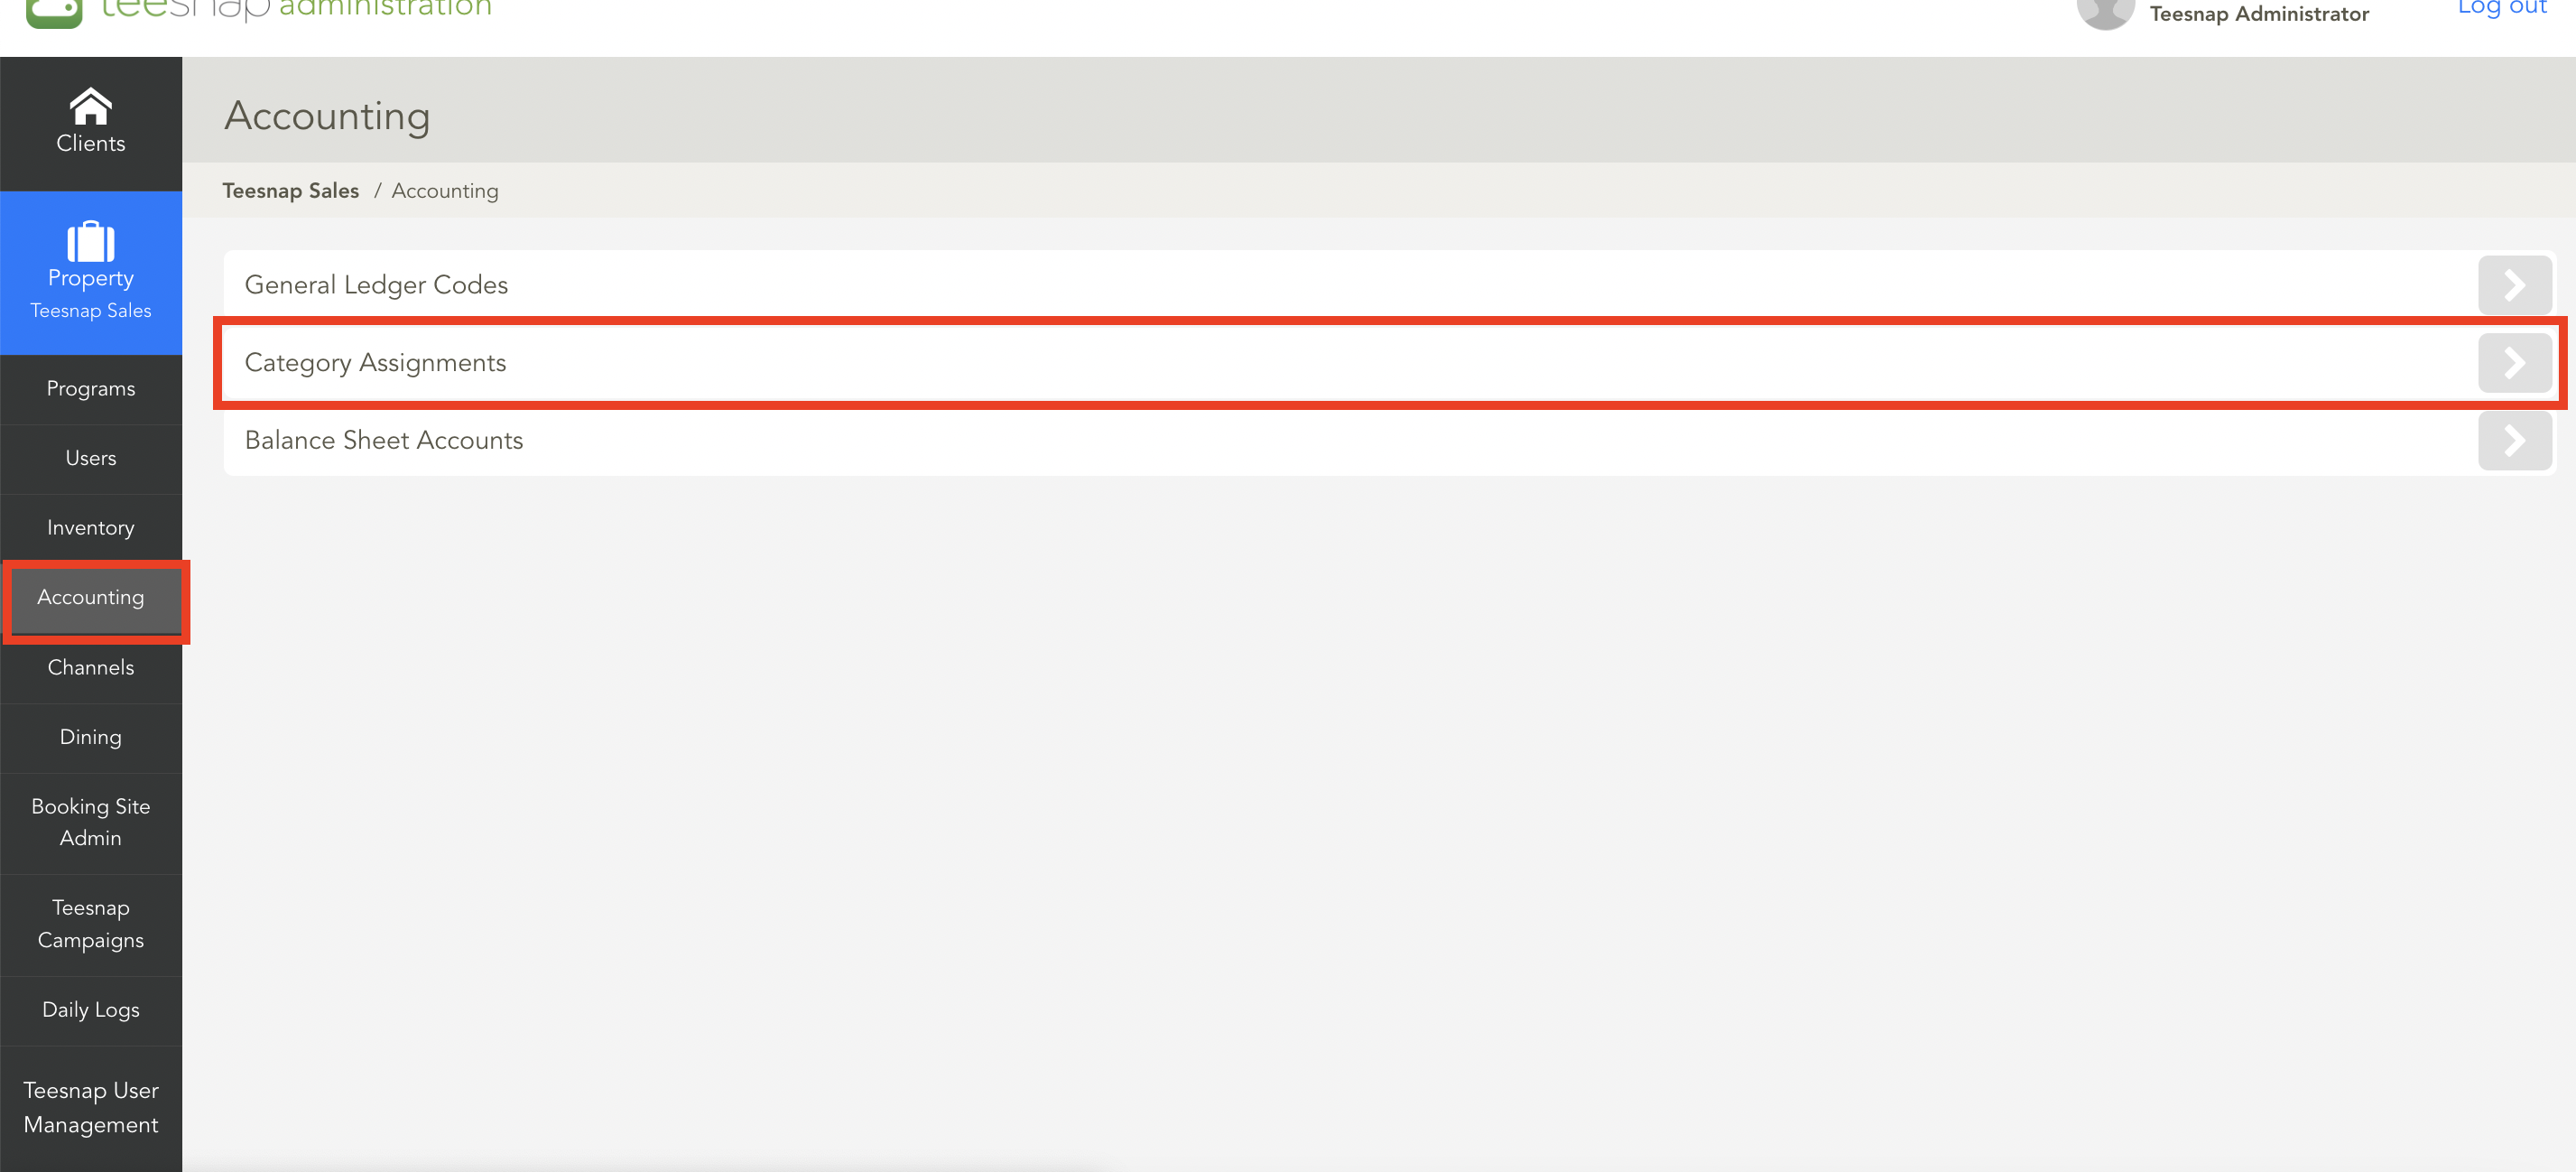
Go to Accounting, then Category Assignments.

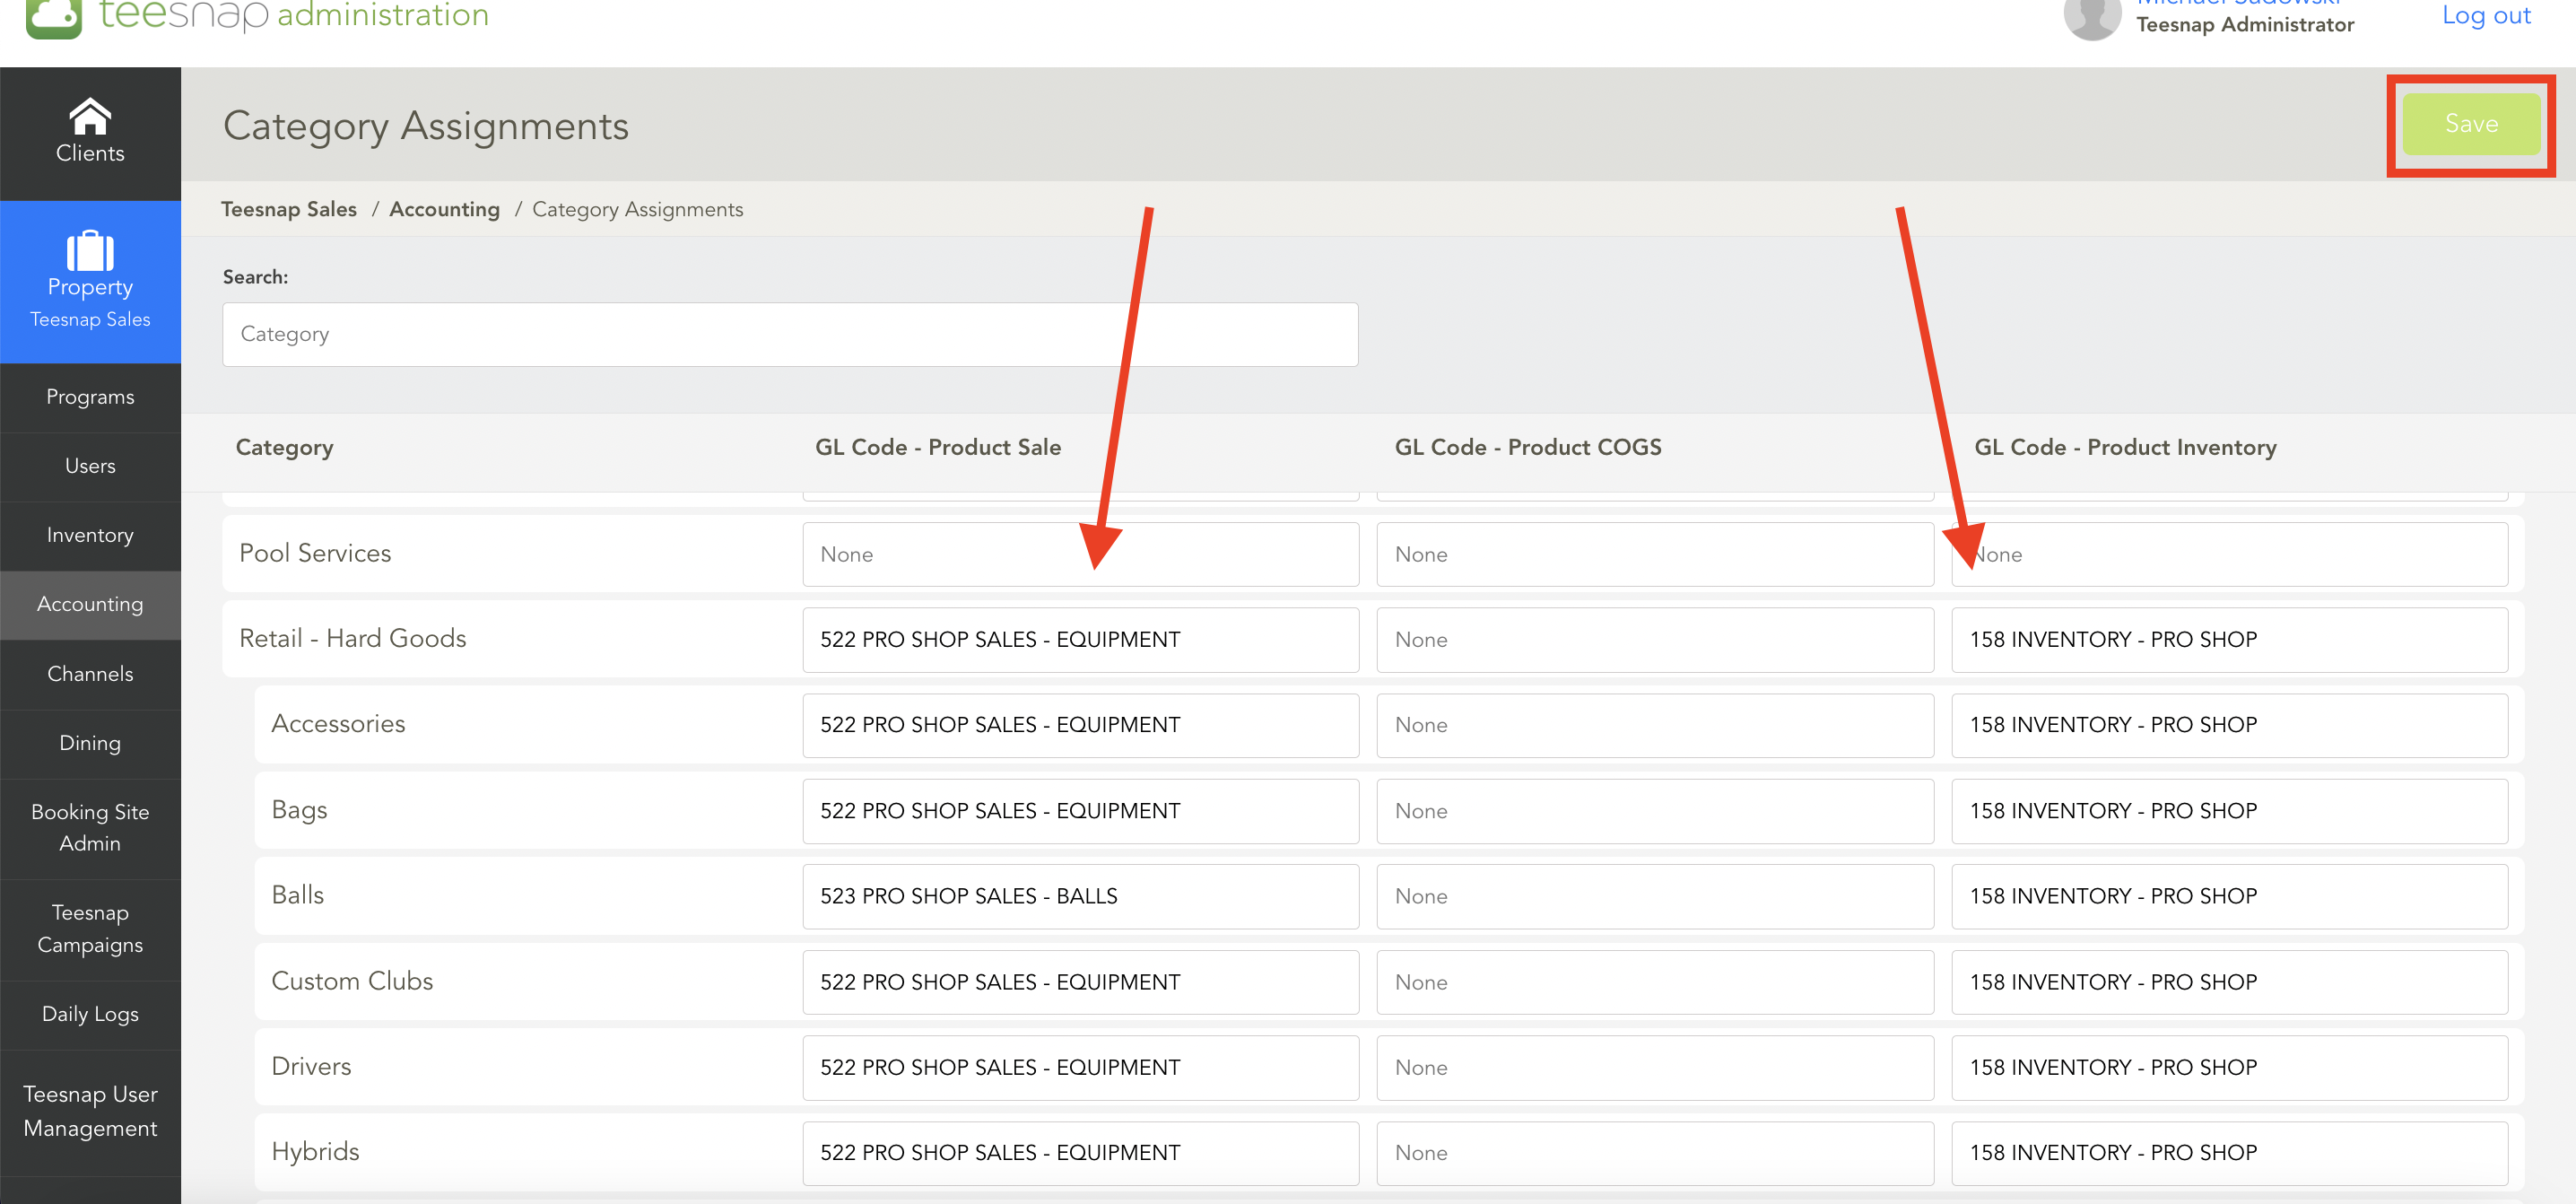
Each category has a box to assign a Sales, COGS, and Inventory code. At a minimum, a Sales code should be assigned. Select the appropriate GL code that should correspond to the Inventory Category. After the code has been assigned to the category, select Save at the top-right to save the changes. Continue this until all appropriate Categories have their corresponding GL assigned.

If you have any questions, please do not hesitate to reach out to Teesnap Support by emailing us at support@teesnap.com or calling 844-458-1032.
.png?width=240&height=55&name=Untitled%20design%20(86).png)