How to Create a Floating Tab
This article will explain how to create a floating tab. A floating tab is a tab that isn't associated with or connected to a table.
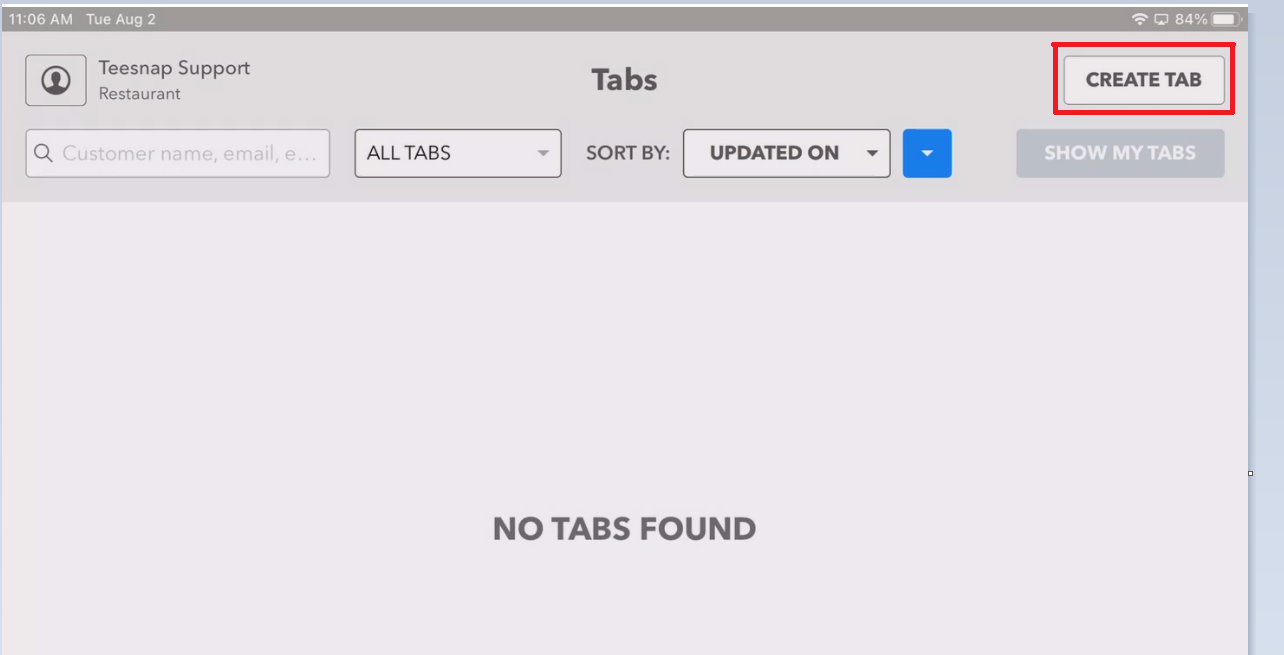
1. From the tabs menu, click create tab in the top right corner of the page.

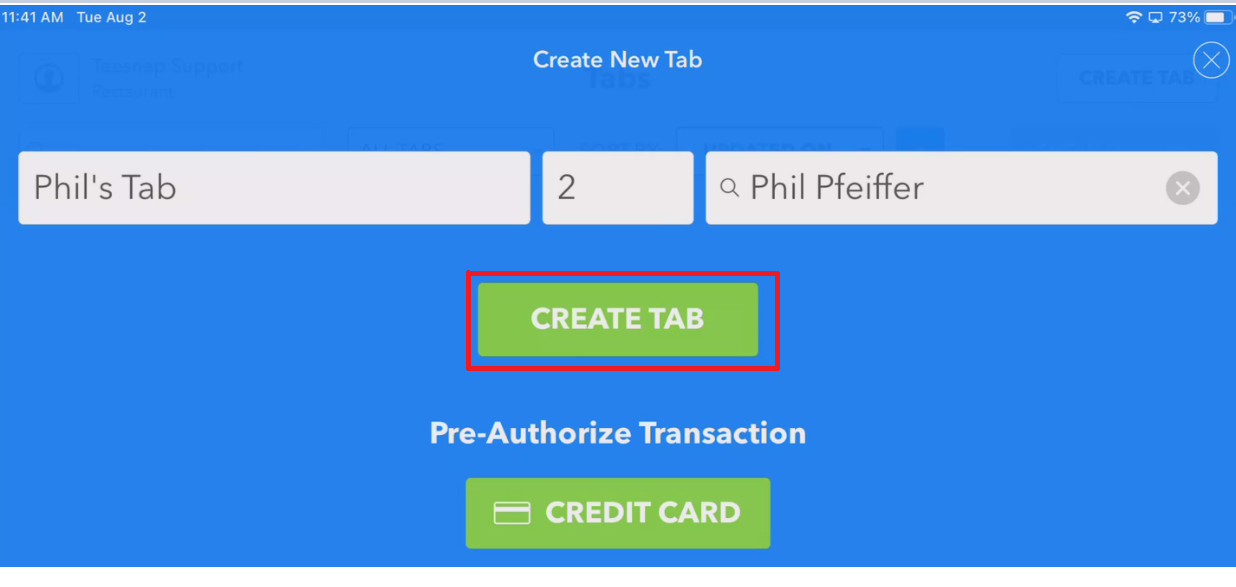
2. In the create new tab window fill in all the required fields.

3. When the tabs are filled out the create tab button will turn green. Tap create tab before proceeding.

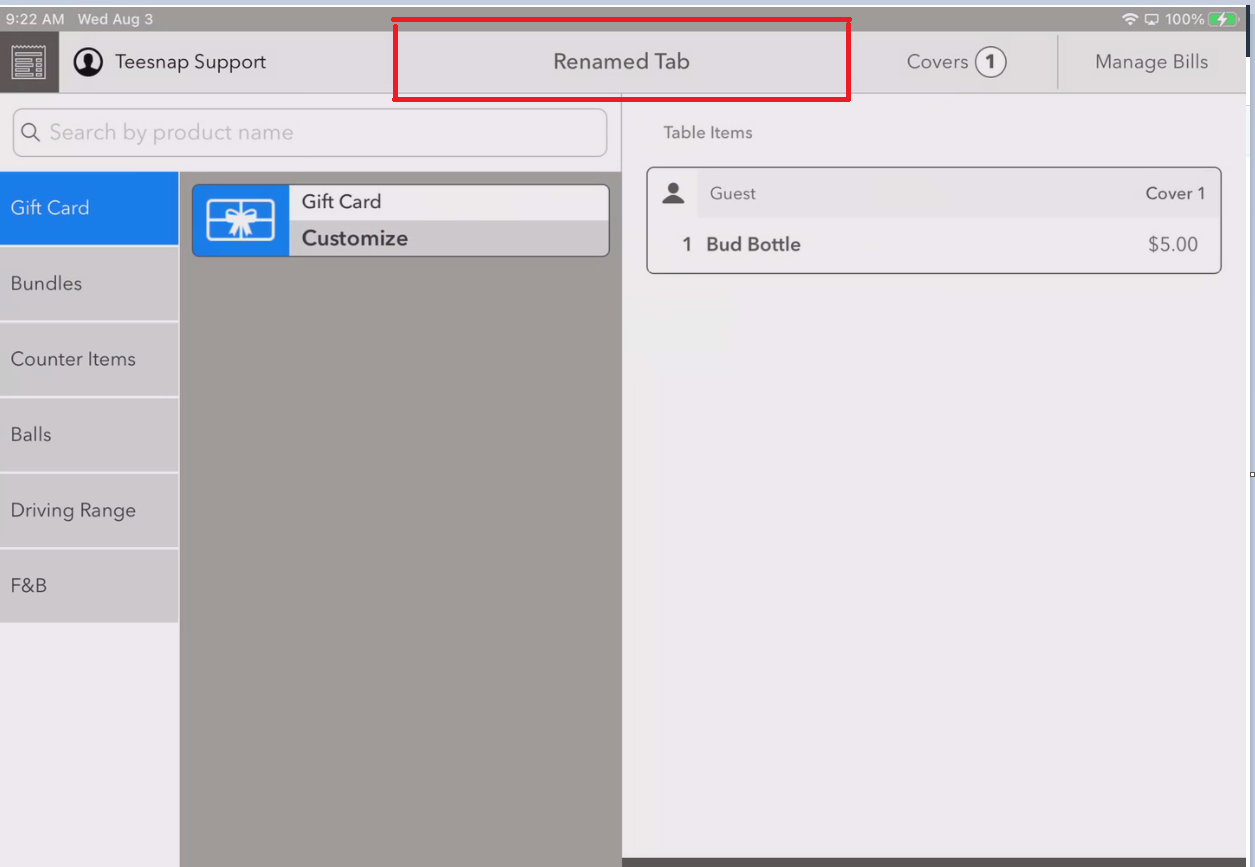
4. Your tab is created, you can add a product to the tab now. Repeat these steps to create a floating tab.

If you have any questions, please do not hesitate to reach out to Teesnap Support by emailing us at support@teesnap.com or calling 844-458-1032.
.png?width=240&height=55&name=Untitled%20design%20(86).png)