.png?width=240&height=55&name=Untitled%20design%20(86).png)
This article describes the process for creating a tab in Teesnap.
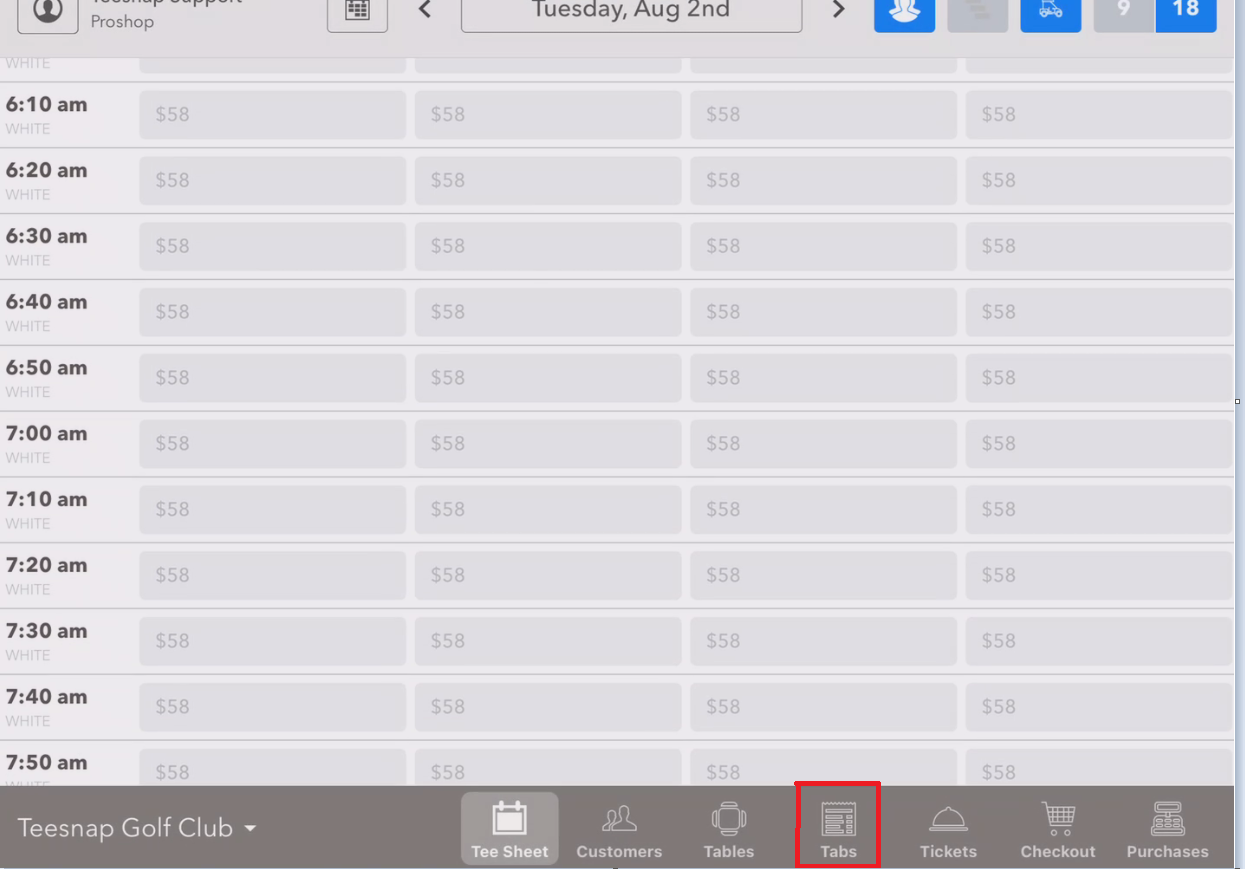
To start a tab in Teesnap, first, navigate to the Tabs screen by touching the Tabs button
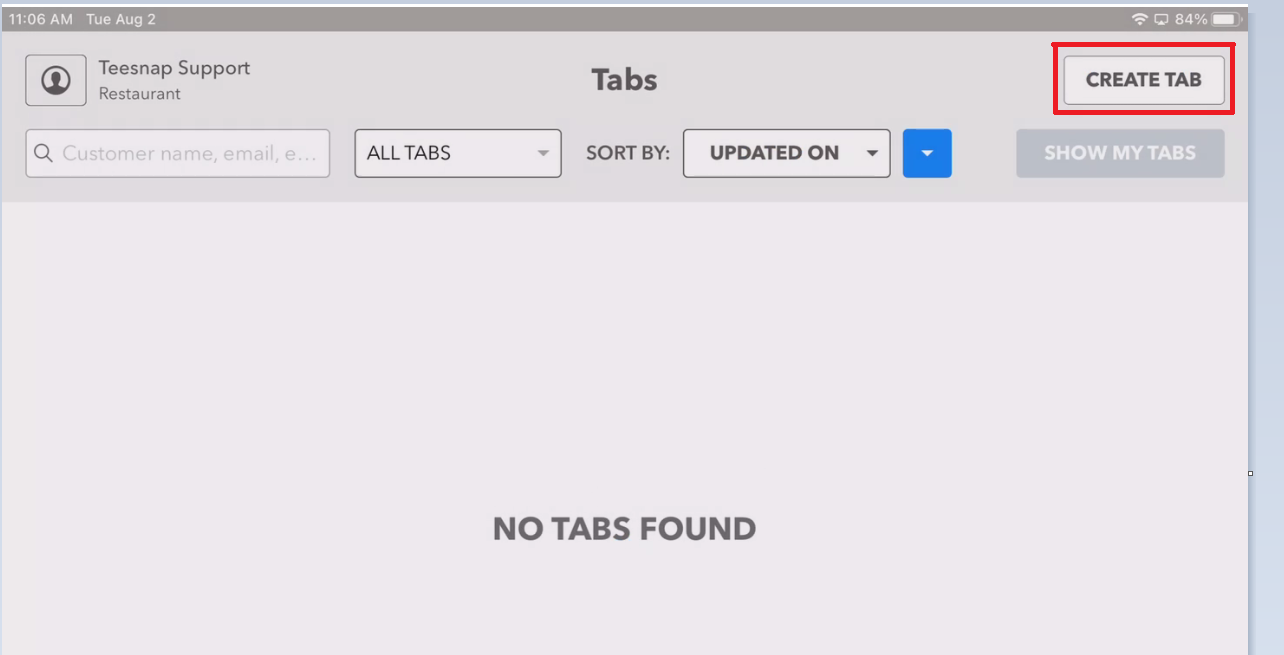
This brings up the main Tabs screen. To open a new tab, Touch CREATE TAB at the top-right.
This brings up the Create New Tab screen.
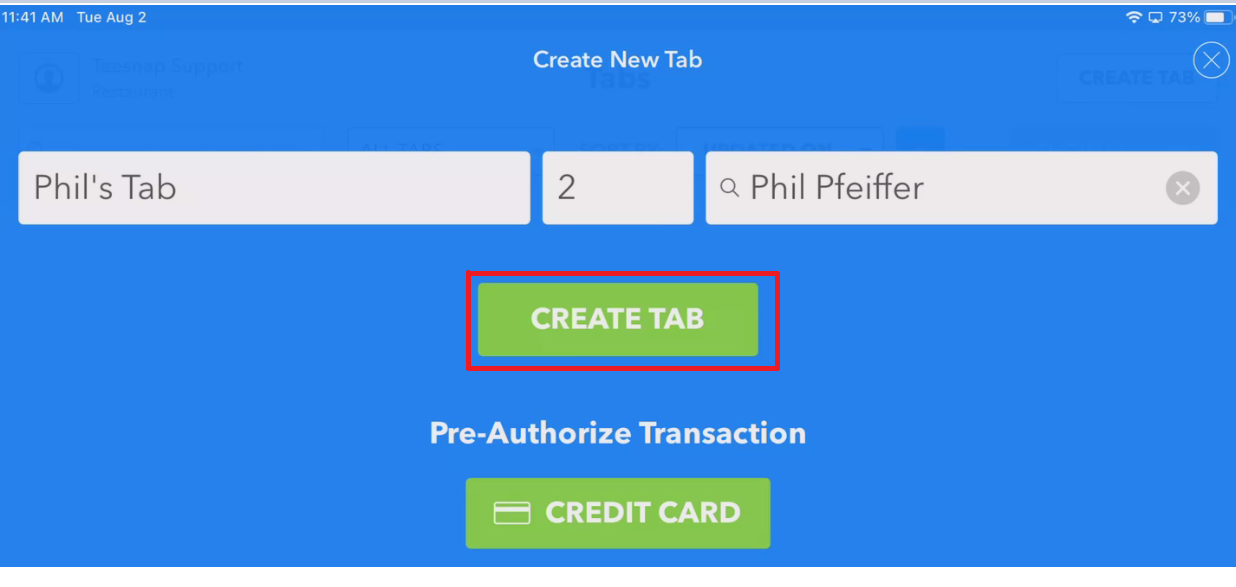
Enter a name for the tab. This can be anything you would like to enter as an easy way for you to identify the tab.
Enter the number of covers for the tab. This will allow you to assign specific products to each individual that is on the tab.
You can also search the customer database for a customer to attach to the tab. This may be especially useful if the tab is being opened by a member who will later be charging their tab to their A/R account. While the tab name and number is covers is required, the customer name is optional.
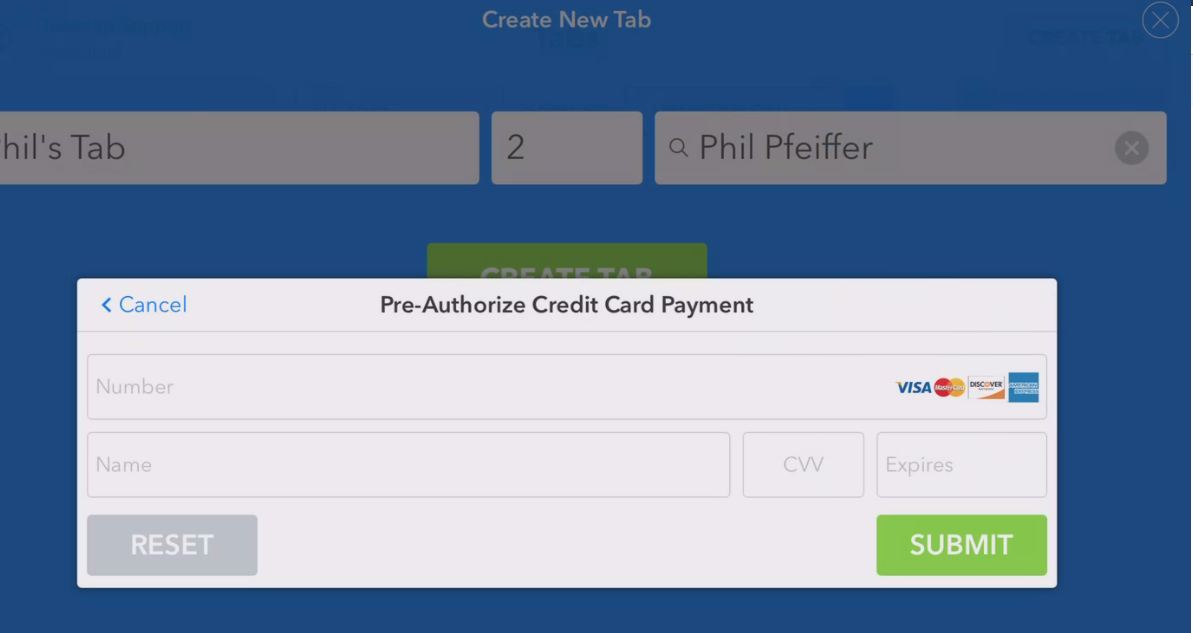
At this time you can also pre-authorize a credit card and attach it to the tab. To do this, touch the Credit Card button, swipe the card number into the Pre-Authorize Credit Card Payment window, then touch Submit.
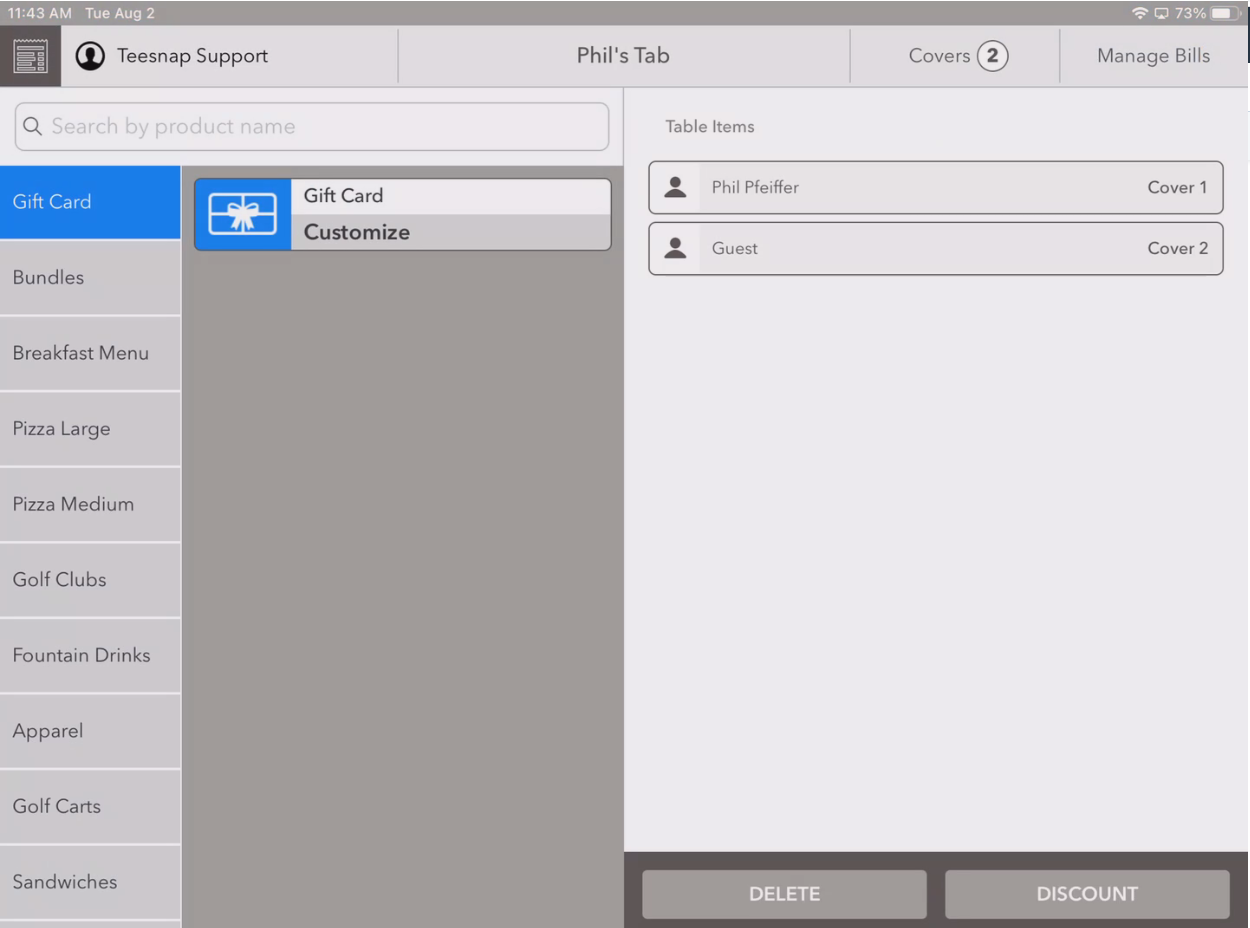
After all information has been entered, touch CREATE TAB. The tab has now been created and you can begin adding products.