.png?width=240&height=55&name=Untitled%20design%20(86).png)
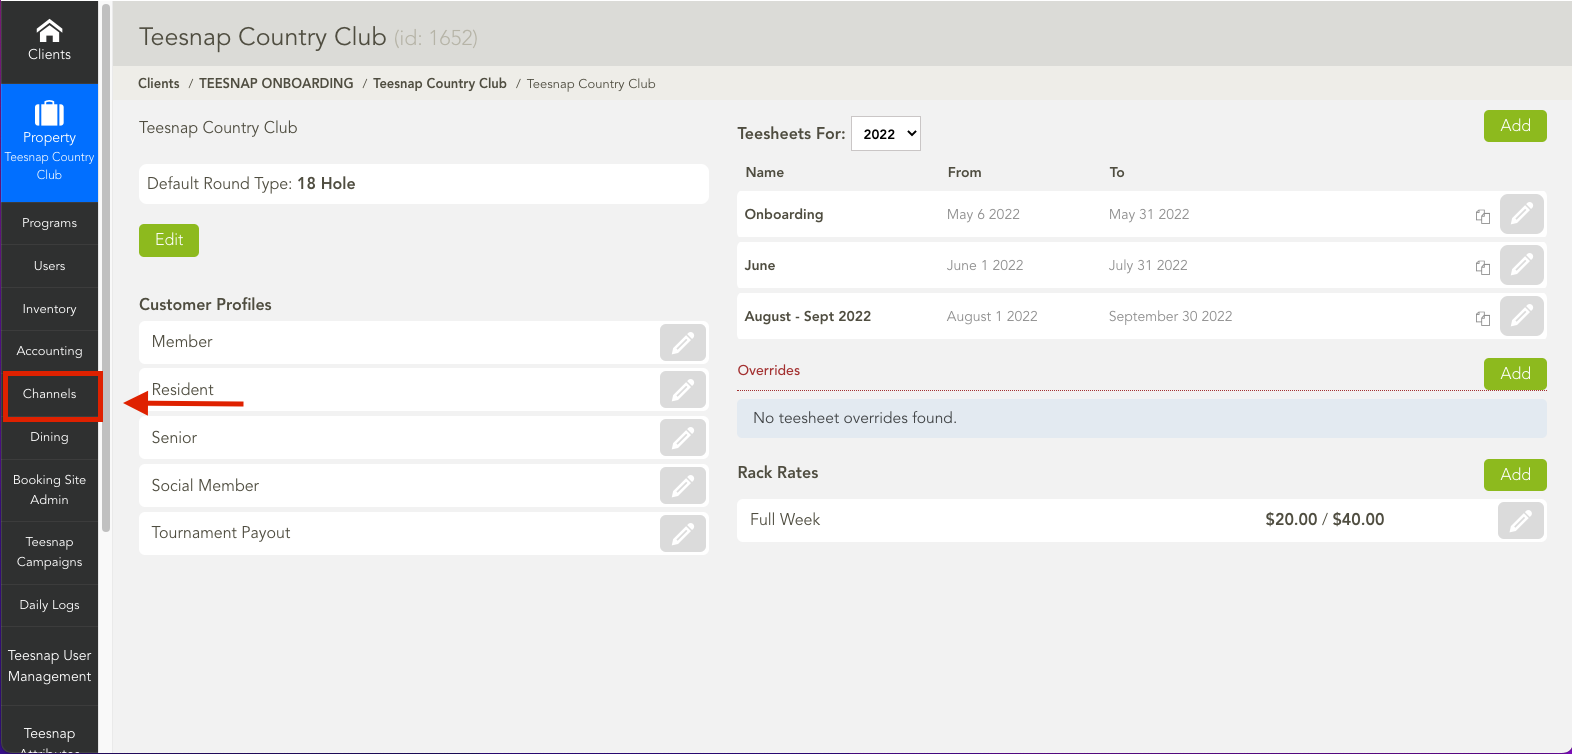
1. Start by finding and opening the "channels" button in the admin portal.
2. Once on the channels page, start by finding the date and time you would like the "Pre-Payment" to begin. For example, we would like to begin this program on August 1st at 7 am.
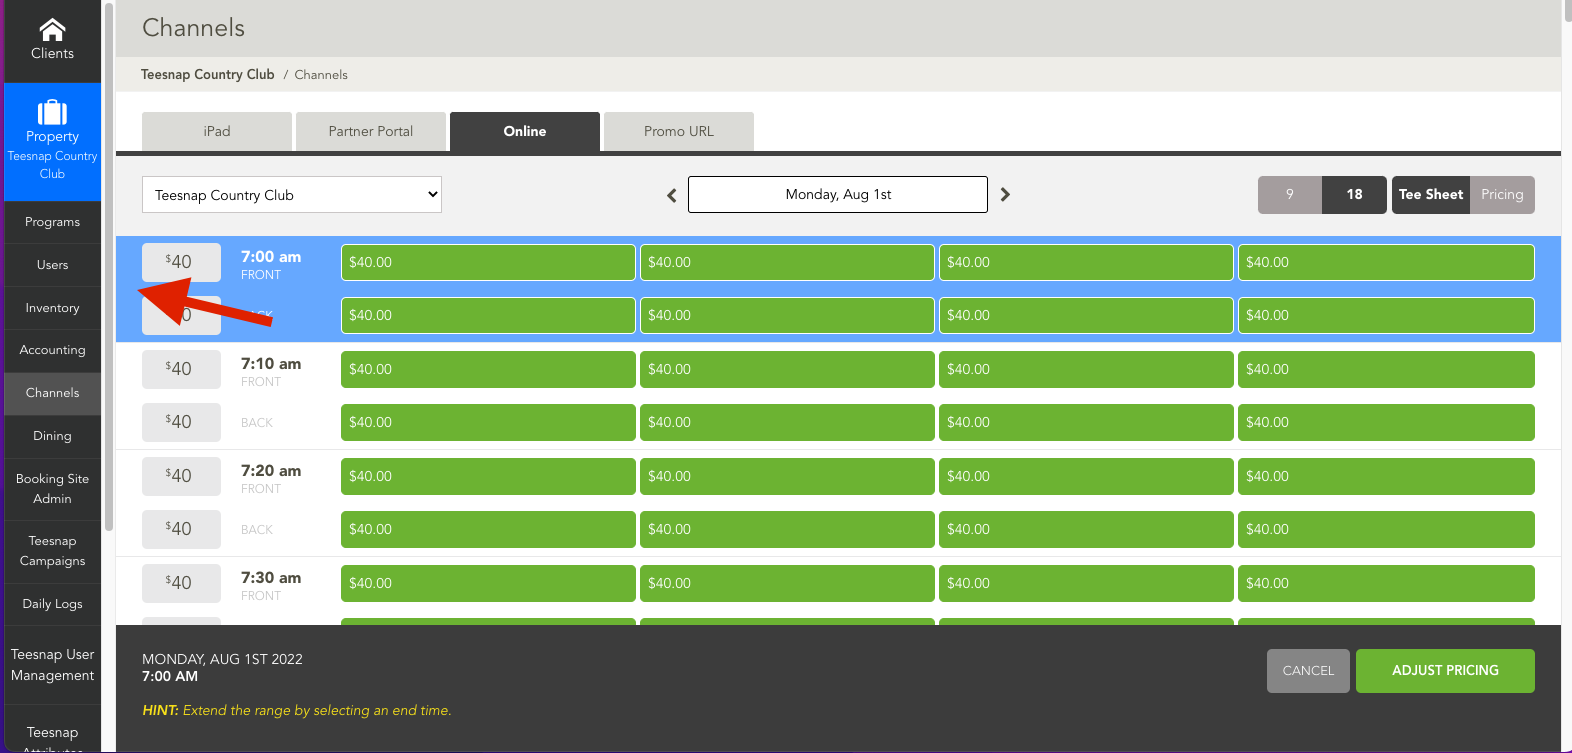
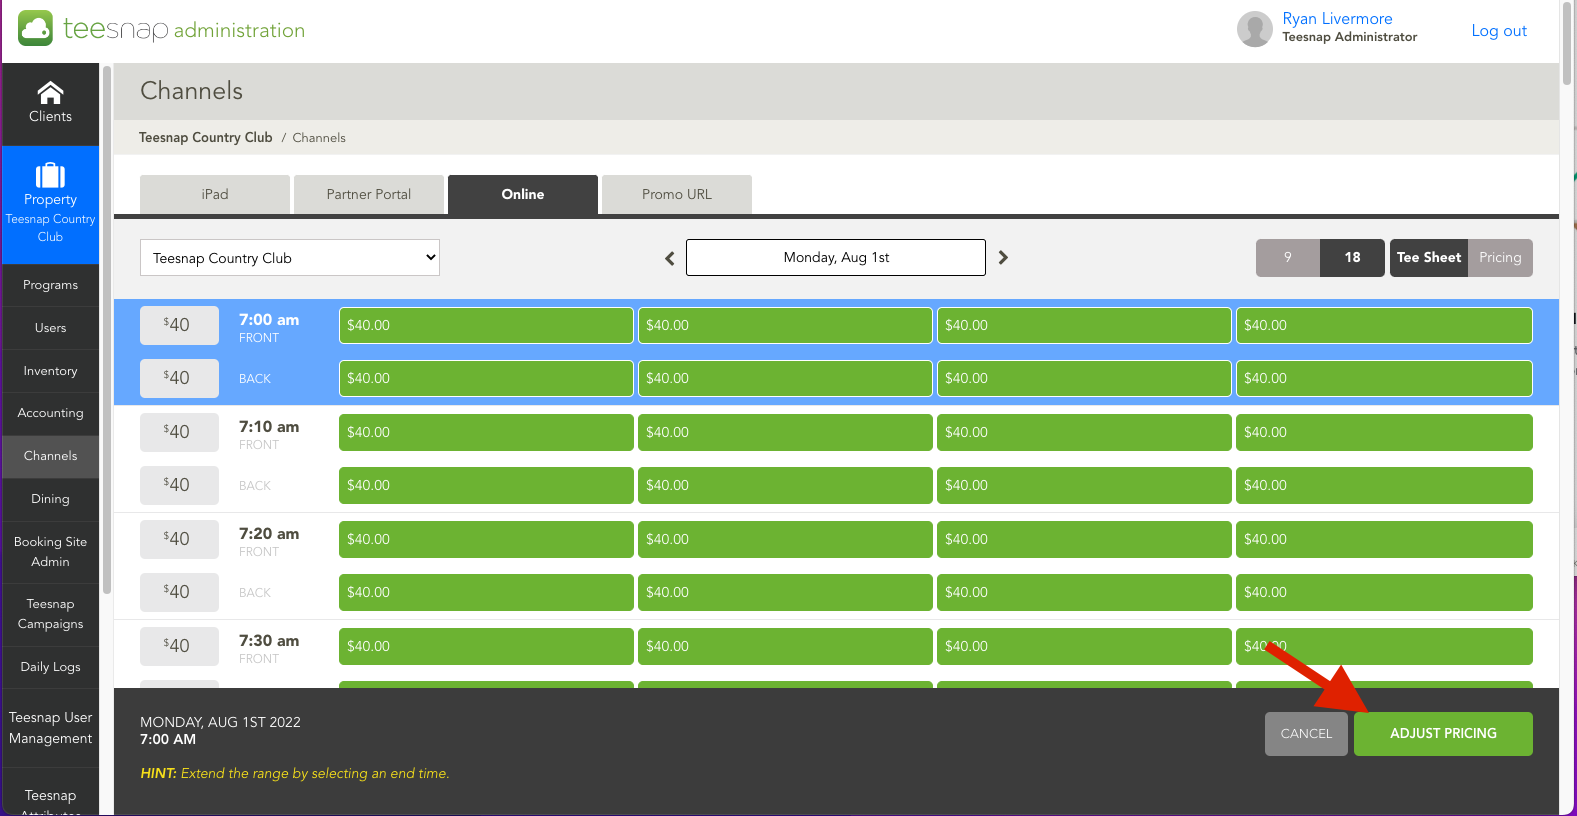
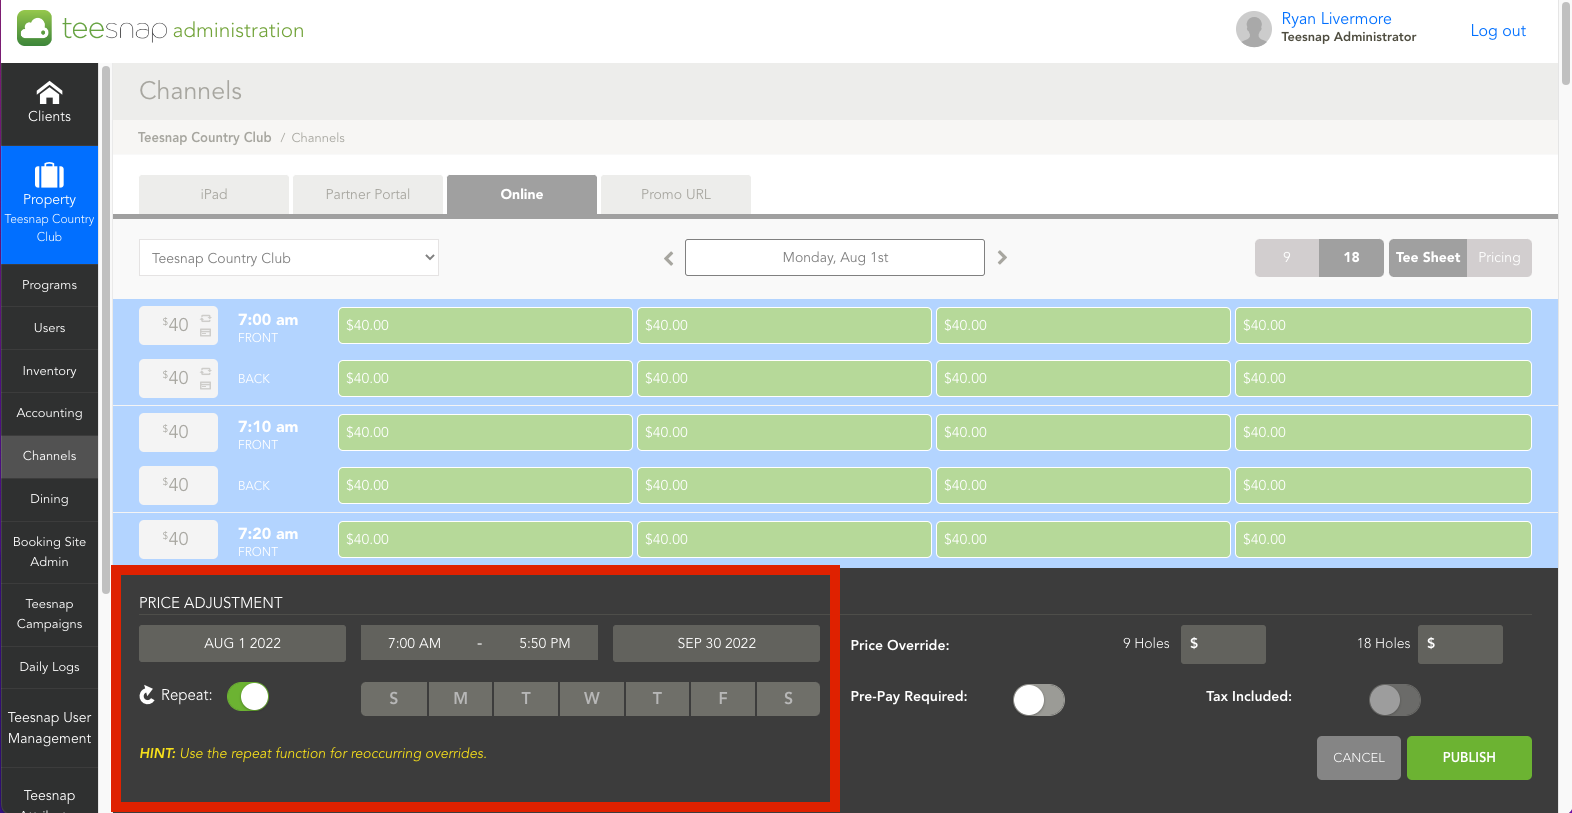
3. Next you will have an option for "Adjust Pricing." Click it.
4. When the adjust pricing page is open, you will see filters for start date, end date, days, and times.
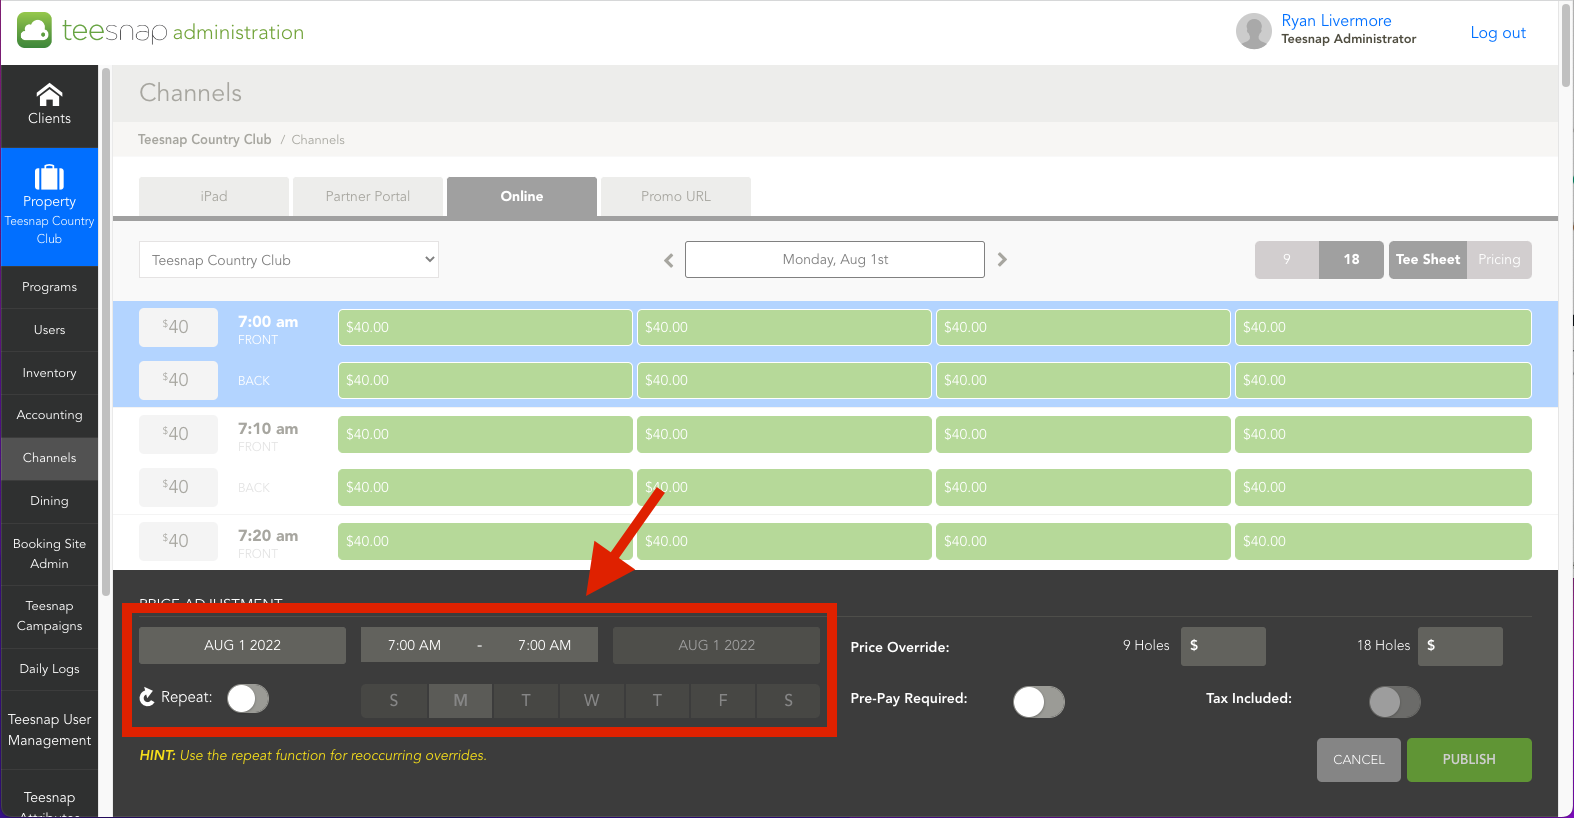
5. Start by toggling repeat. This will allow you to adjust the following. Select all your filters. For example, we have chosen to require pre-payment online from August 1st - September 30th, 7 am - 5:50 pm. We also selected all days of the week. If you only wanted to require pre-payment on the weekends, you would only select those weekend days.
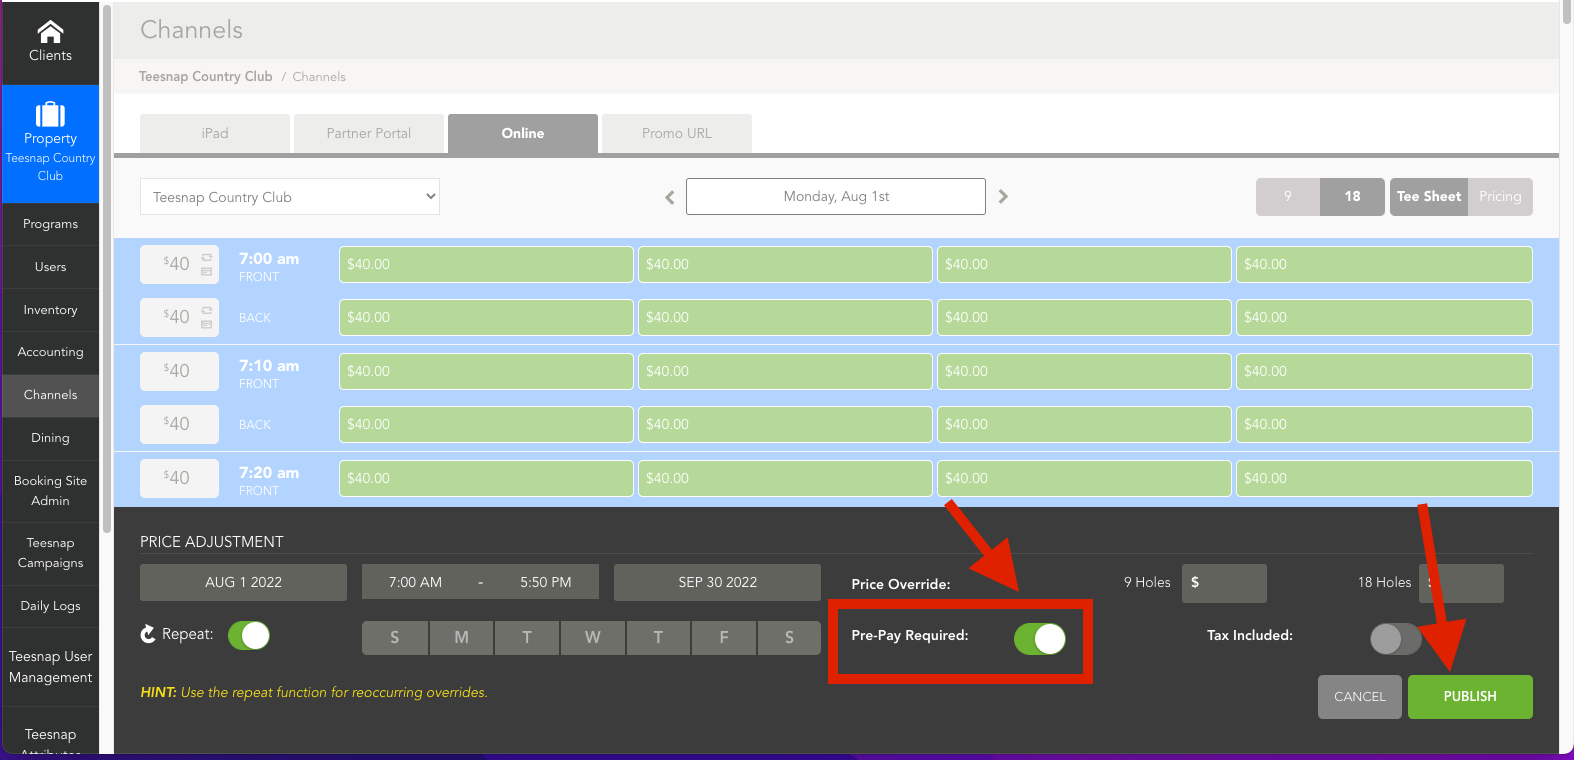
6. At this point we have created our timeline. Now we want to make sure we toggle on the"Pre-Pay Required". Once Pre-pay is toggled on, you can click publish to activate pre-payment online.
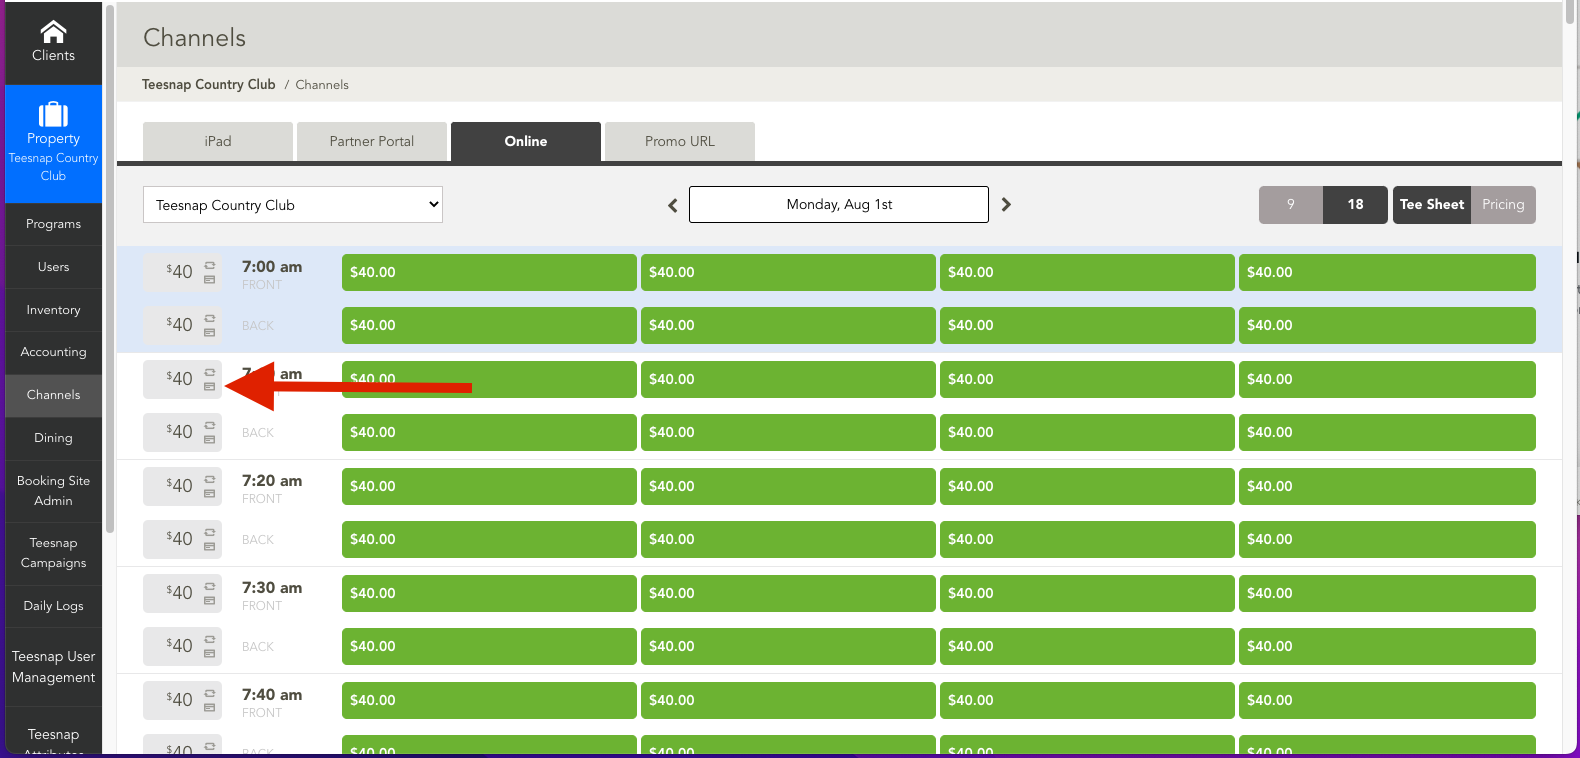
7. To double-check that pre-payment is turned on, you can see on the channels screen a Credit Card icon next to the green fees.
If you have any questions, please do not hesitate to reach out to Teesnap Support by emailing us at support@teesnap.com or calling 844-458-1032