How to Pre-Authorize a Credit Card at the Create Tab Screen
Pre-authorization allows you to attach a credit card to a tab at the beginning of the tab creation process. Follow these steps to pre-authorize a card on a tab using Teesnap's new contactless credit card chip readers.
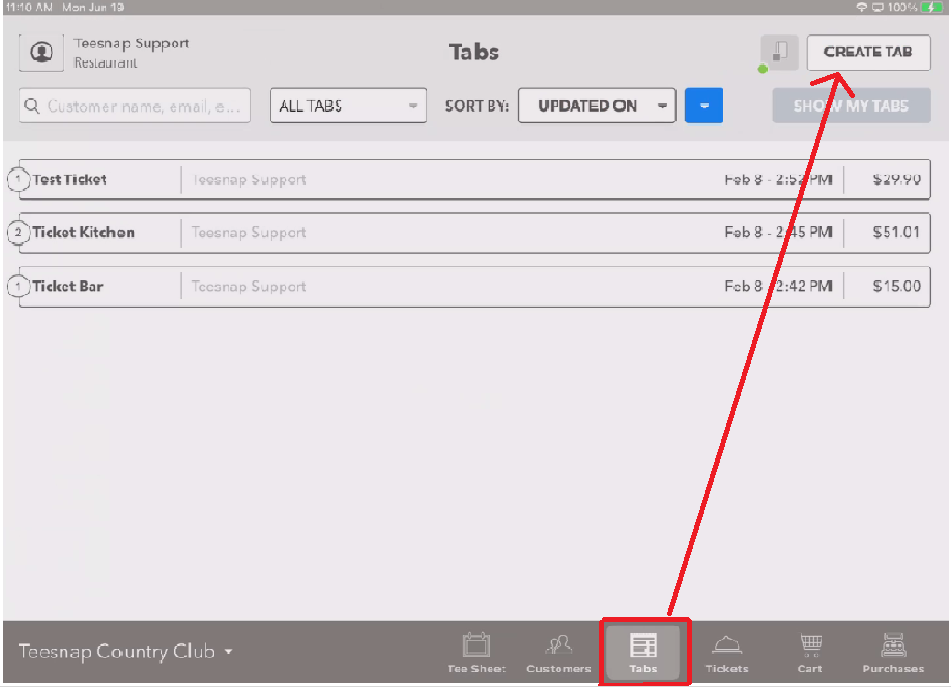
Go to the TABS area of the system, then to CREATE TAB
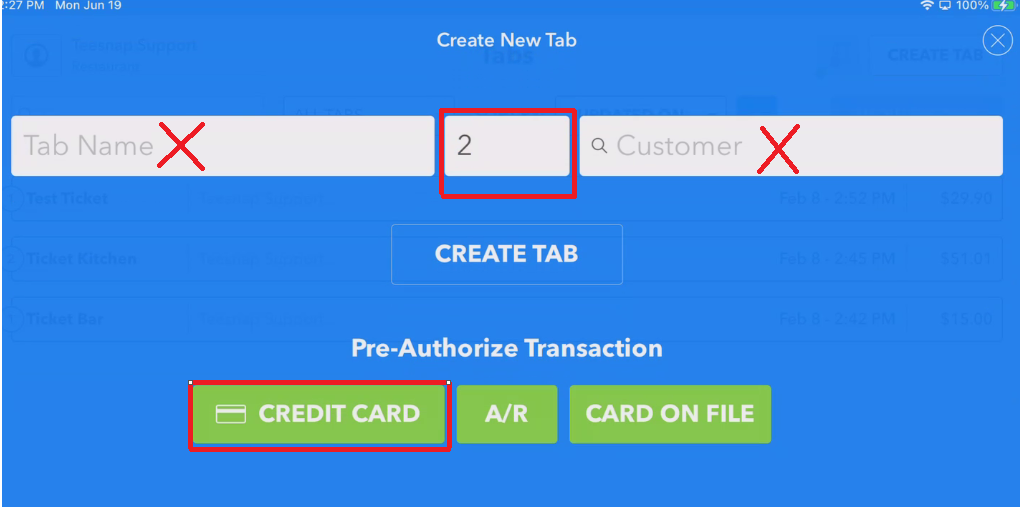
At the CREATE NEW TAB screen, enter the number of covers. To begin the credit card pre-authorization process, select CREDIT CARD. If you are pre-authorizing a card, DO NOT enter the tab name or add a customer to the tab at this time.
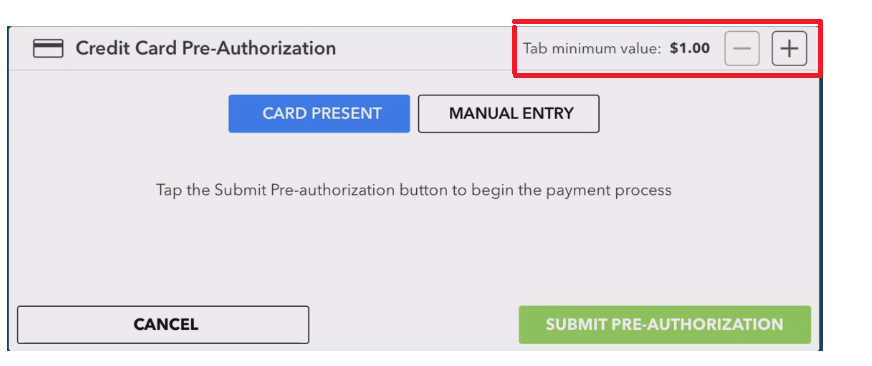
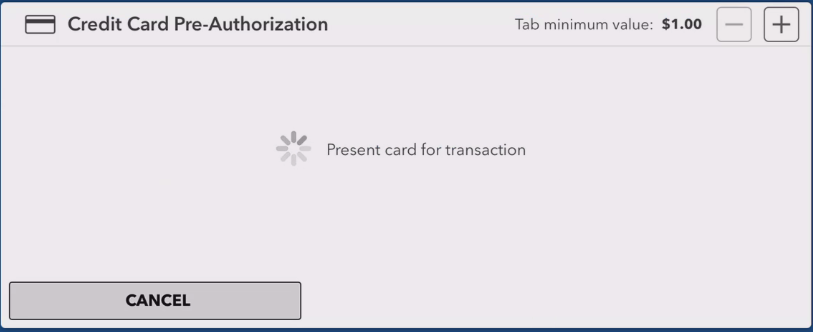
The system provides an opportunity to override the default tab minimum value before executing the pre-authorization. If you would like to adjust this minimum, use the plus button to increase the minimum until you reach the desired value
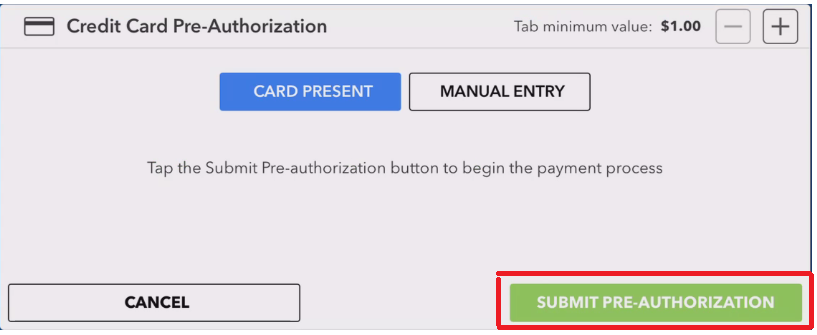
Note that the CARD PRESENT button is selected by default. If the card is present (this will usually be the case), choose SUBMIT PRE-AUTHORIZATION
The system will prompt you to tap or insert the credit card
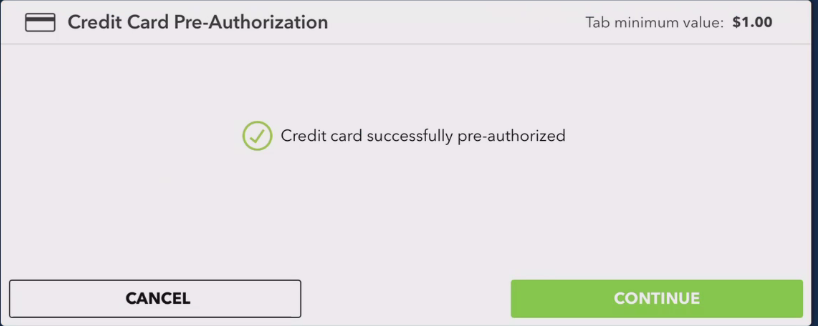
After a successful tap or after the card is inserted into the chip reader, the system will display that the card has been successfully pre-authorized. Tap CONTINUE
At this time the system defaults the name of the tab to that of the last four digits of the card that was pre-authorized
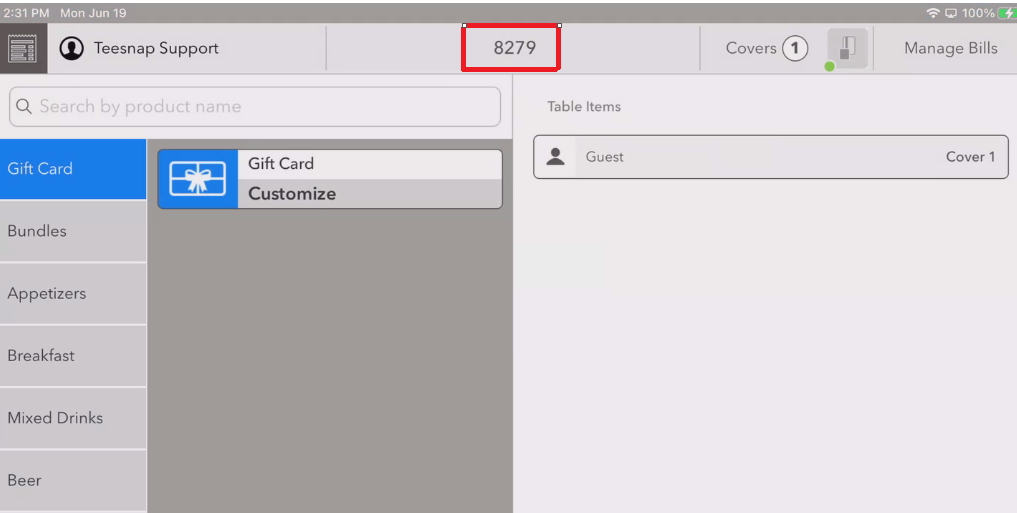
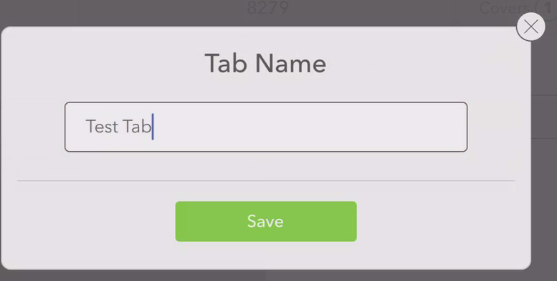
If you wish to rename the tab, tap on the current tab name. This will allow you to overwrite the current tab name with something different.
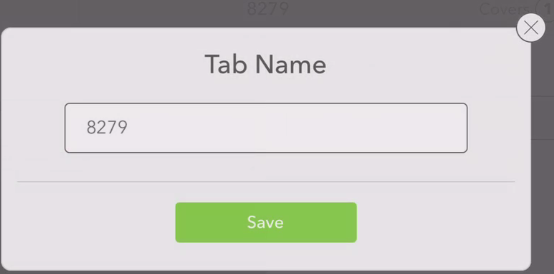
Type in the new name for the tab and hit SAVE
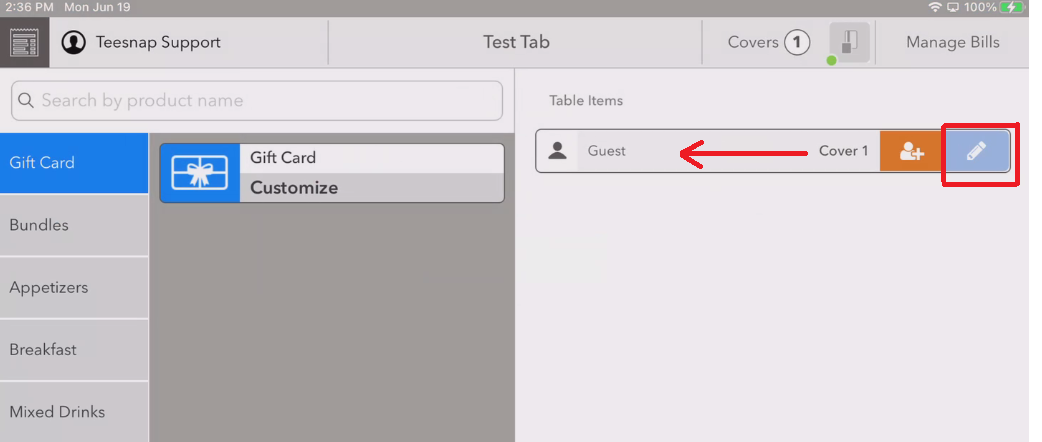
At this point, you can also assign a customer from the database to any of the covers on the tab if you wish to do so. To do this, swipe the name of the cover from right to left and choose the "Change Cover Assignment" button.
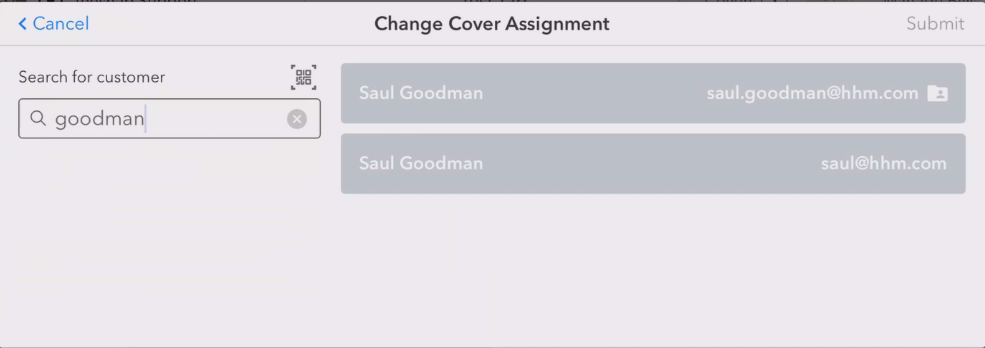
Search for the customer by name, email, or phone. Select the desired customer and choose SUBMIT
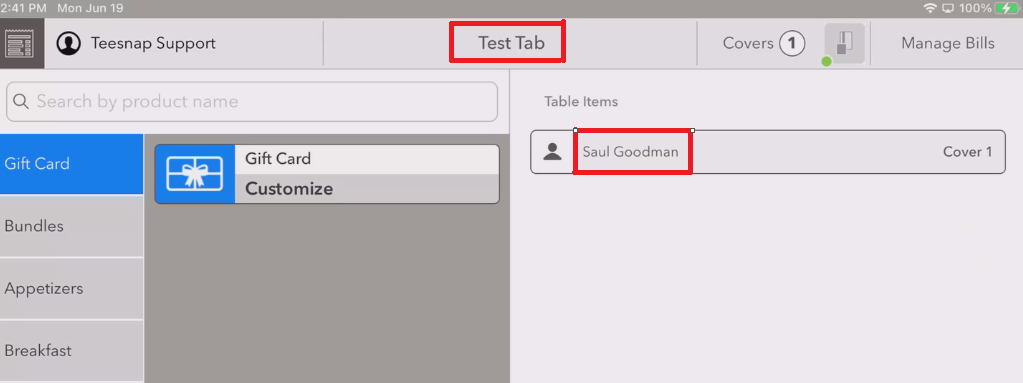
Both the name of the overall tab and the name of the cover have now been changed
If you have any questions, please do not hesitate to reach out to Teesnap Support by emailing us at support@teesnap.com or calling 844-458-1032.
.png?width=240&height=55&name=Untitled%20design%20(86).png)