How To Remove a Display Category
This article describes the process for removing/deactivating a Display Category.
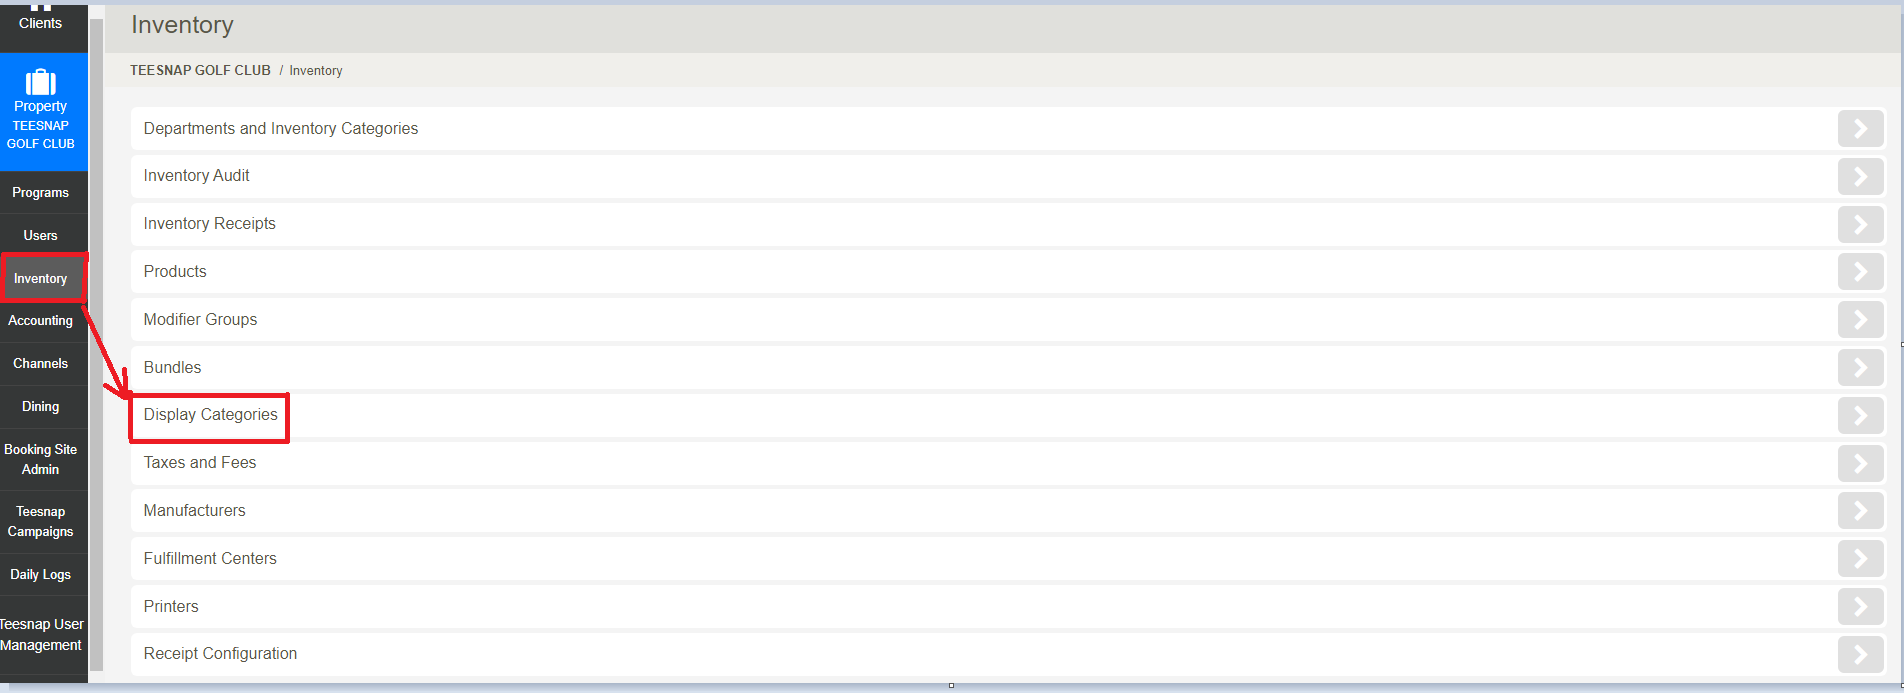
1. To remove (deactivate) an unused or unwanted Display Category, log into the Teesnap Admin Portal at admin.teesnap.com. Go to Inventory, then Display Categories.

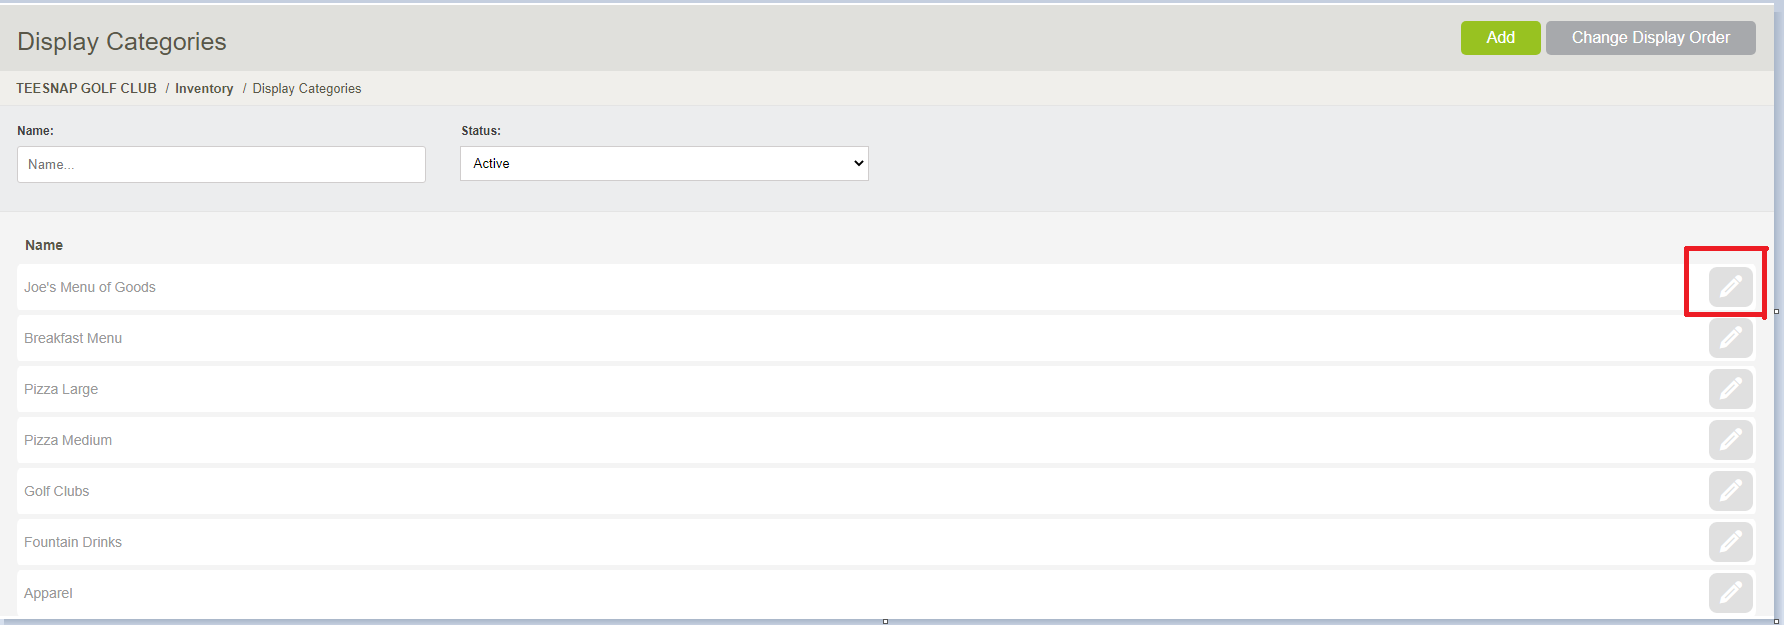
2. This will bring up the menu of available Display Categories. Select the Display Category you would like to deactivate by clicking the Edit button at the far right.

3. At the Edit Display Category window, change the Status to Inactive. Click Save to apply the change.

4. You can confirm the Display Category has been removed by noting that it does not appear in the list while the Status filter is set to Active.

If you have any questions, please do not hesitate to reach out to Teesnap Support by emailing us at support@teesnap.com or calling 844-458-1032
.png?width=240&height=55&name=Untitled%20design%20(86).png)