.png?width=240&height=55&name=Untitled%20design%20(86).png)
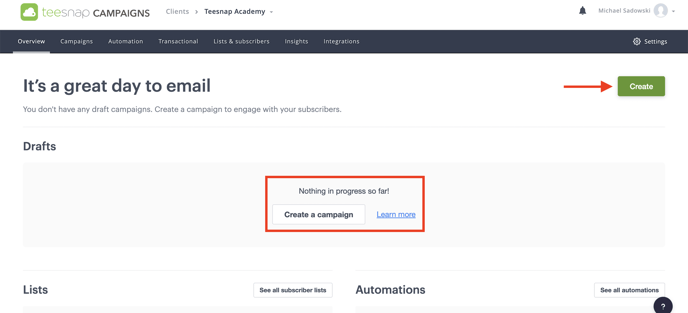
1. After logging in, click "CREATE" or "CREATE A CAMPAIGN" to begin setting up your email.
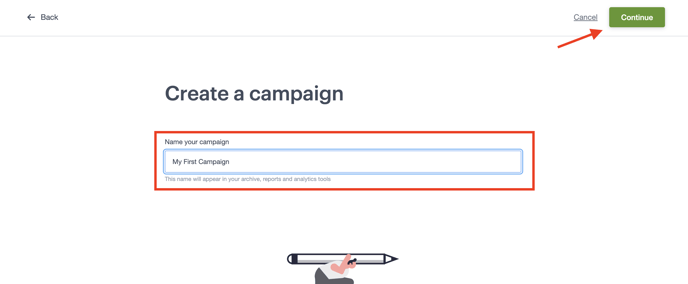
 2. Name your campaign then click "CONTINUE" in the top right corner of the screen.
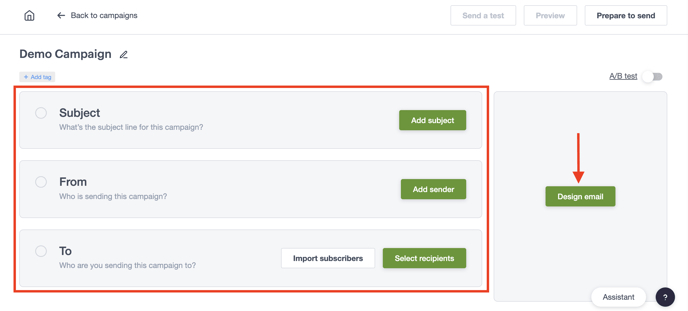
3. Add a subject line, sender email, and select which list you're sending this to. Then click DESIGN EMAIL on the right hand side of the screen.
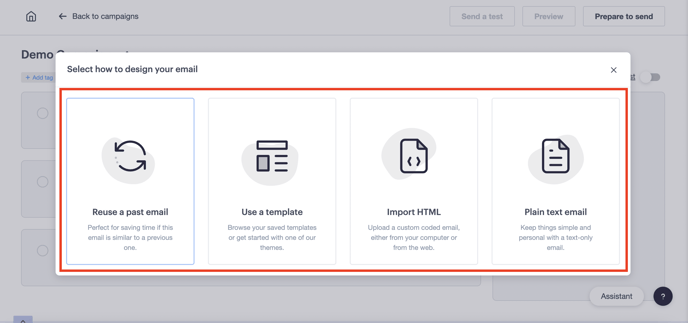
4. The design window will appear where you will decide between reusing a past email, using a template, importing HTML or designing one from scratch. In our example we used a template.
5. After the template is selected you will see a preview of it on the right side of the screen. In addition to the email design you will also see the subject, from, and to fields all completed. To prepare to send, preview or send a test use the buttons in the top right corner of the screen. We selected "PREPARE TO SEND".

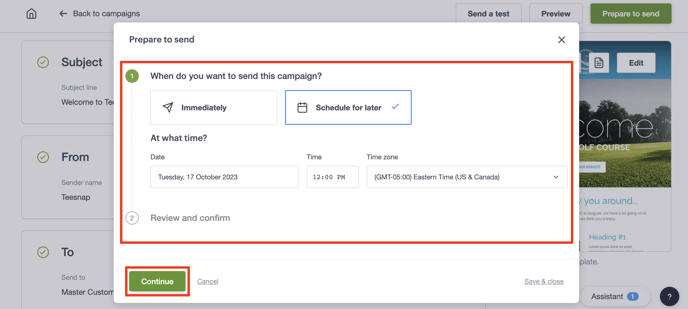
6. The prepare to send window will appear where you will decide whether to send the email immediately or schedule for later. In our example, we scheduled the email to send out on 10/17/23 at 12:00 PM EST.
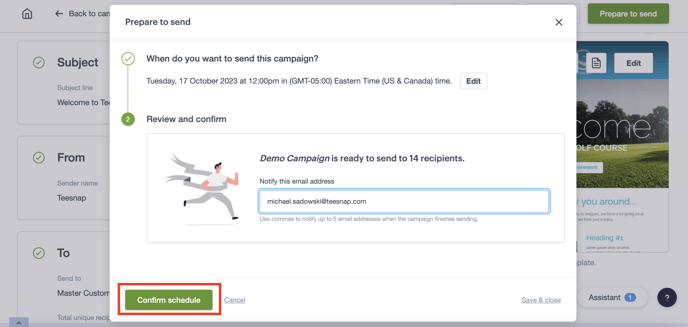
7. After selecting continue you're able to add an email address notification to let you know when your campaign goes out. To confirm the schedule click the green button at the bottom of the window. Repeat these steps to send a campaign (email blast) to your customers in campaigns.
If you have any questions, please do not hesitate to reach out to Teesnap Support by emailing us at support@teesnap.com or calling 844-458-1032.