.png?width=240&height=55&name=Untitled%20design%20(86).png)
Six tasks need to be completed to set up the integration:
- Adjust your Quickbooks Online Chart of Accounts Settings
- Upload a TS.UNDEF GL Code in your QuickBooks Chart of Accounts (CRITICAL)
- Download your Quickbooks Online Chart of Accounts
- Import your Chart of Accounts into Teesnap Accounting Assignment
- Assign all Chart of Accounts to correct general ledger mapping in Teesnap Admin
- Connect Teesnap to your QuickBooks Online Account
STEP 1. Navigate to your QuickBooks Online Account, click on Help, then Account and Settings. 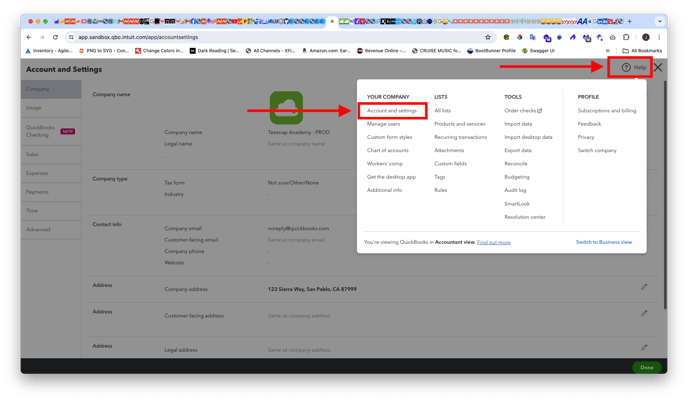
2. Navigate to Advanced 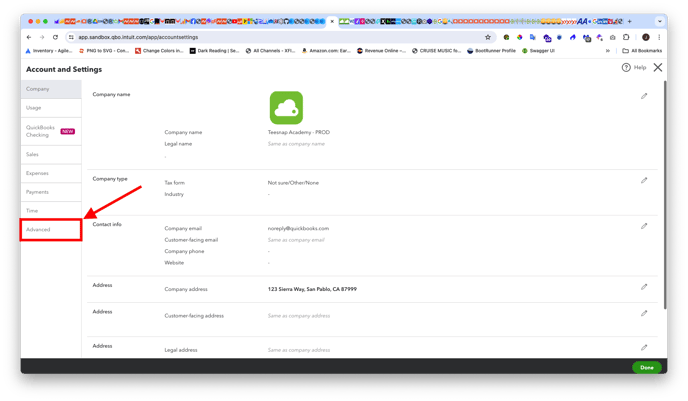
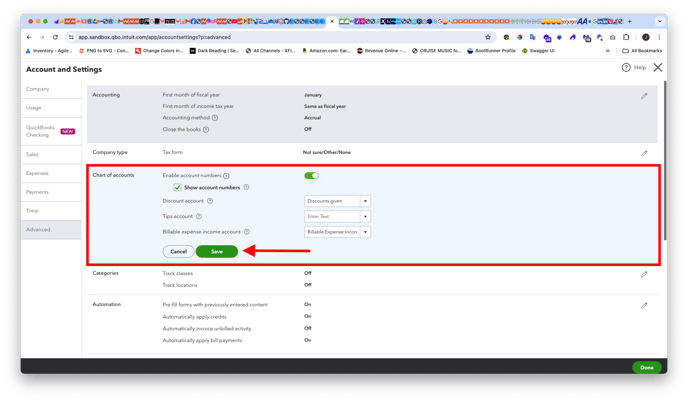
3. Click on the pencil icon in the Chart of Accounts section. 
4. Check the box for Enable account numbers and turn the toggle to green. Choose a Discount Account, Tips Account, and Billable Expense Income Account (if these three accounts are applicable). Then click Save.
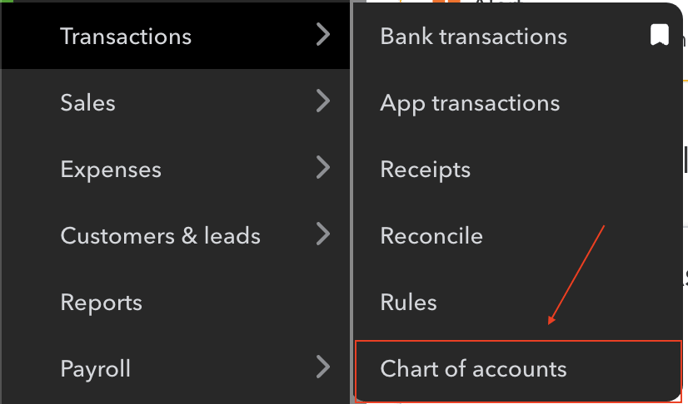
 5. Next, go to your QuickBooks Online Account and select "Transactions and Chart of Accounts" from the left-hand menu.
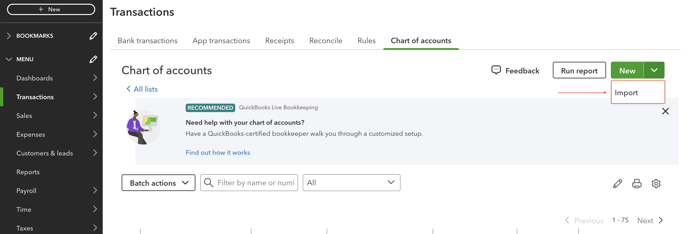
6. Select the dropdown next to the New button and choose Import from the right side of the Chart of Accounts Screen.
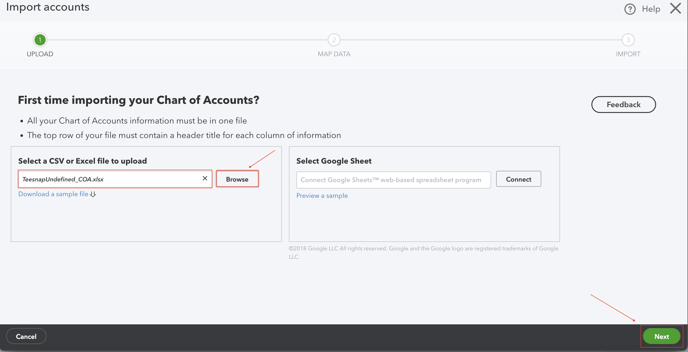
7. Next, you'll need to import a TS.UNDEF account. To download the import file, click HERE.
When you've downloaded the file, click the Browse button on the "Import Accounts" screen and upload it. Once the file is uploaded and the file name is in the text box (as shown below), click Next at the bottom right of the screen.
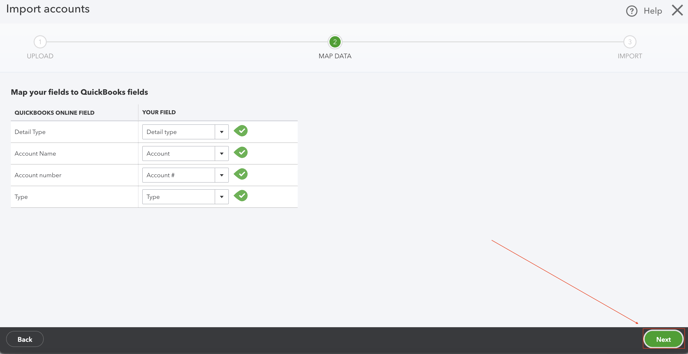
8. In the Map Data screen, make sure all fields are checked green, then proceed by clicking the Next button in the lower right corner.
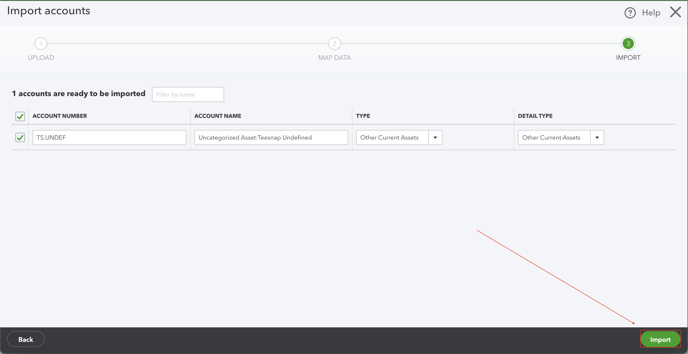
9. Click Import in the lower right-hand corner.
10. Next, choose Chart of Accounts from the settings menu in Quickbooks Online.
11. Now choose "Run Report" and export to CSV.

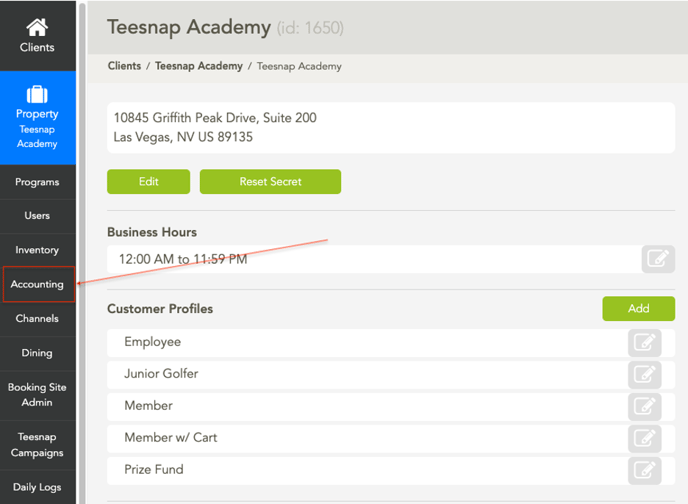
12. Next, from the Property Screen in the Admin Portal, click on Accounting from the left sidebar menu.
13. Select General Ledger Codes.

14. Now, choose the import button. You must ensure that the exported file from QuickBooks matches the import file format.

15. Choose the chart of account file from your QuickBooks download as the file to upload.
16. Next, you will need to map all of your chart of accounts in the Teesnap Accounting Category Assignments and Balance Sheet accounts sections.
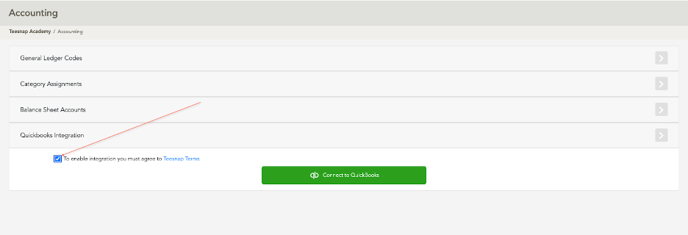
17. Now that you have assigned all GL Codes in Teesnap, click on the QuickBooks Integration option on the Accounting Page.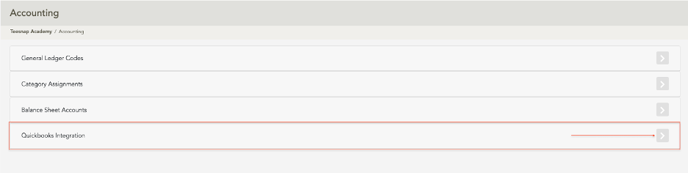
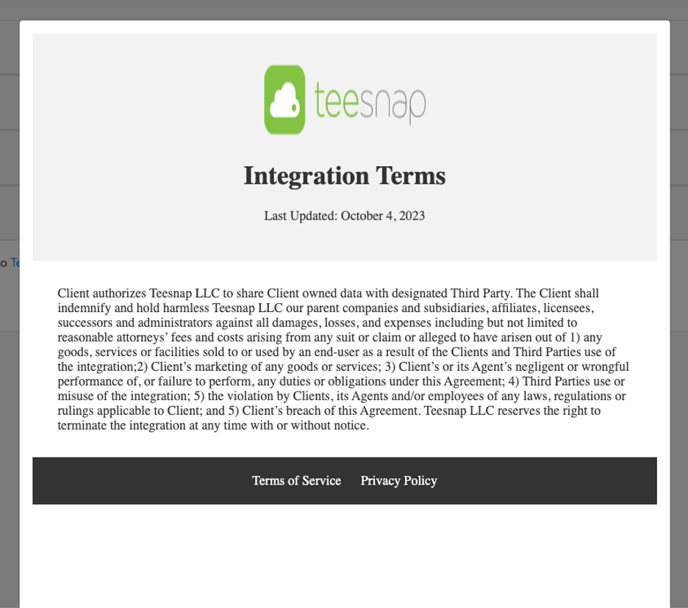
18. You'll find a checkbox to opt-in and a link to the Terms of Service on the right.
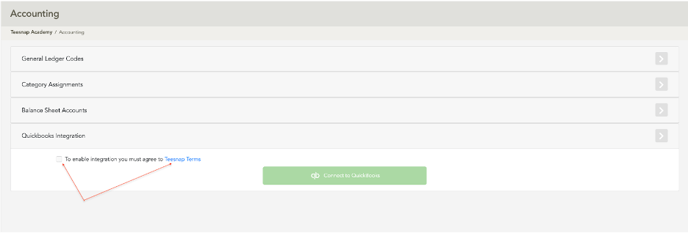
19. After opting in, the Connect to QuickBooks button will become active and can be clicked.
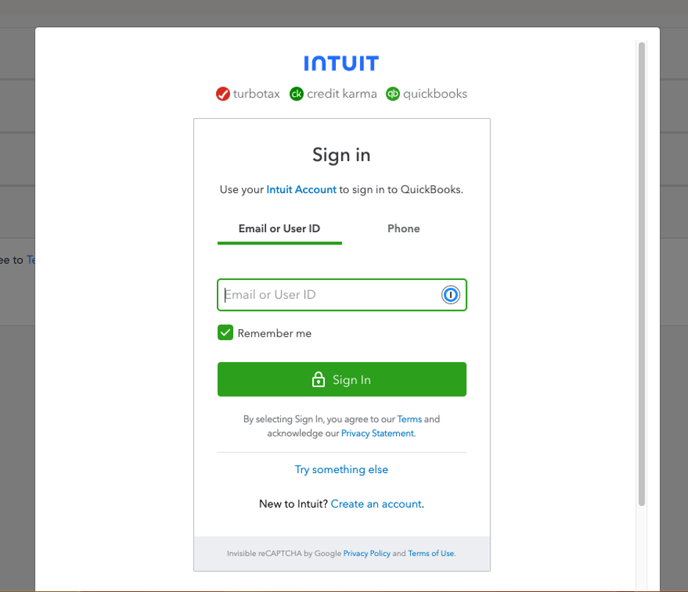
20. A popup modal will appear where you will enter your QuickBooks Online credentials.
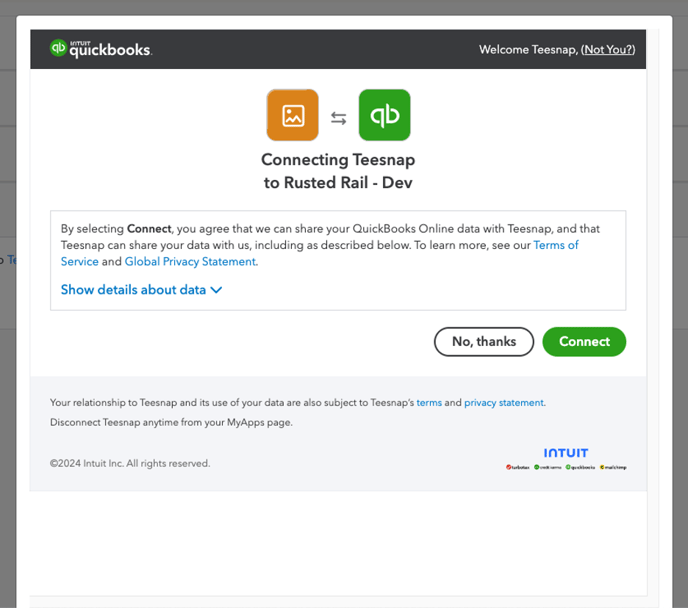
21. Once you have entered your credentials, select your company name from the drop-down and click on the Next button.

22. Press the green Connect button to connect Teesnap with your company's QuickBooks account.
23. In the Admin Portal, you will now enter up to 9 email addresses as your company's contact points. This will allow Teesnap to notify you of any issues that may occur when importing your data from Teesnap to QuickBooks.
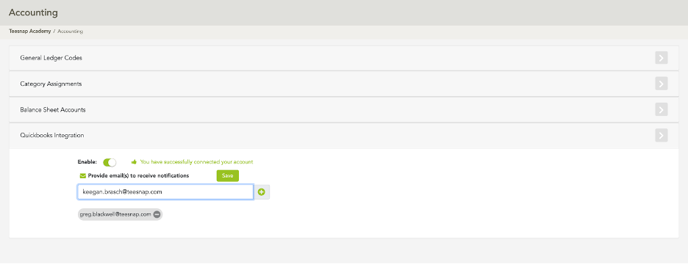
Congratulations! You have successfully set up the Teesnap—QuickBooks Online Integration. Your data will sync daily at 3 a.m. PT.
If you have any questions, please do not hesitate to contact Teesnap Support by emailing us at support@teesnap.com or calling 844-458-1032.