.png?width=240&height=55&name=Untitled%20design%20(86).png)
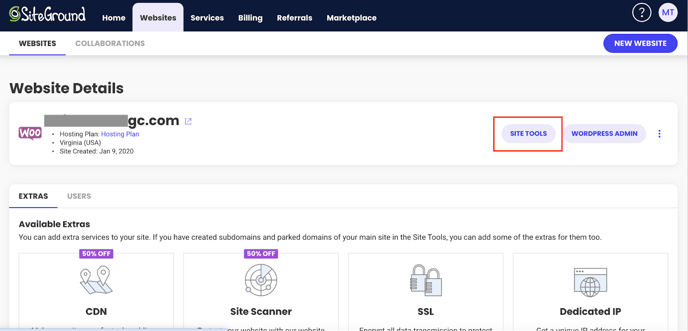
1. On the SiteGround home page, locate and select "Websites" from the menu bar. This option is typically found in the navigation menu at the top of the page.

2. Look for and click on "Site Tools" located on the right side of the page.
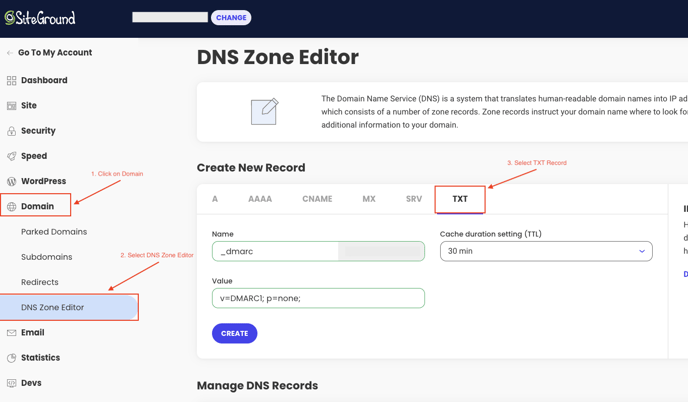
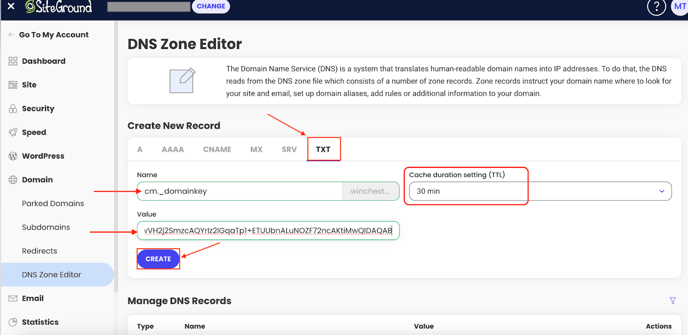
 3. Look for and click on "Domain" on the left sidebar and then choose "DNS Zone Editor" from the options available. Select "TXT" in the record options.
4. Next, you'll need to open another tab and navigate to your Campaign Monitor account to get the records to enter in the "Name" and "Value" fields.
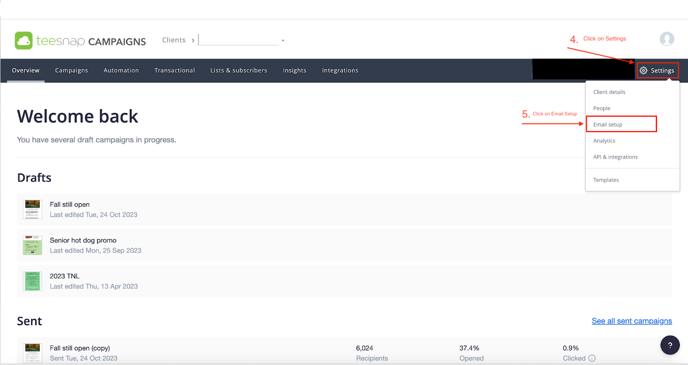
5. To retrieve the necessary DNS records, follow these steps (image shown below):
- Navigate to "Teesnap Campaigns"
- Log in to your Teesnap Campaigns account.
- Click on the "Settings" gear icon on the right side of the screen.
- Locate and click on "Email Setup" in the dropdown menu.
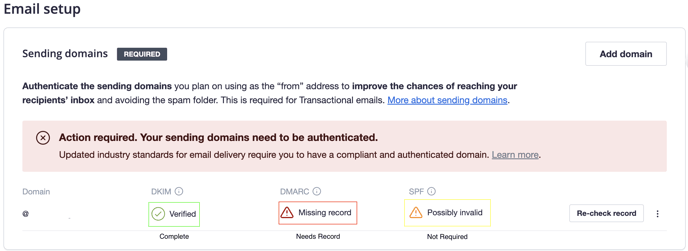
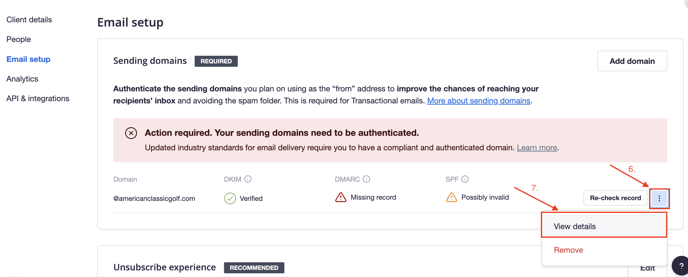
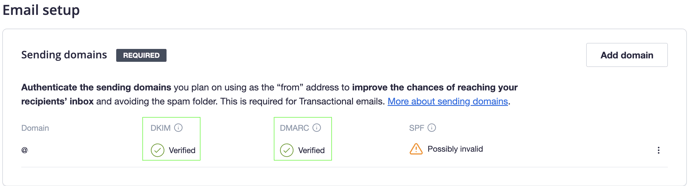
On the Email Setup Page, you'll see three records with a status.
- DKIM
- DMARC
- SPF
DKIM and DMARC need a green "Verified" status indicator, the SPF record does not. You do not need to validate the SPF record to authenticate the email domain. If the DKIM and/or DMARC have a status indicator showing "Missing Record" proceed to step 6.
6. On the Email Setup Screen, click the ellipsis next to "Re-check record" and select "View Details" from the dropdown menu.
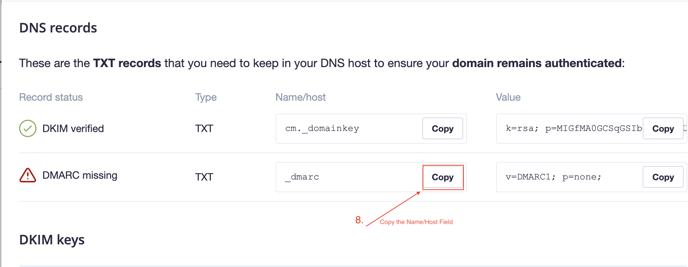
7. If only the DMARC record is missing (most common), you only need to copy the DMARC "Name/Host" & "Value" fields from Campaign Monitors DNS records into the "Create New Record" fields of the SiteGround DNS Zone Editor.
Start by copying the "Name/Host" field.
8. Next, navigate back to the DNS Zone Editor Section of SiteGround and paste the value in the "Name" Field.
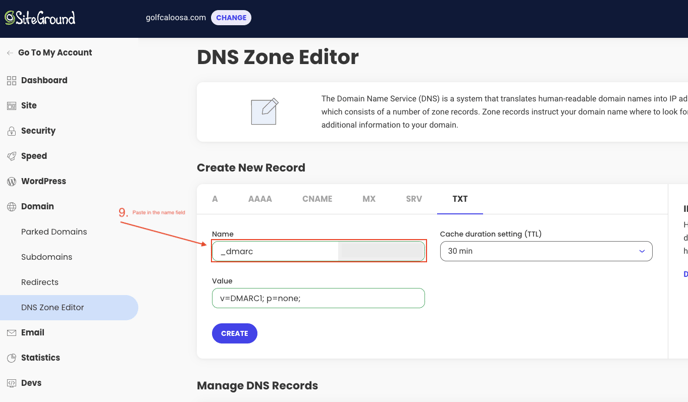
9. Repeat the same steps for the "Value" field.

10. Set the Cache duration setting to "30 minutes" - confirm that the fields match the image below and click "Create"
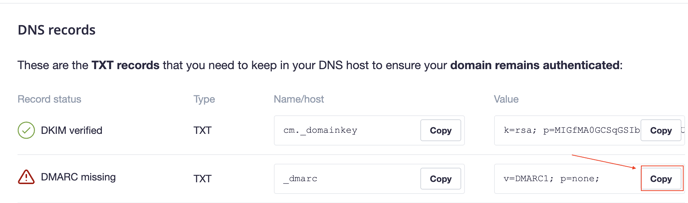
After completing these steps, the DMARC record should be added to your DNS settings on SiteGround and verified in Teesnap Campaigns (There is a refresh time, don't be alarmed if the verification status doesn't update immediately).
Once the email setup page matches the image below, you have successfully authenticated your email domain.
If you have any questions, please do not hesitate to reach out to Teesnap Support by emailing us at support@teesnap.com or calling 844-458-1032.