Fulfillment Center: Digital & Paper
This article will discuss the differences between the digital and paper fulfillment center configurations in the admin portal.
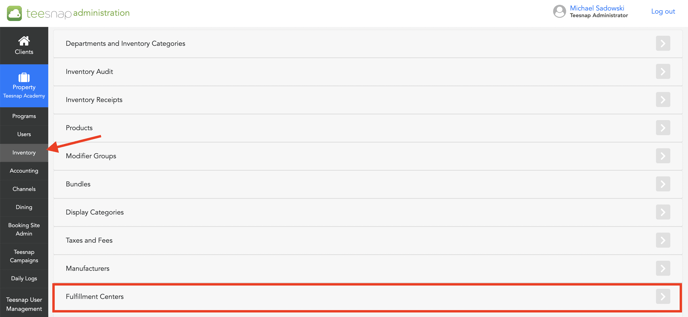
1. To add a fulfillment center, you can check out this article. To access your fulfillment center settings, navigate to the Teesnap Admin portal and click inventory on the left side of the page. The fulfillment center option is at the bottom of the list.
 2. Select the fulfillment center by clicking anywhere on the white bar or the grey pencil icon.

3. After clicking on the grey pencil icon on the bar fulfillment center, this window appears where you will see a toggle for active/inactive and digital/paper. There's also a products tab that will allow you to quickly add products to the fulfillment center given that the product is configured as "ticketable", to make a product ticketable check out this article. In our case, the bar fulfillment center is configured to be digital.

What does this mean? A digital fulfillment center indicates the ticket status is controlled by the user on the mobile device. The user would have to manually complete the tickets to clear the digital queue. With the manual effort, it gives the ability to the user to control the status throughout the experience.
.jpg?width=688&height=501&name=IMG_0617%20(2).jpg)
A paper fulfillment center is different in the fact that a staff member doesn't need to physically tap "complete" on each ticket that is in the queue. The ticket will automatically "complete" after it's printed, this allows the staff less opportunity to make changes to products that were previously added to the tab.
If you have any questions, please do not hesitate to reach out to Teesnap Support by emailing us at support@teesnap.com or calling 844-458-1032
.png?width=240&height=55&name=Untitled%20design%20(86).png)