.png?width=240&height=55&name=Untitled%20design%20(86).png)
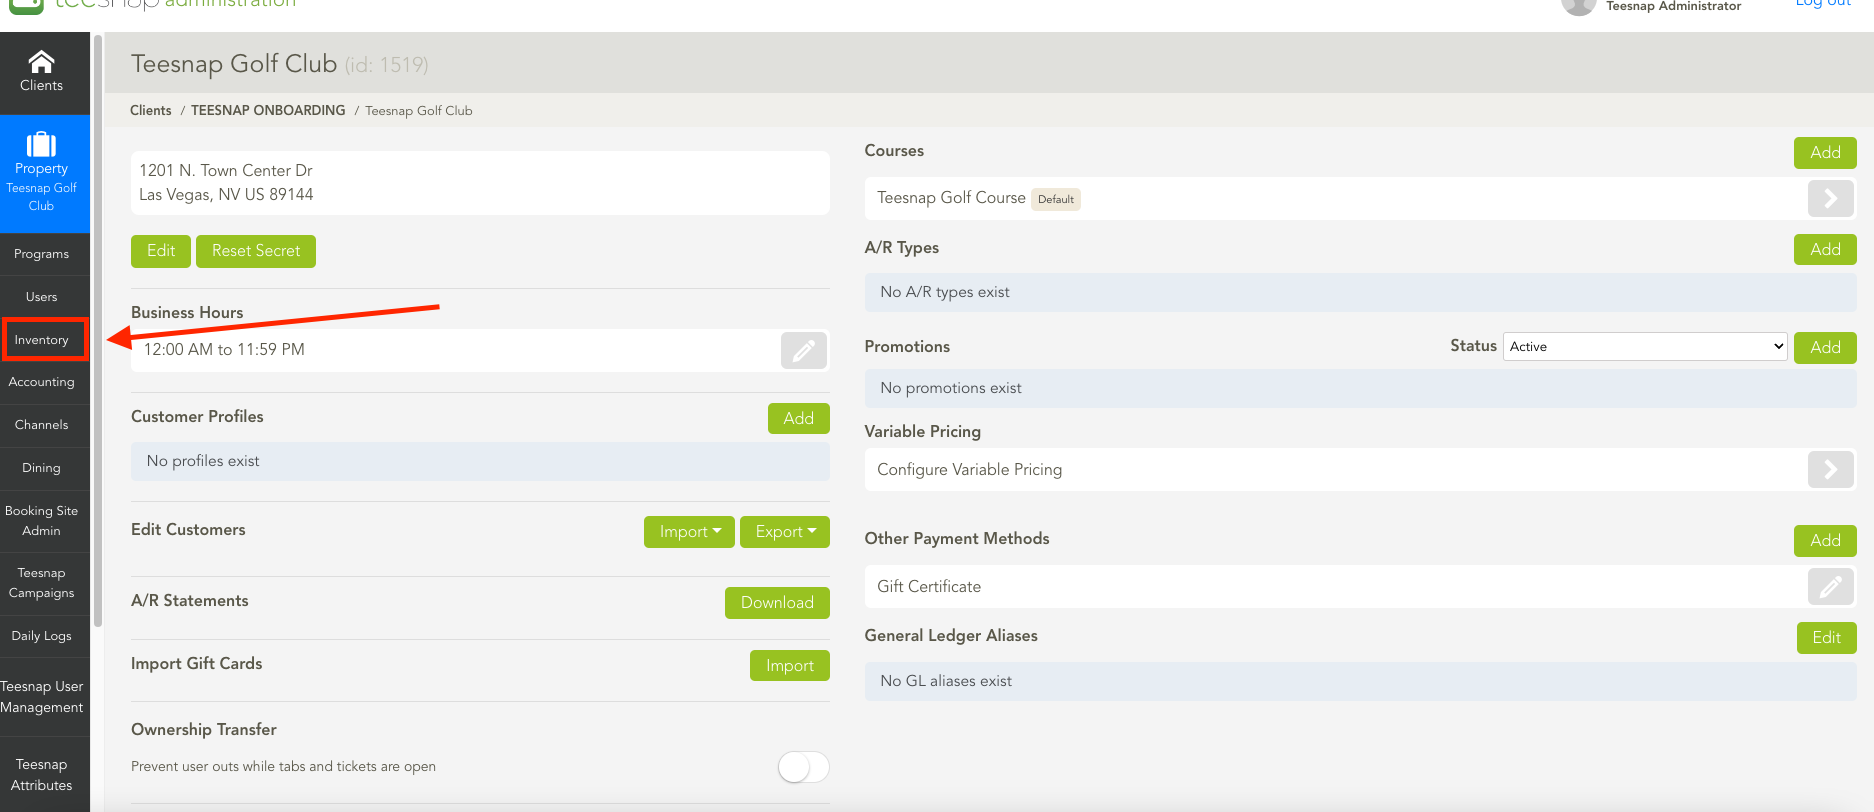
1. In the admin portal click inventory on the left side of the screen.
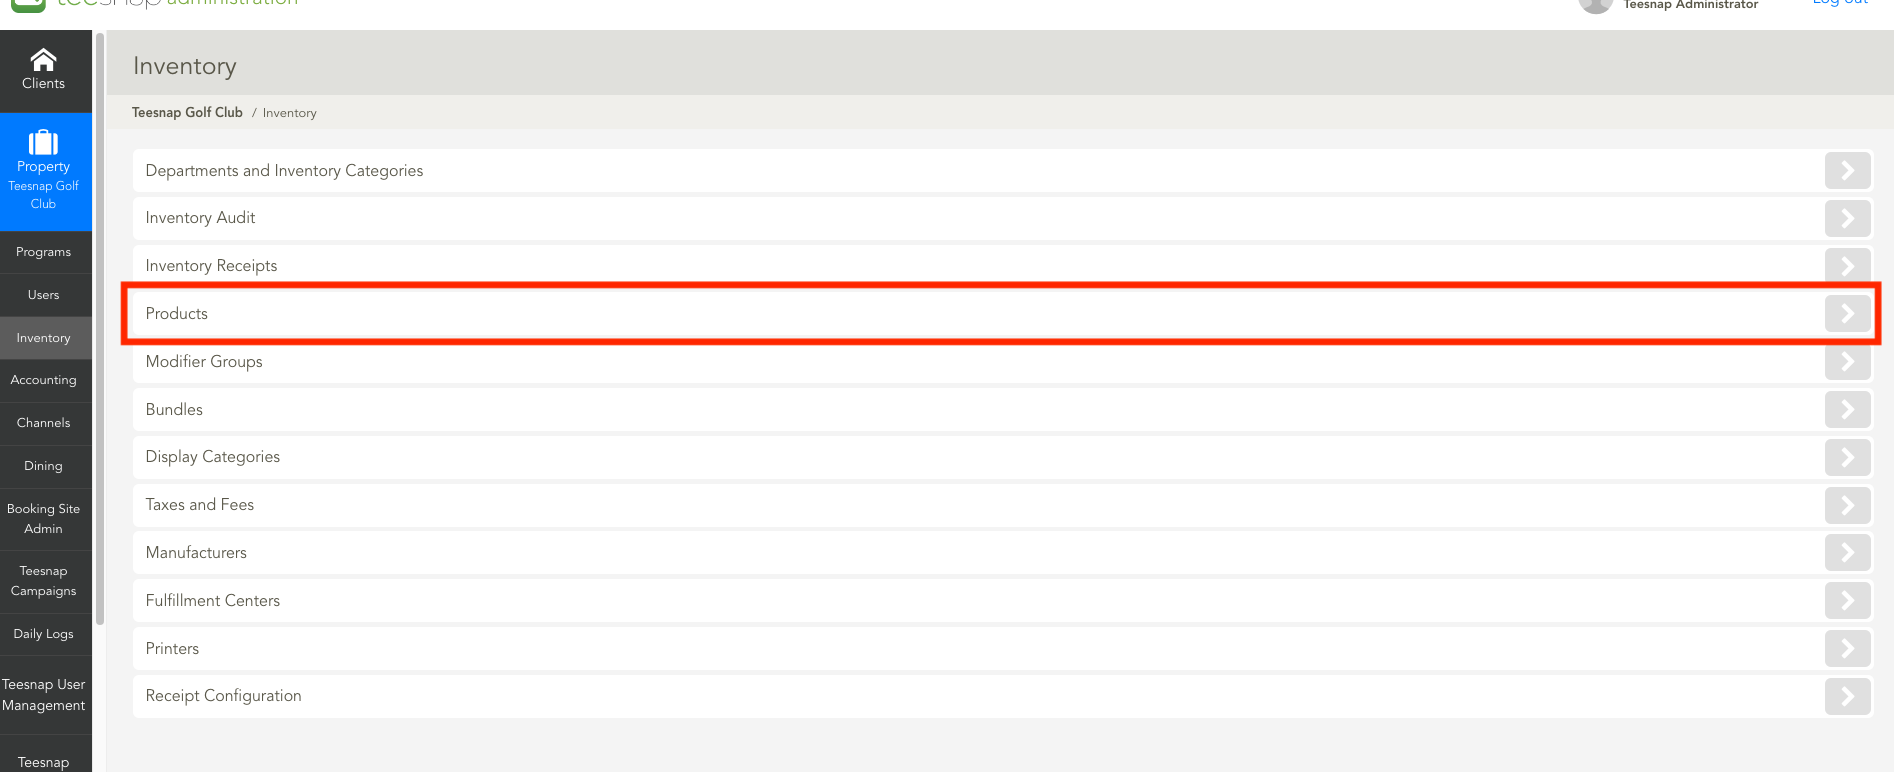
2. From the inventory list select products.
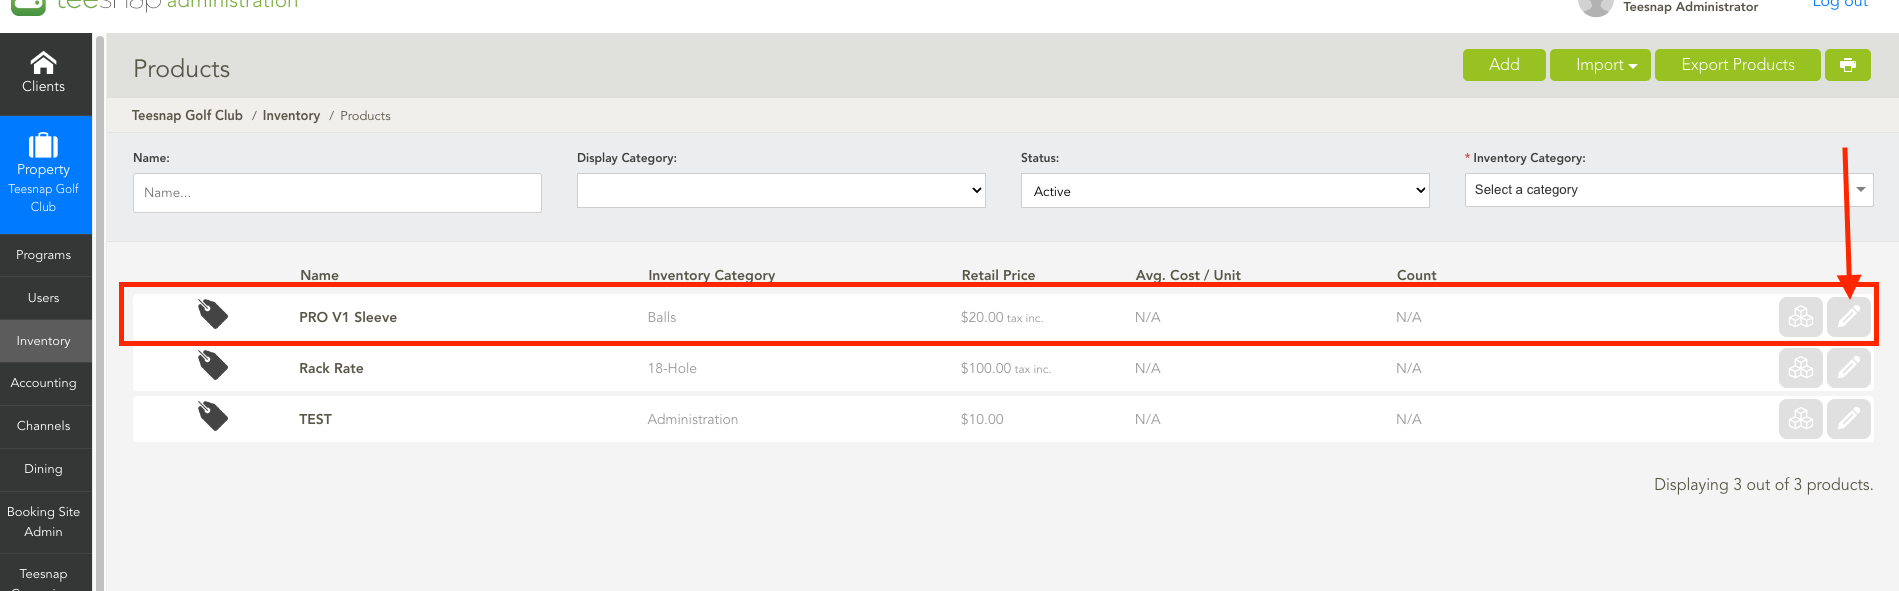
3. Your product list will live here. Tap the grey pencil on the right-hand side of the product to edit this product. We selected PRO V1 in our example.
4. The edit product window will display some simple product info, to attach a manufacturer click inventory on the upper right-hand portion of the window.
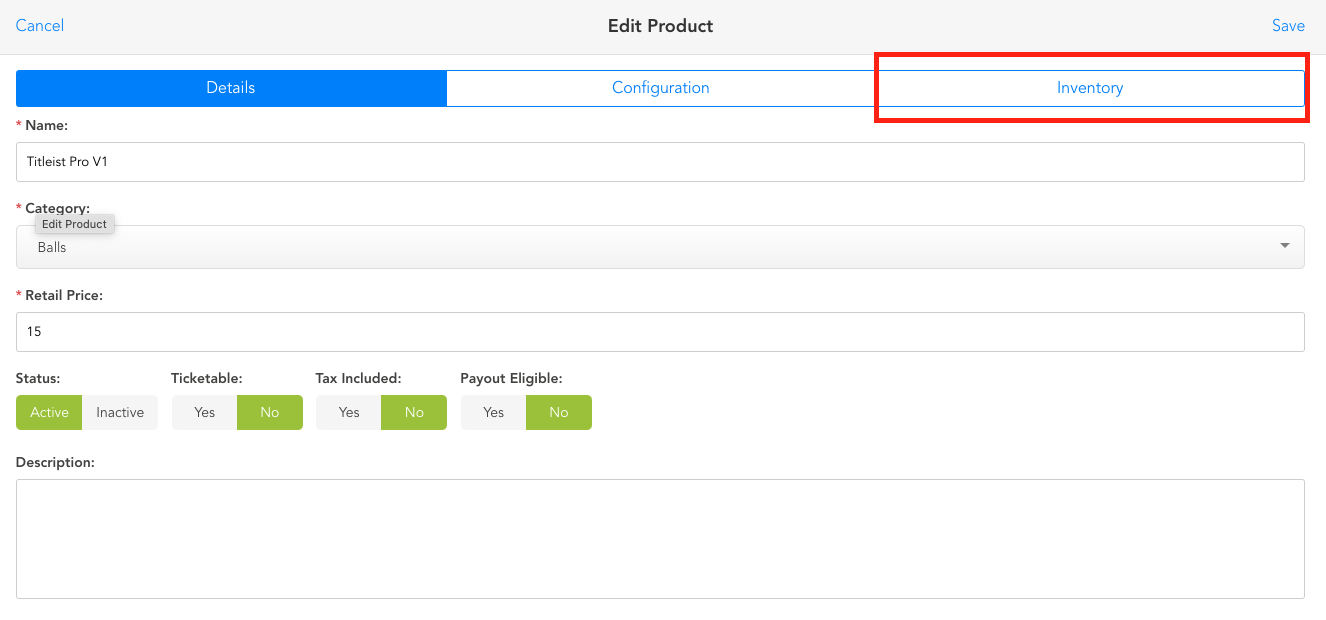
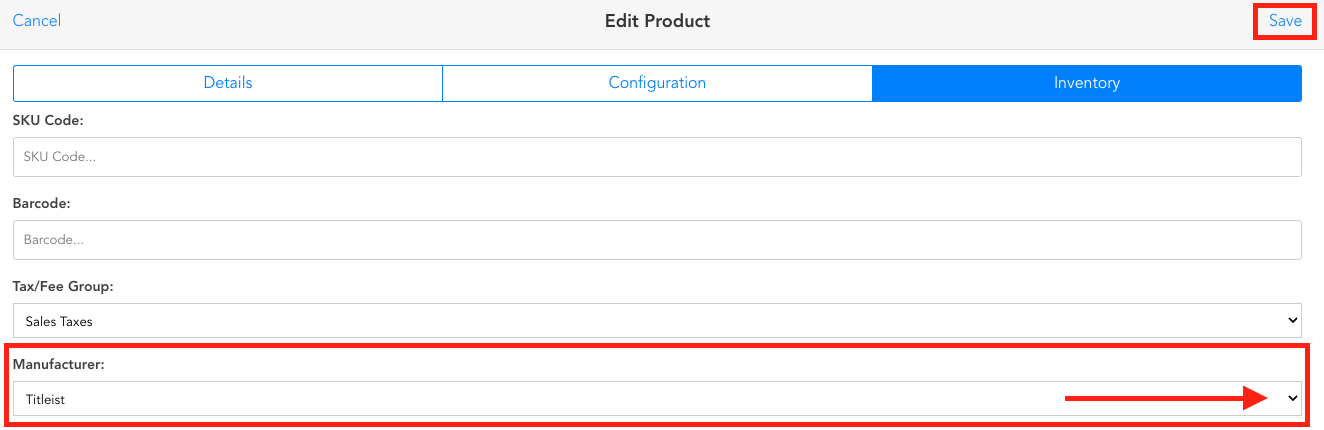
5. Here you will click the manufacturers drop-down in the red box to add a manufacturer, in our case we selected Titleist. Click save in the top right corner before proceeding.
See this article to add manufacturers in the admin portal.
If you have any questions, please do not hesitate to reach out to Teesnap Support by emailing us at support@teesnap.com or calling 844-458-1032.