.png?width=240&height=55&name=Untitled%20design%20(86).png)
You can configure your fulfillment center(s) to have either a digital or paper setting, to find out more information check out this article.
Add an Item Workflow:
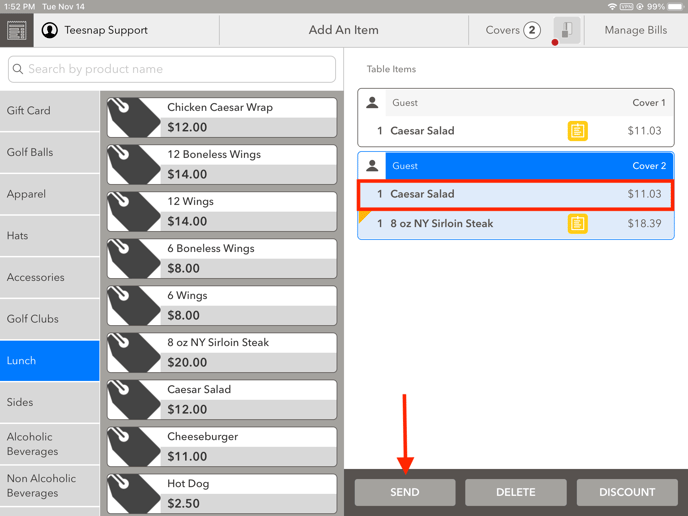
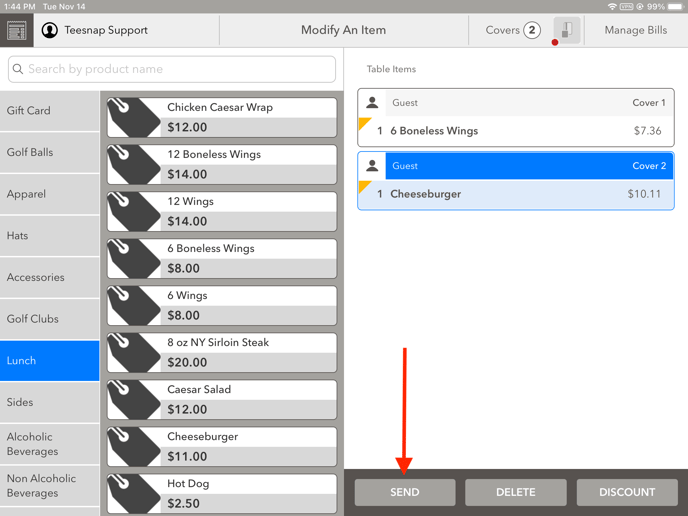
Below you will see the new SEND button that is present at the bottom of the tab management screen, the button will allow you to send tickets to the appropriate fulfillment center for preparation. In our example below, we have two covers with one product each, to send these items to the kitchen we will press the send button at the bottom of the screen.

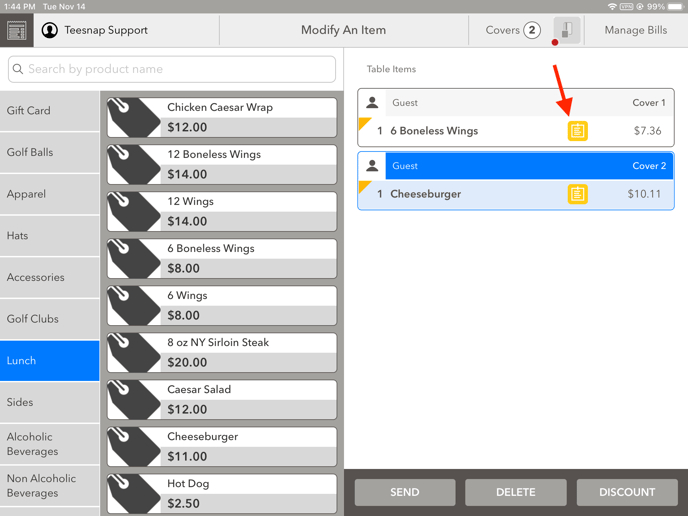
After pressing the send button, a yellow ticket icon will appear on each product line item indicating that this product has been sent to the fulfillment center.

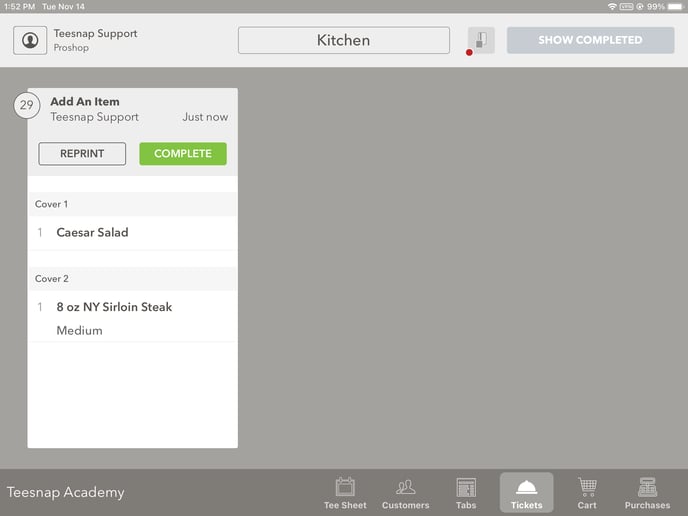
Notice the items here in the digital ticket screen below.
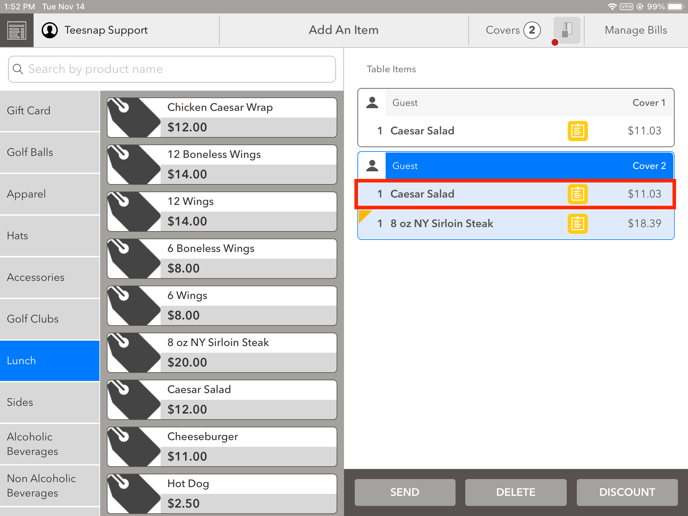
Returning to the tab management screen, we are going to ADD an item to the second cover, notice this product doesn't have the yellow ticket icon visible, once again we will press SEND at the bottom of the screen.
After pressing send, the yellow ticket icon appears on the product line indicating the product has been sent to the fulfillment center.
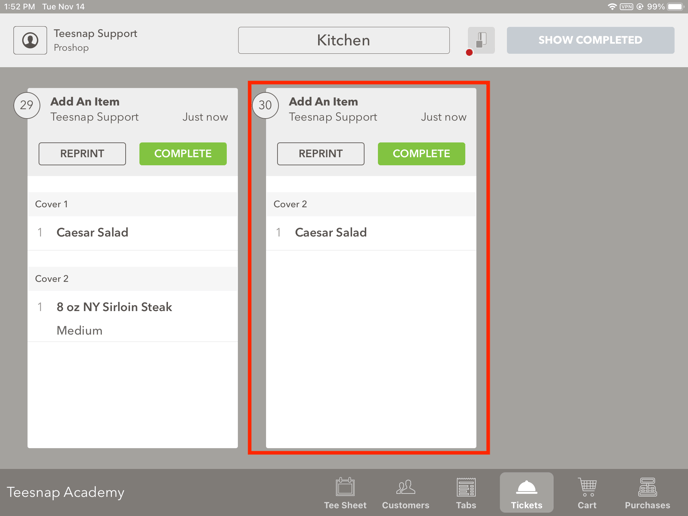
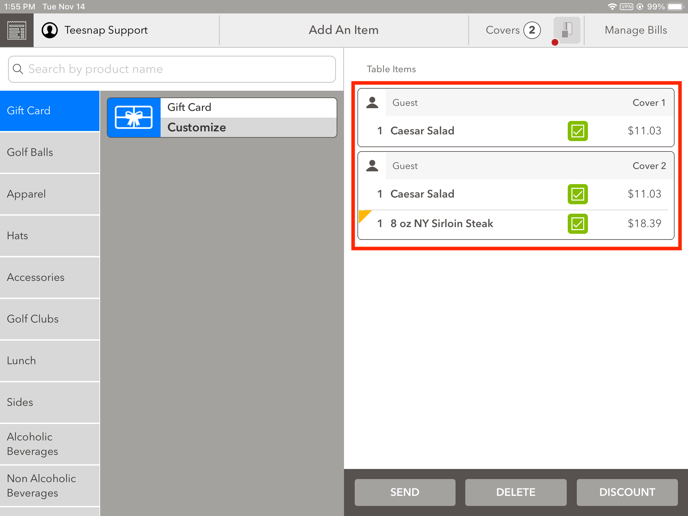
After navigating to the digital ticket screen, you can see that both products from the first portion of the order and the added item appear here. The new item appears on its own ticket to ensure clarity in the preparation of the orders.
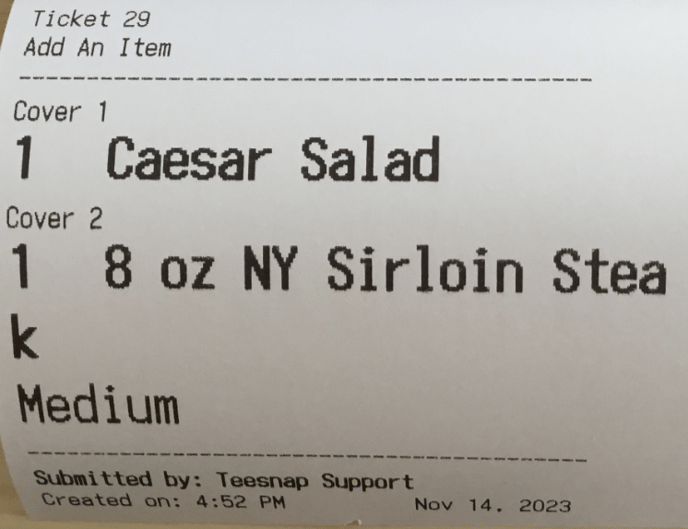
Below we have the first ticket that was sent to the fulfillment center.
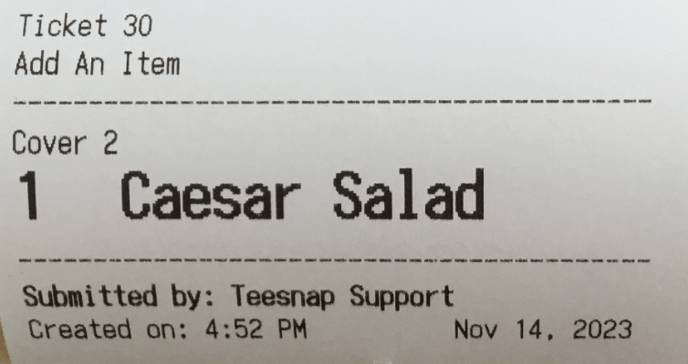
 After adding an item to the order, ticket #30 also was printed at the fulfillment center, see below.
After returning to the tab management screen, you will see that all three products indicate a green ticket icon next to them, showing that both of the tickets were completed.
Deleted Tab (Entire Order) Workflow:
To delete an ordered item, start by highlighting the desired items, and then tapping the delete button at the bottom of the page.
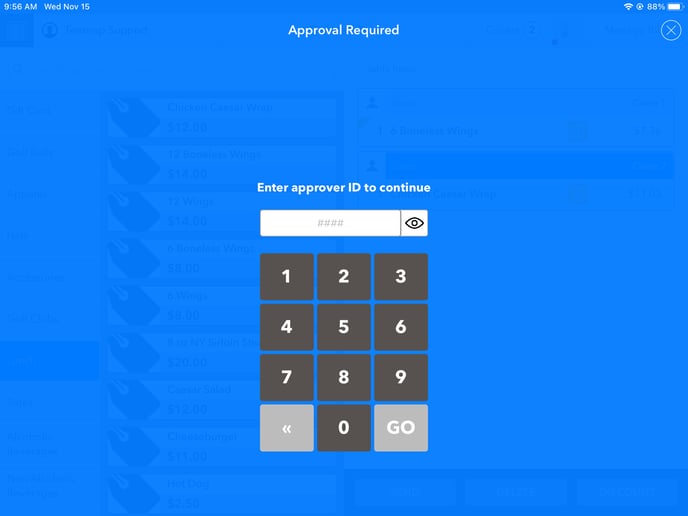
 This blue screen will appear where you will enter your employee ID then tap go.
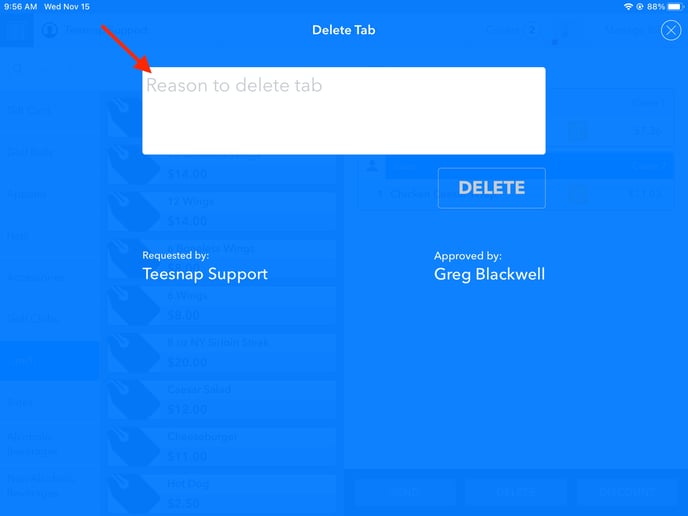
 You must first enter a reason as to why you're deleting the tab.
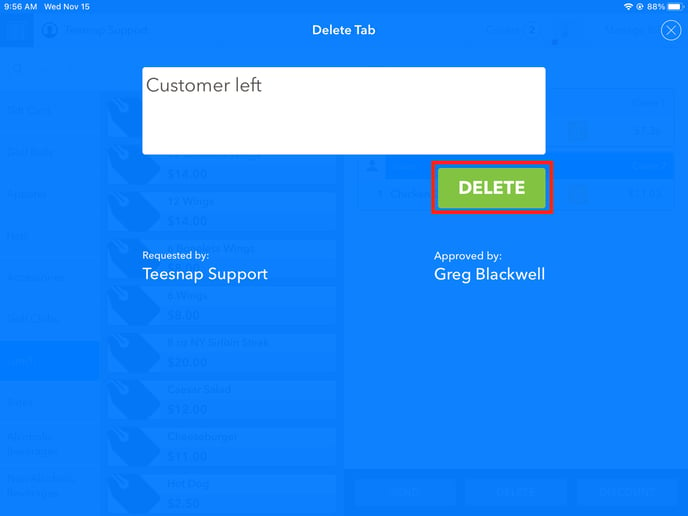
 After entering the reason "Customer left", you're now able to press the green delete button to delete the tab.
 At the ticket printer, you will see the first ticket printed normally.
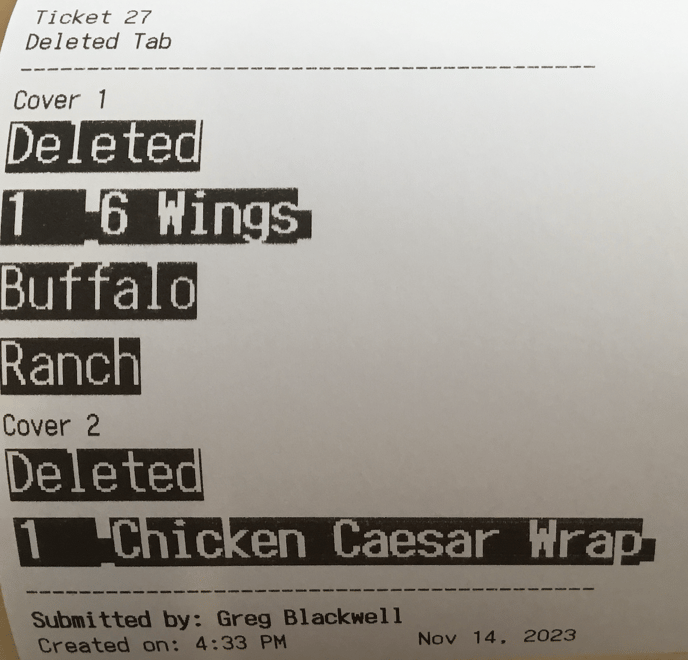
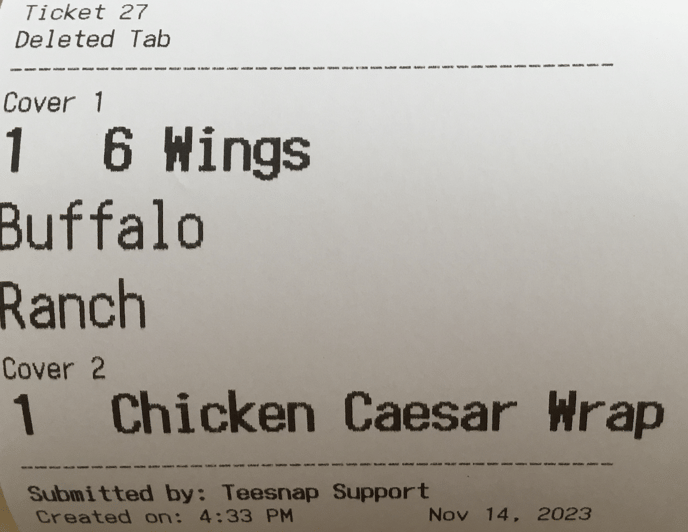 However, the second ticket that prints for the deleted tab will appear in all-black inverted text as shown below, and include the "deleted" message.
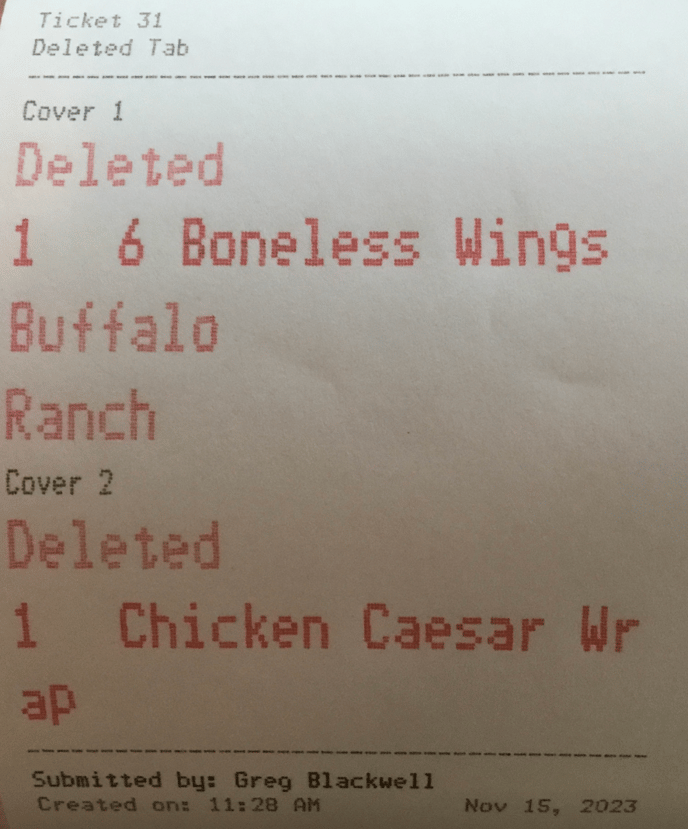
 For those users that have an impact printer, the deleted tab will appear on the printed ticket below in all red font.
Modify an Item Workflow:
Begin by sending your order to the fulfillment center using the send button at the bottom of the screen.
 The yellow ticket icon appearing on the product line indicates that this ticket has indeed been sent to the fulfillment center.
Below is the digital ticket screen containing both products and any necessary modifiers.
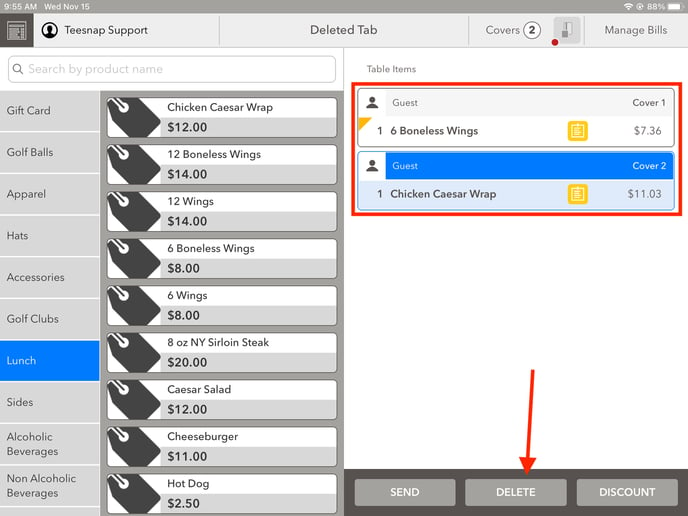
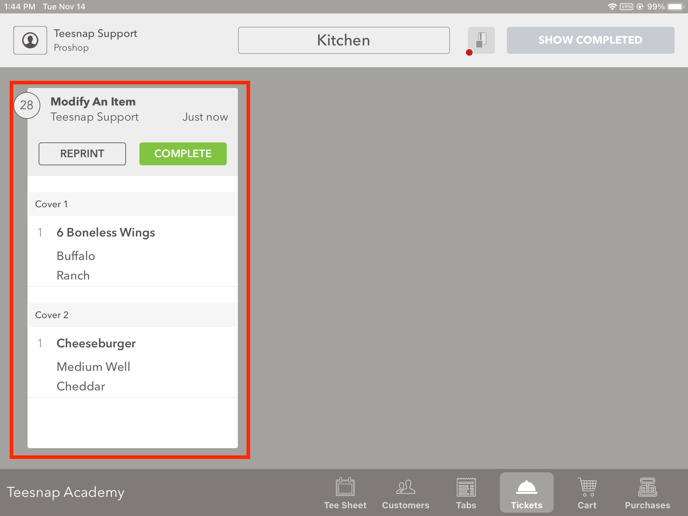 Below is the original ticket with both products.

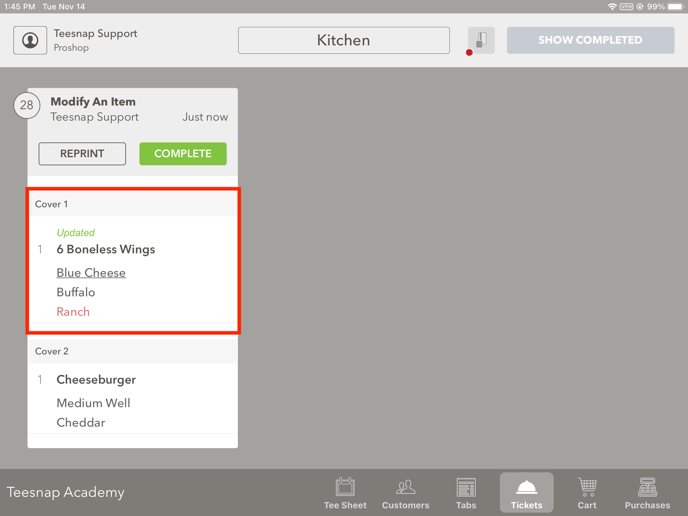
After returning to the tab screen and tapping on 6 Boneless Wings, the server then adjusted the modifiers to: Buffalo & Blue Cheese. Anytime a ticket is UPDATED the change will automatically be pushed to the fulfillment center.

Upon returning to the digital tickets screen, you will see the updated ticket appear with the "Updated" status, as well as the removed modifier in red and the updated modifier underlined.
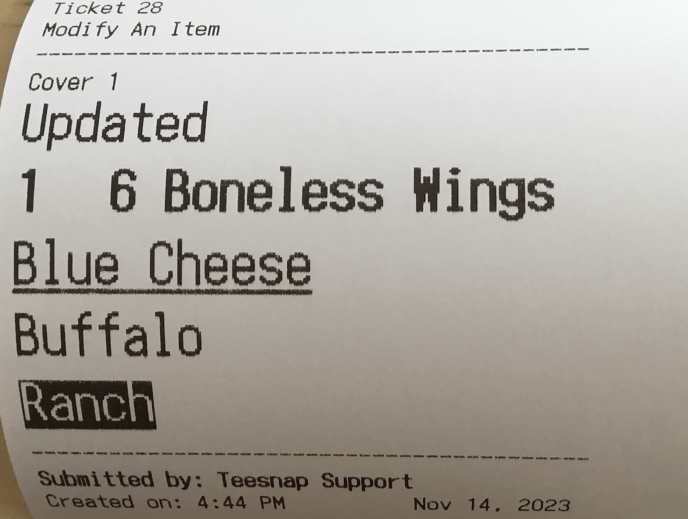
The printed ticket below also matches what appears on the digital ticket screen, showing the updated status, removed modifier in black inverted text, and updated modifier underlined.
Delete an Item Workflow:
Below is an image of the digital ticket center and printed paper ticket for an order with one cover and two products.
 Upon returning to the tab, the user will tap on the product that they wish to delete.
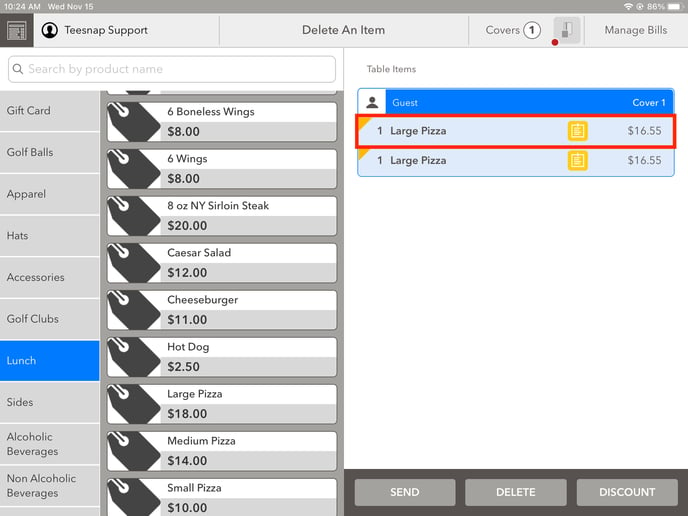
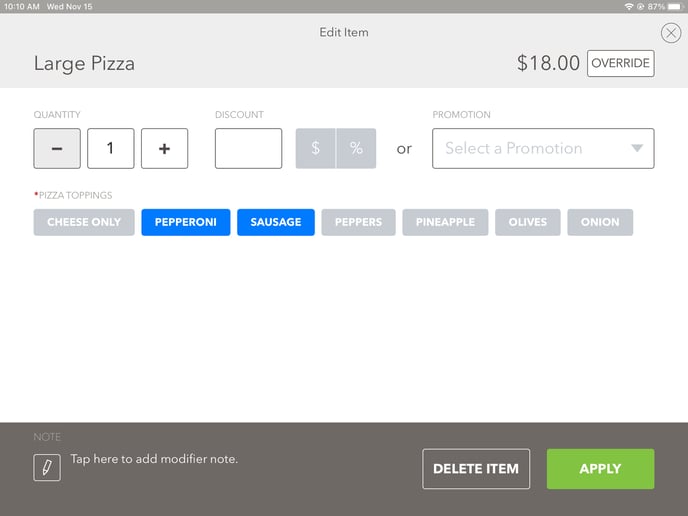
The edit item window will appear where the user will tap "delete item" at the bottom of the screen to remove this item from the order.
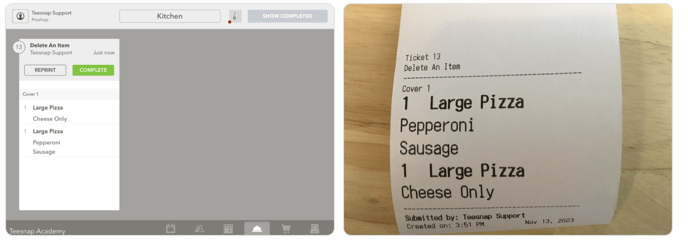
After deleting the product "Large Pizza w/Pepperoni & Sausage" the digital ticket screen and printed ticket appear below. Notice ONLY the deleted item is reprinted on a ticket with all black inverted text.
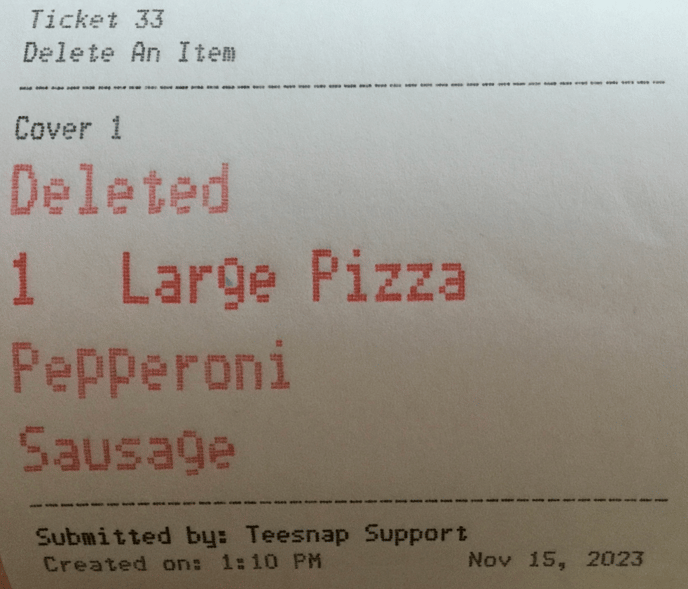
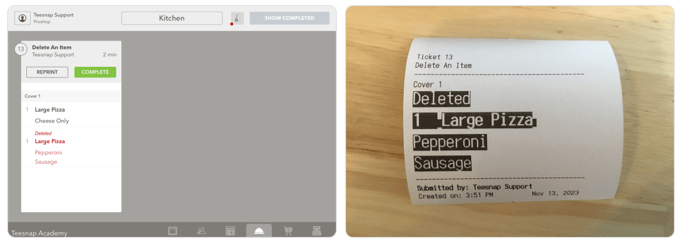 For those that have an impact printer, you will see the deleted item printed on the ticket in red as shown below.
If you have any questions, please do not hesitate to reach out to Teesnap Support
by emailing us at support@teesnap.com or calling 844-458-1032